Storm Relief Efforts

As we’ve been preparing for next month’s Quilt Market in Houston, like so many of you, we’ve also been following the storms that have affected so many in Texas, Florida, and the surrounding regions.

Five years ago, when Sandy struck us here on the East Coast, the pain was profound and long-lasting. We know that the recovery of business, property, and peace of mind doesn’t happen over night; it takes time, resilience, and kindness.

For our part, Andover Fabrics will be making a donation of $10,000 towards foundations supporting victims of the recent storms.

We’ll also be working with stores in the affected areas to help them and their communities get back on their feet.

Quilting and sewing are where so many people find their voice and their bliss. It’s truly our privilege to continue to support our extended community.

Sincerely,

David & The Andover Family

Posted in Uncategorized | Comments Off on Storm Relief Efforts

Celebrating 25 Years of EQ7!

UPDATE! Congratulations to Erin of Quilt by Starlight! You are the winner of your very own Electric Quilt design software! 

Electric Quilt Company has been a leader in innovating the way we design quilts for an incredible 25 years. This groundbreaking software has changed the face of quilt design. From novice quilt makers working at home to professionals working at the top of the quilting industry, this remarkable program is a must-have for all quilters.
eq7_20160310141547

Have you got EQ7? Well good news, if you don’t. To celebrate their 25th year, we are teaming up with EQ7 to bring you not one, but two giveaways! Here’s how it works. To win your own copy of EQ7, just leave a comment on this very blog post.

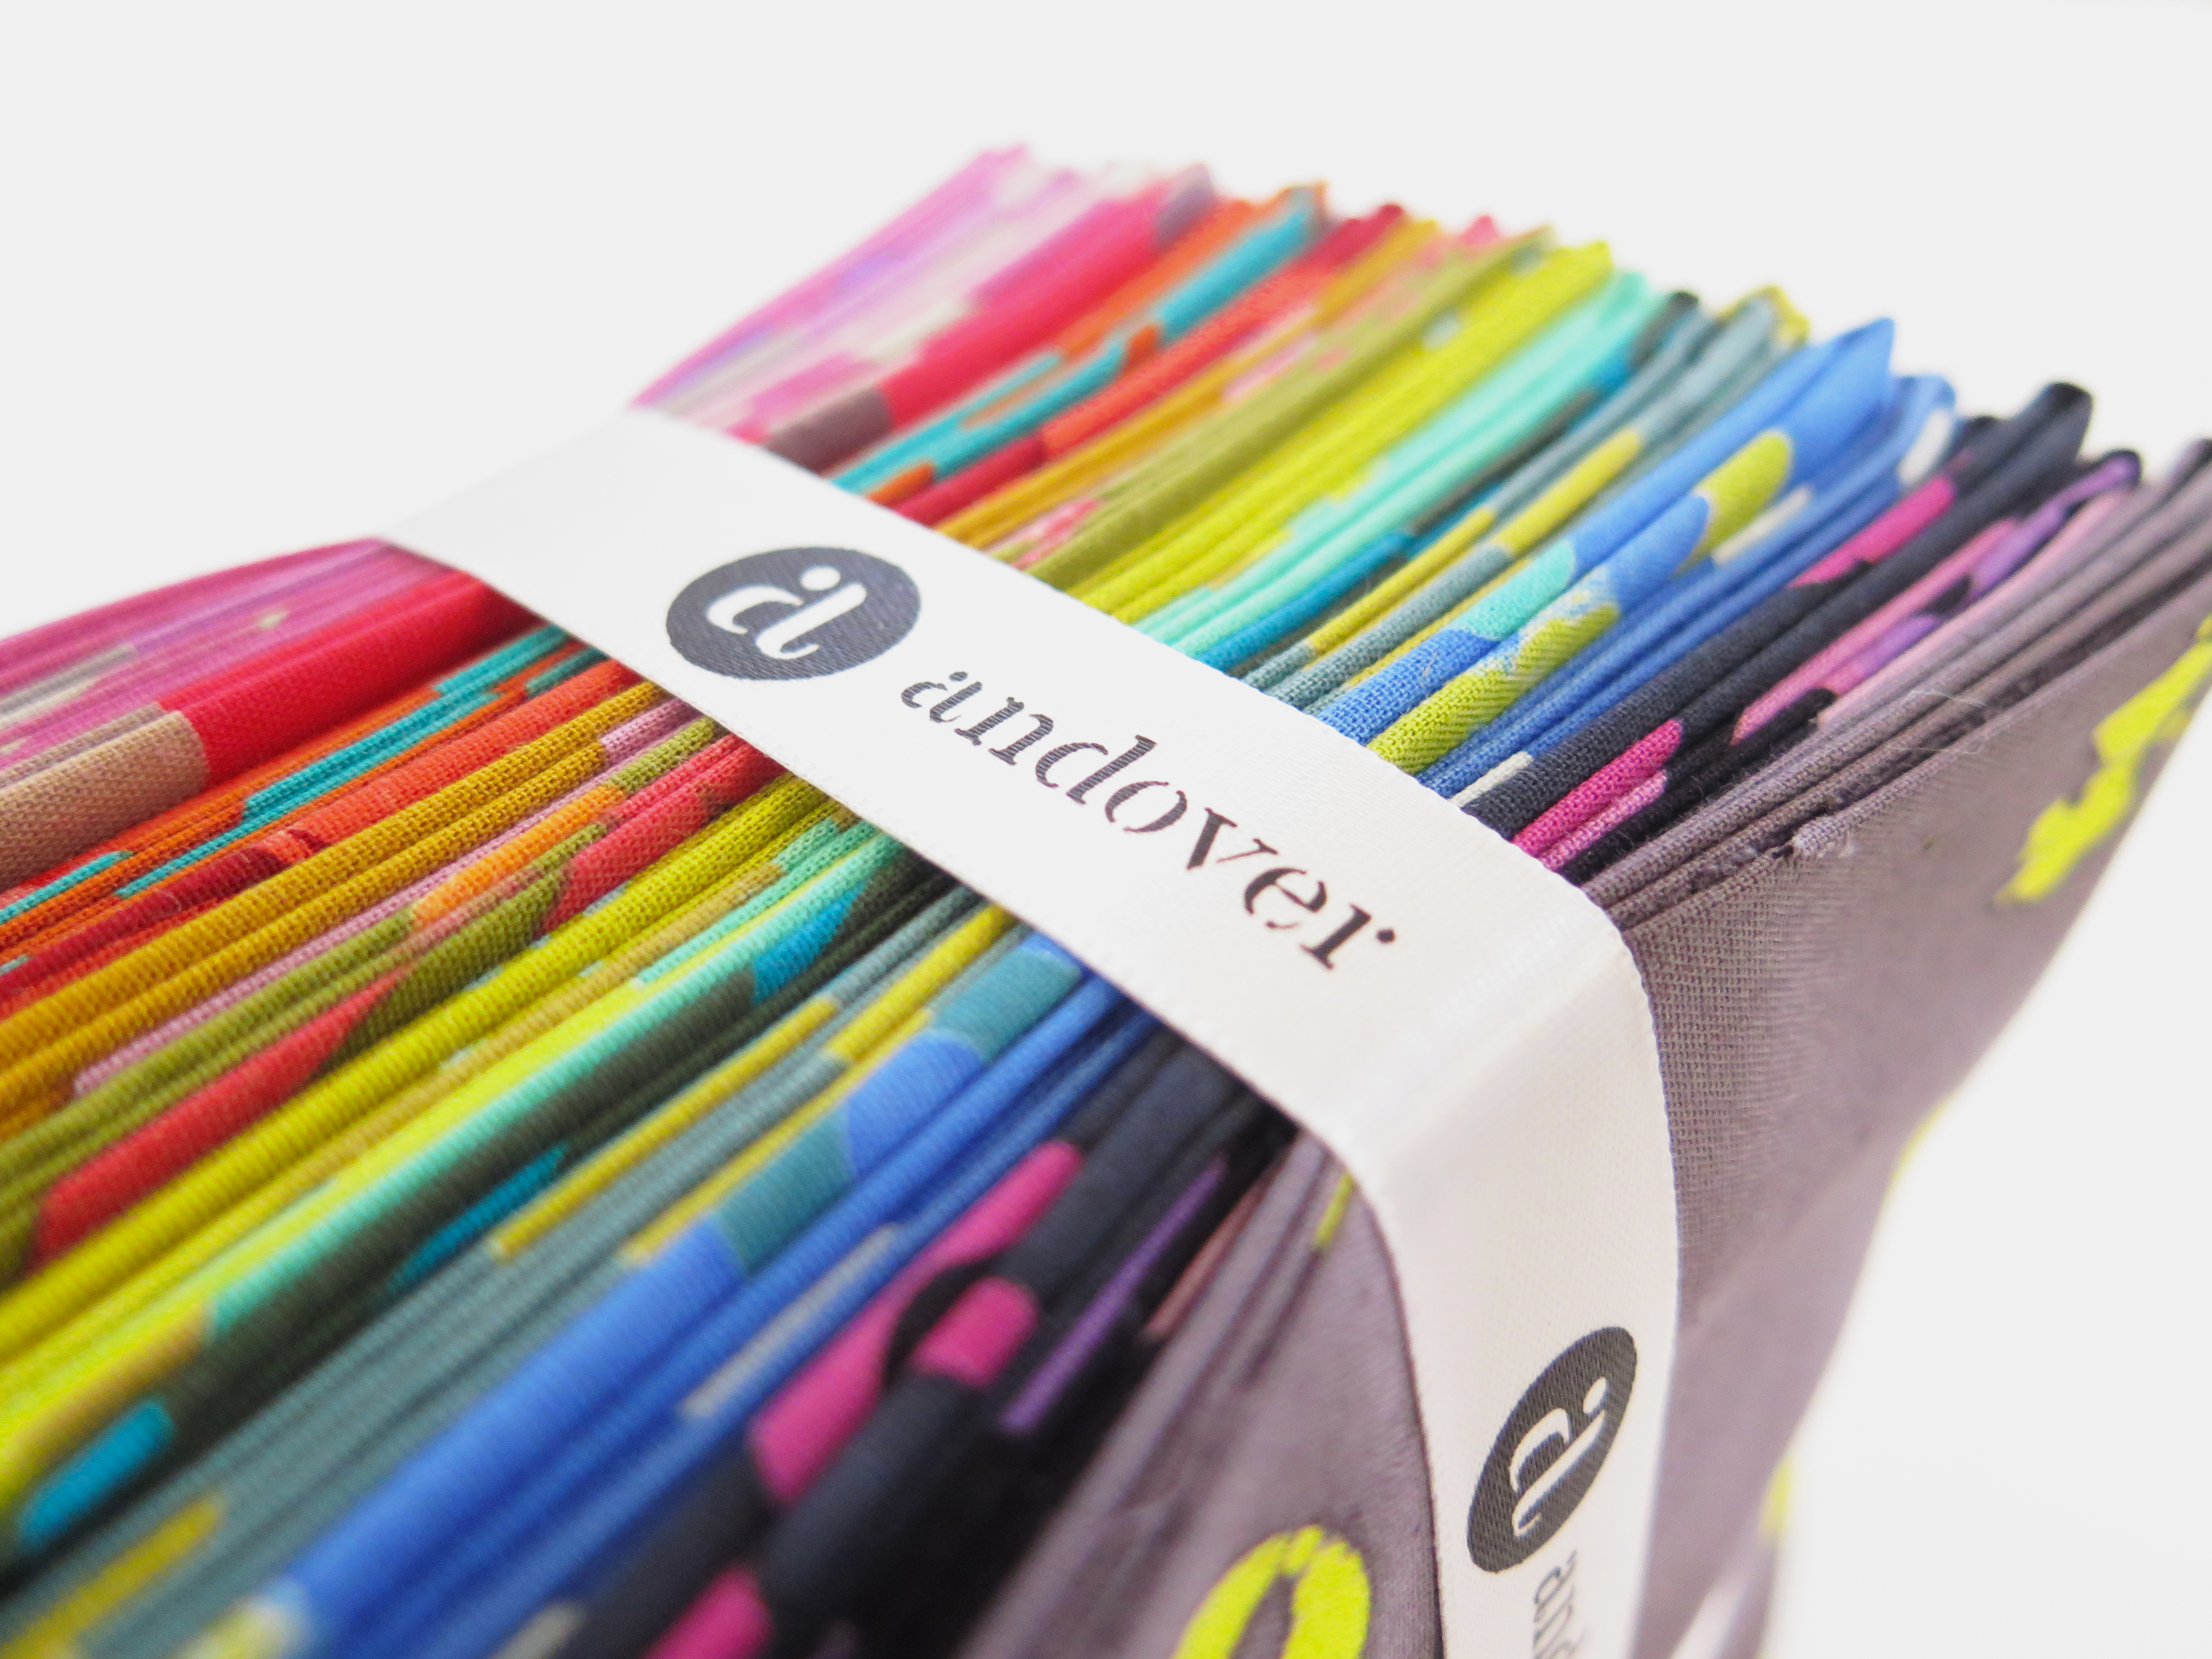
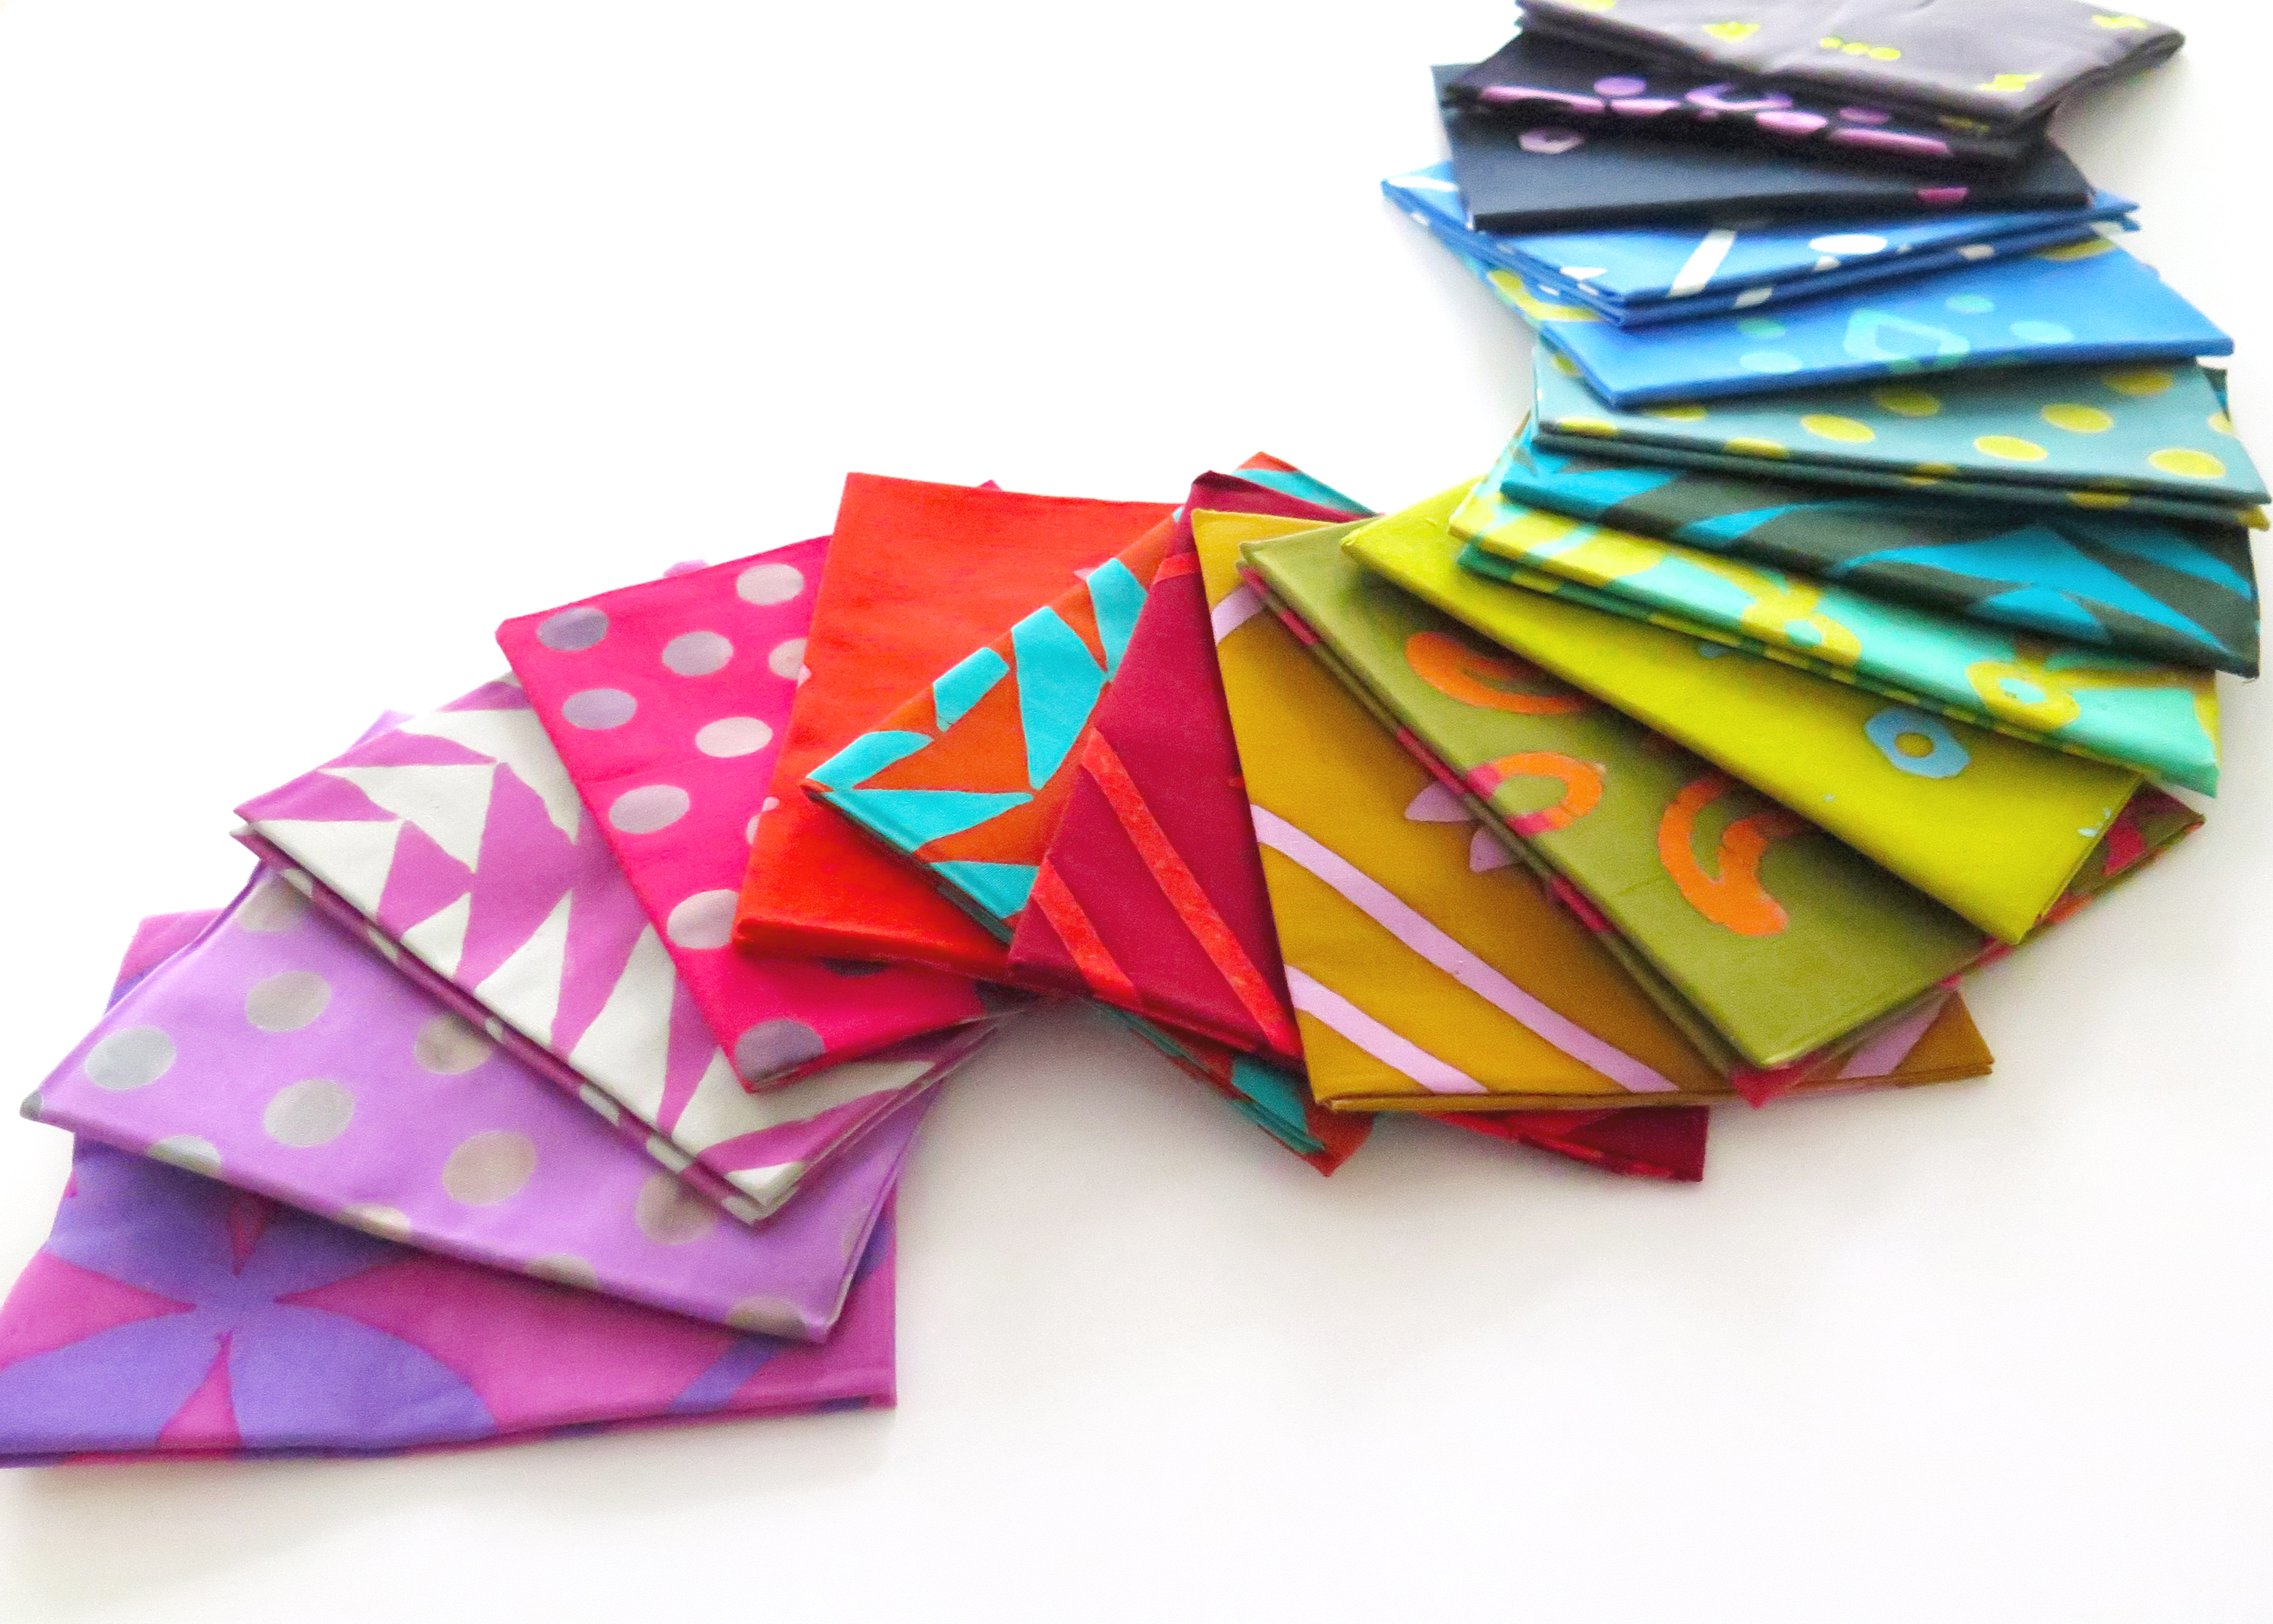
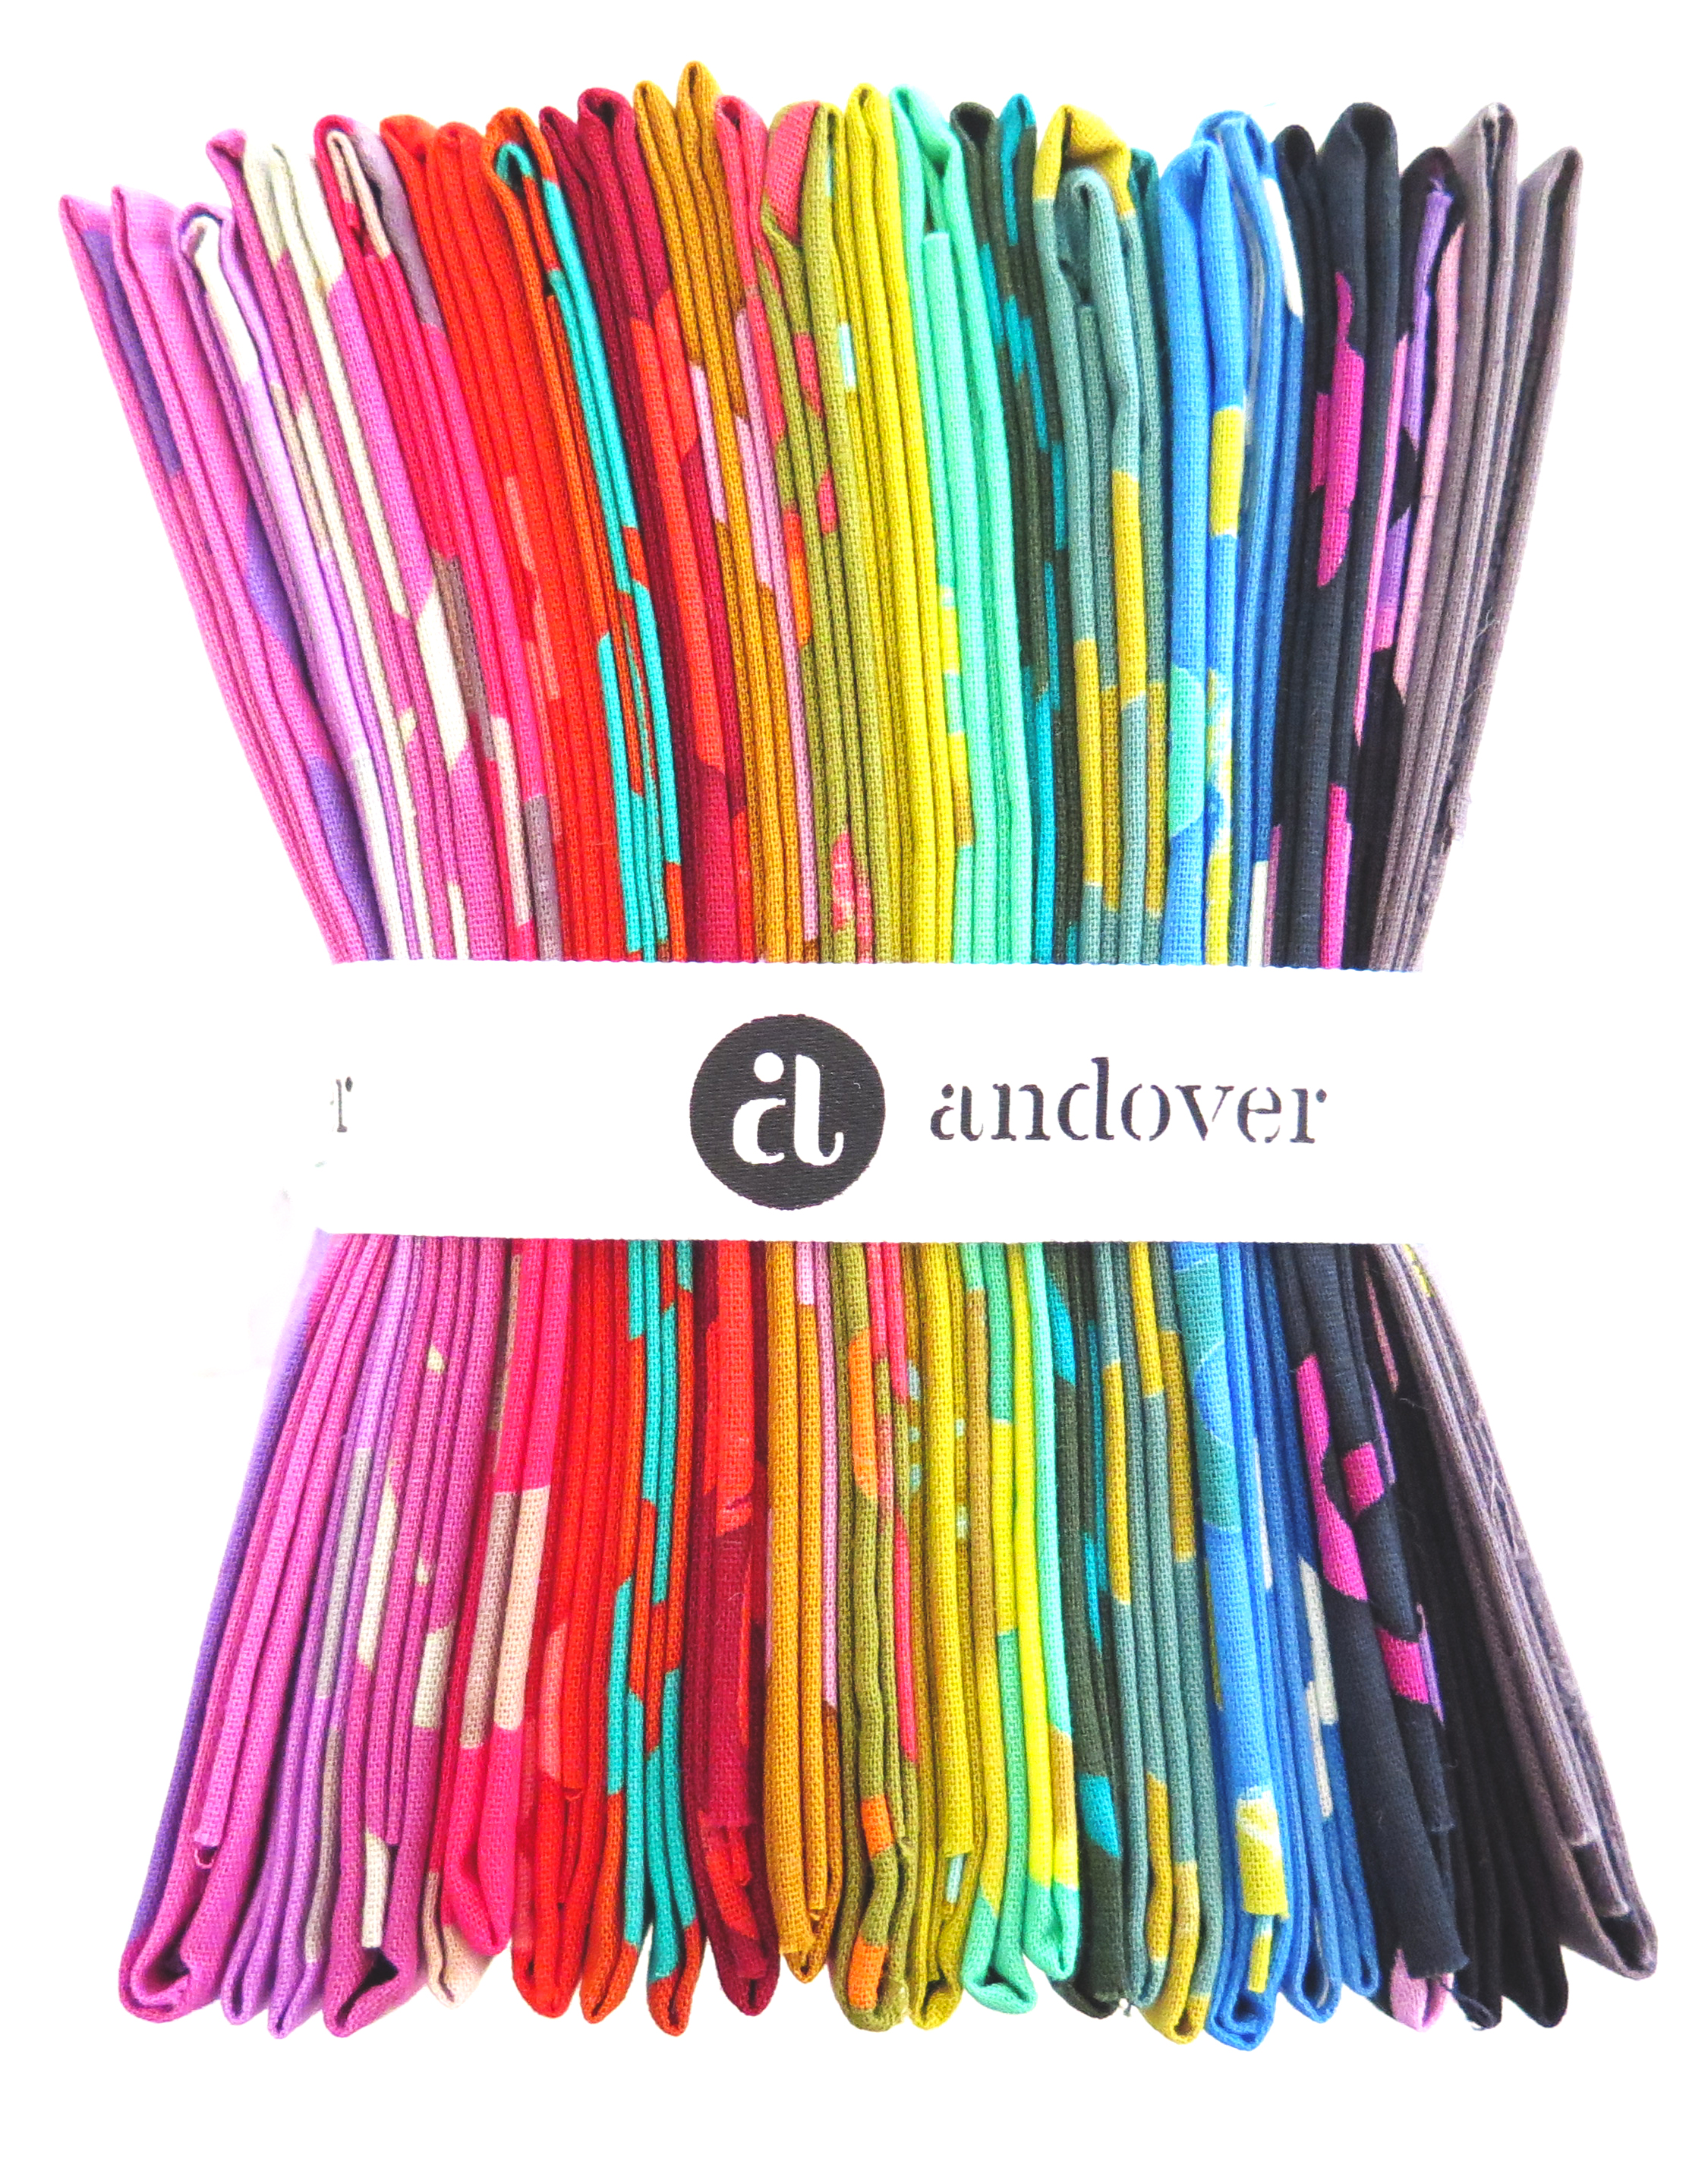
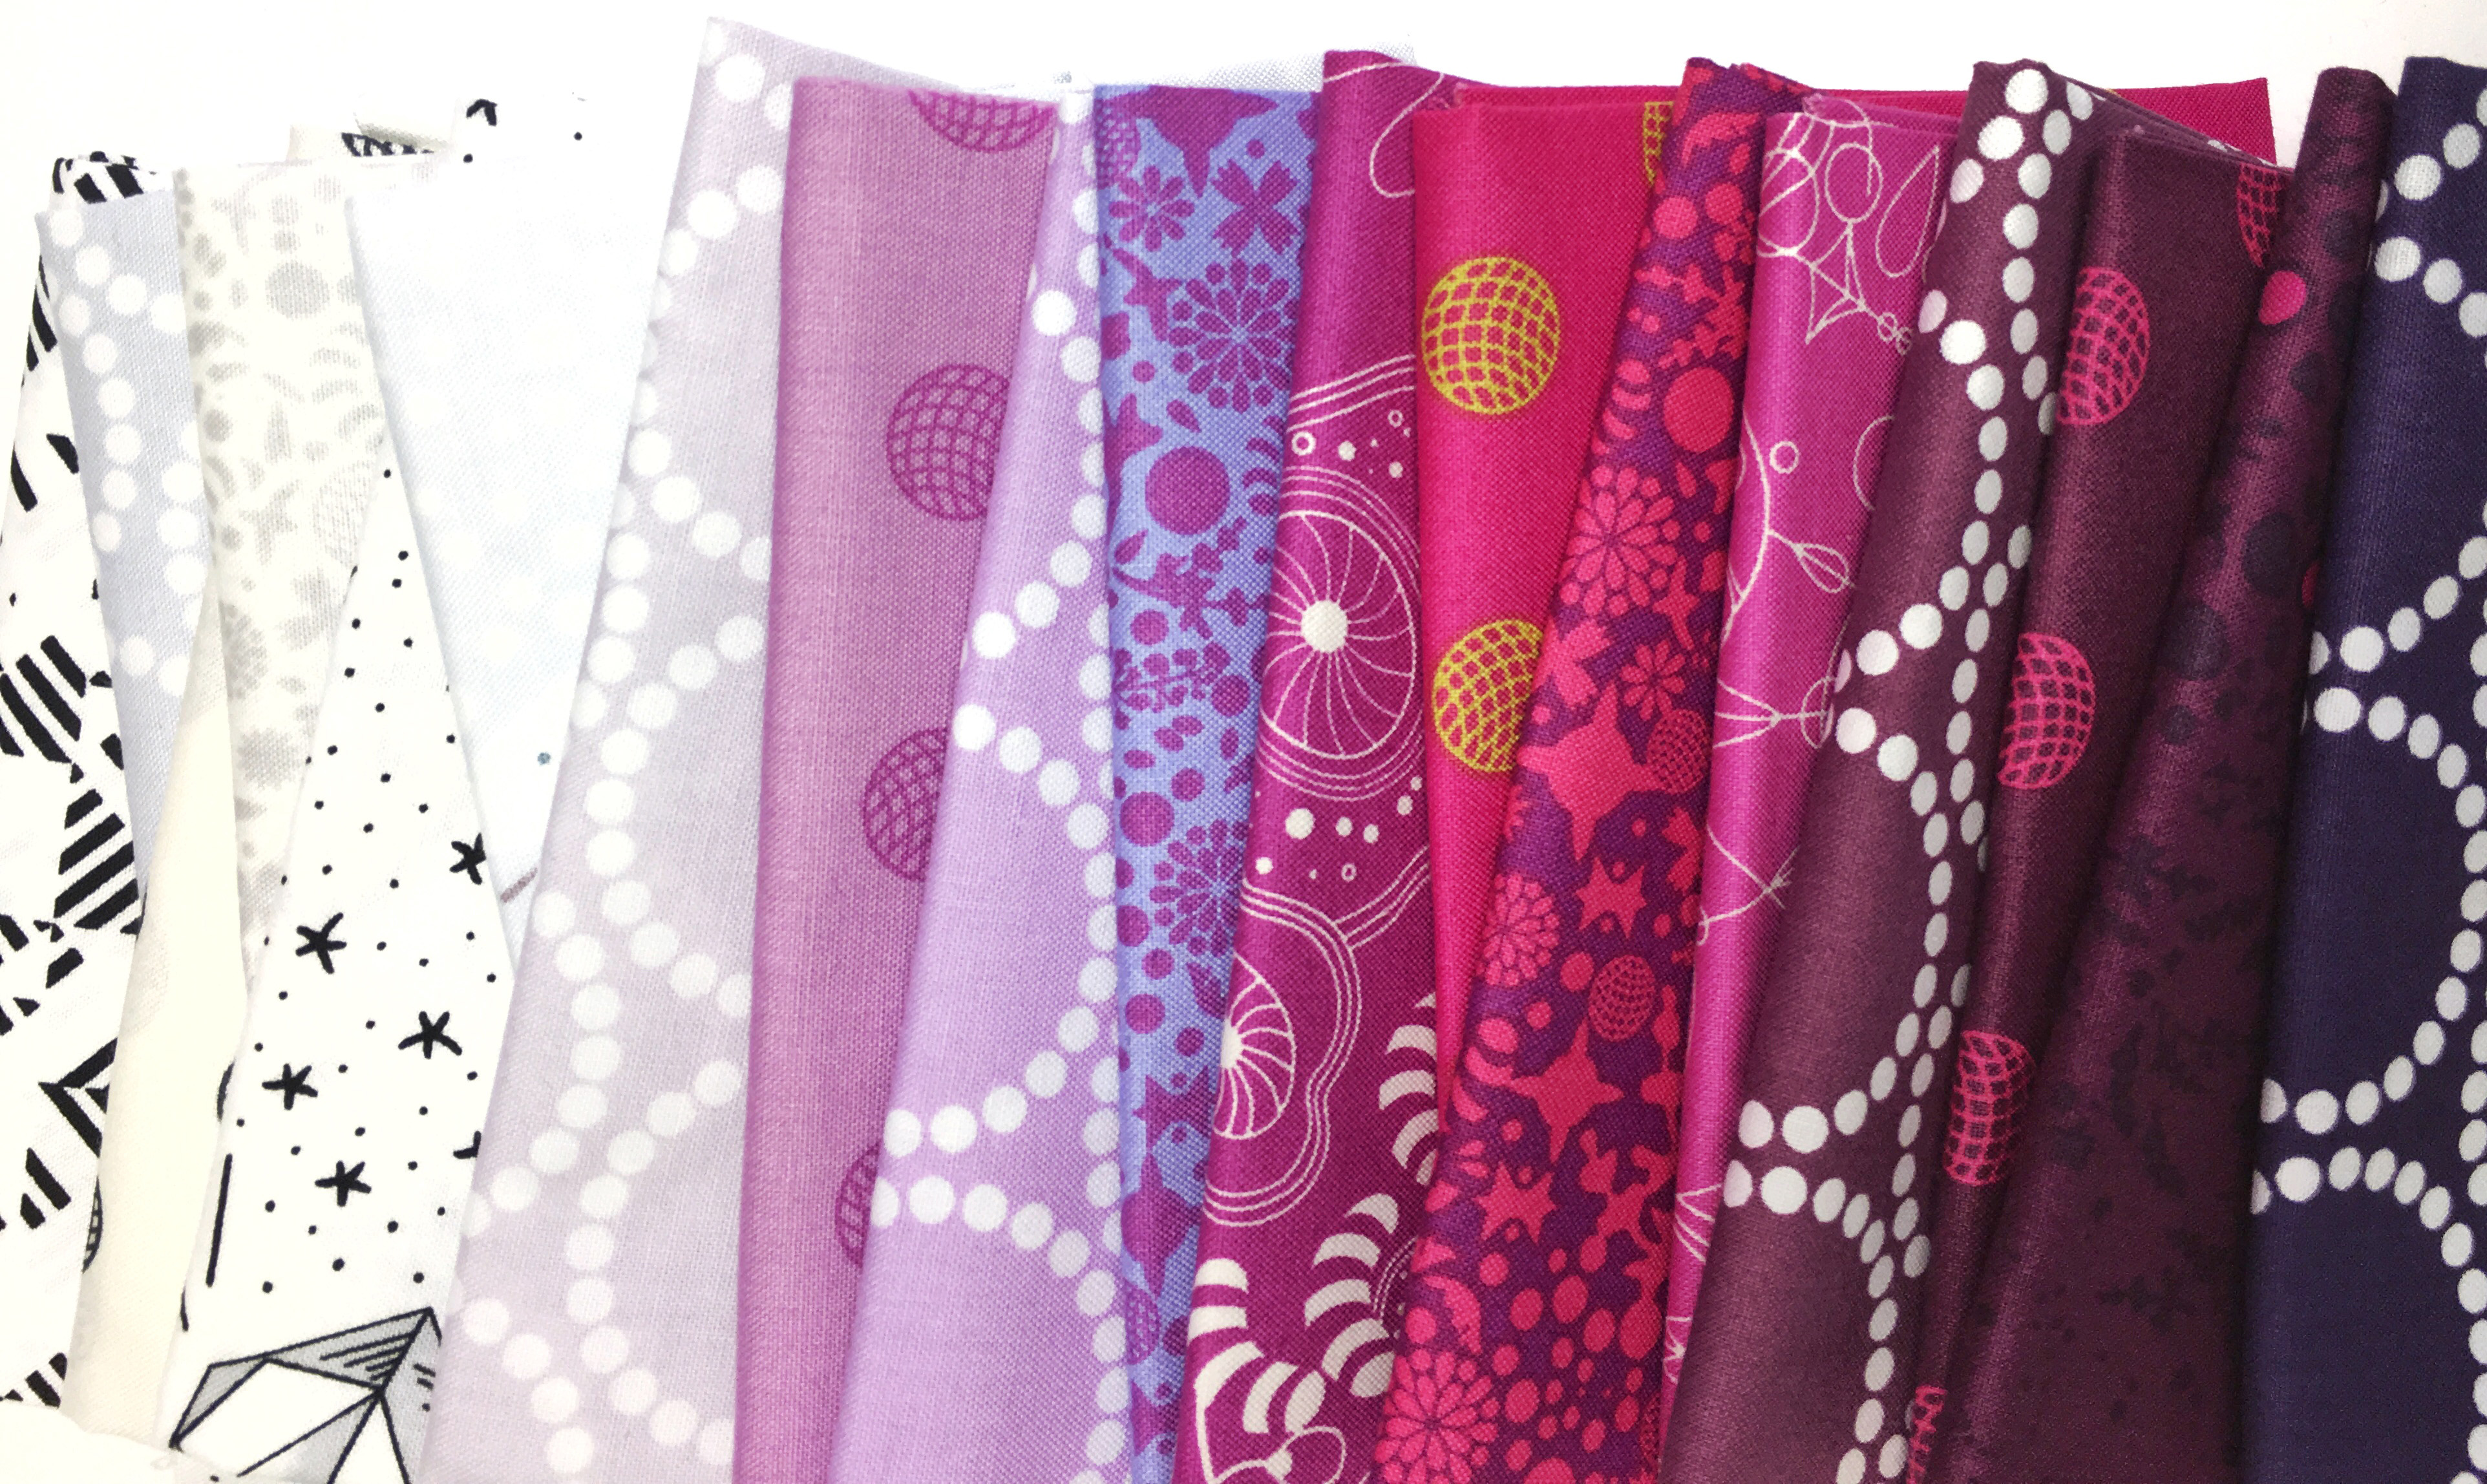
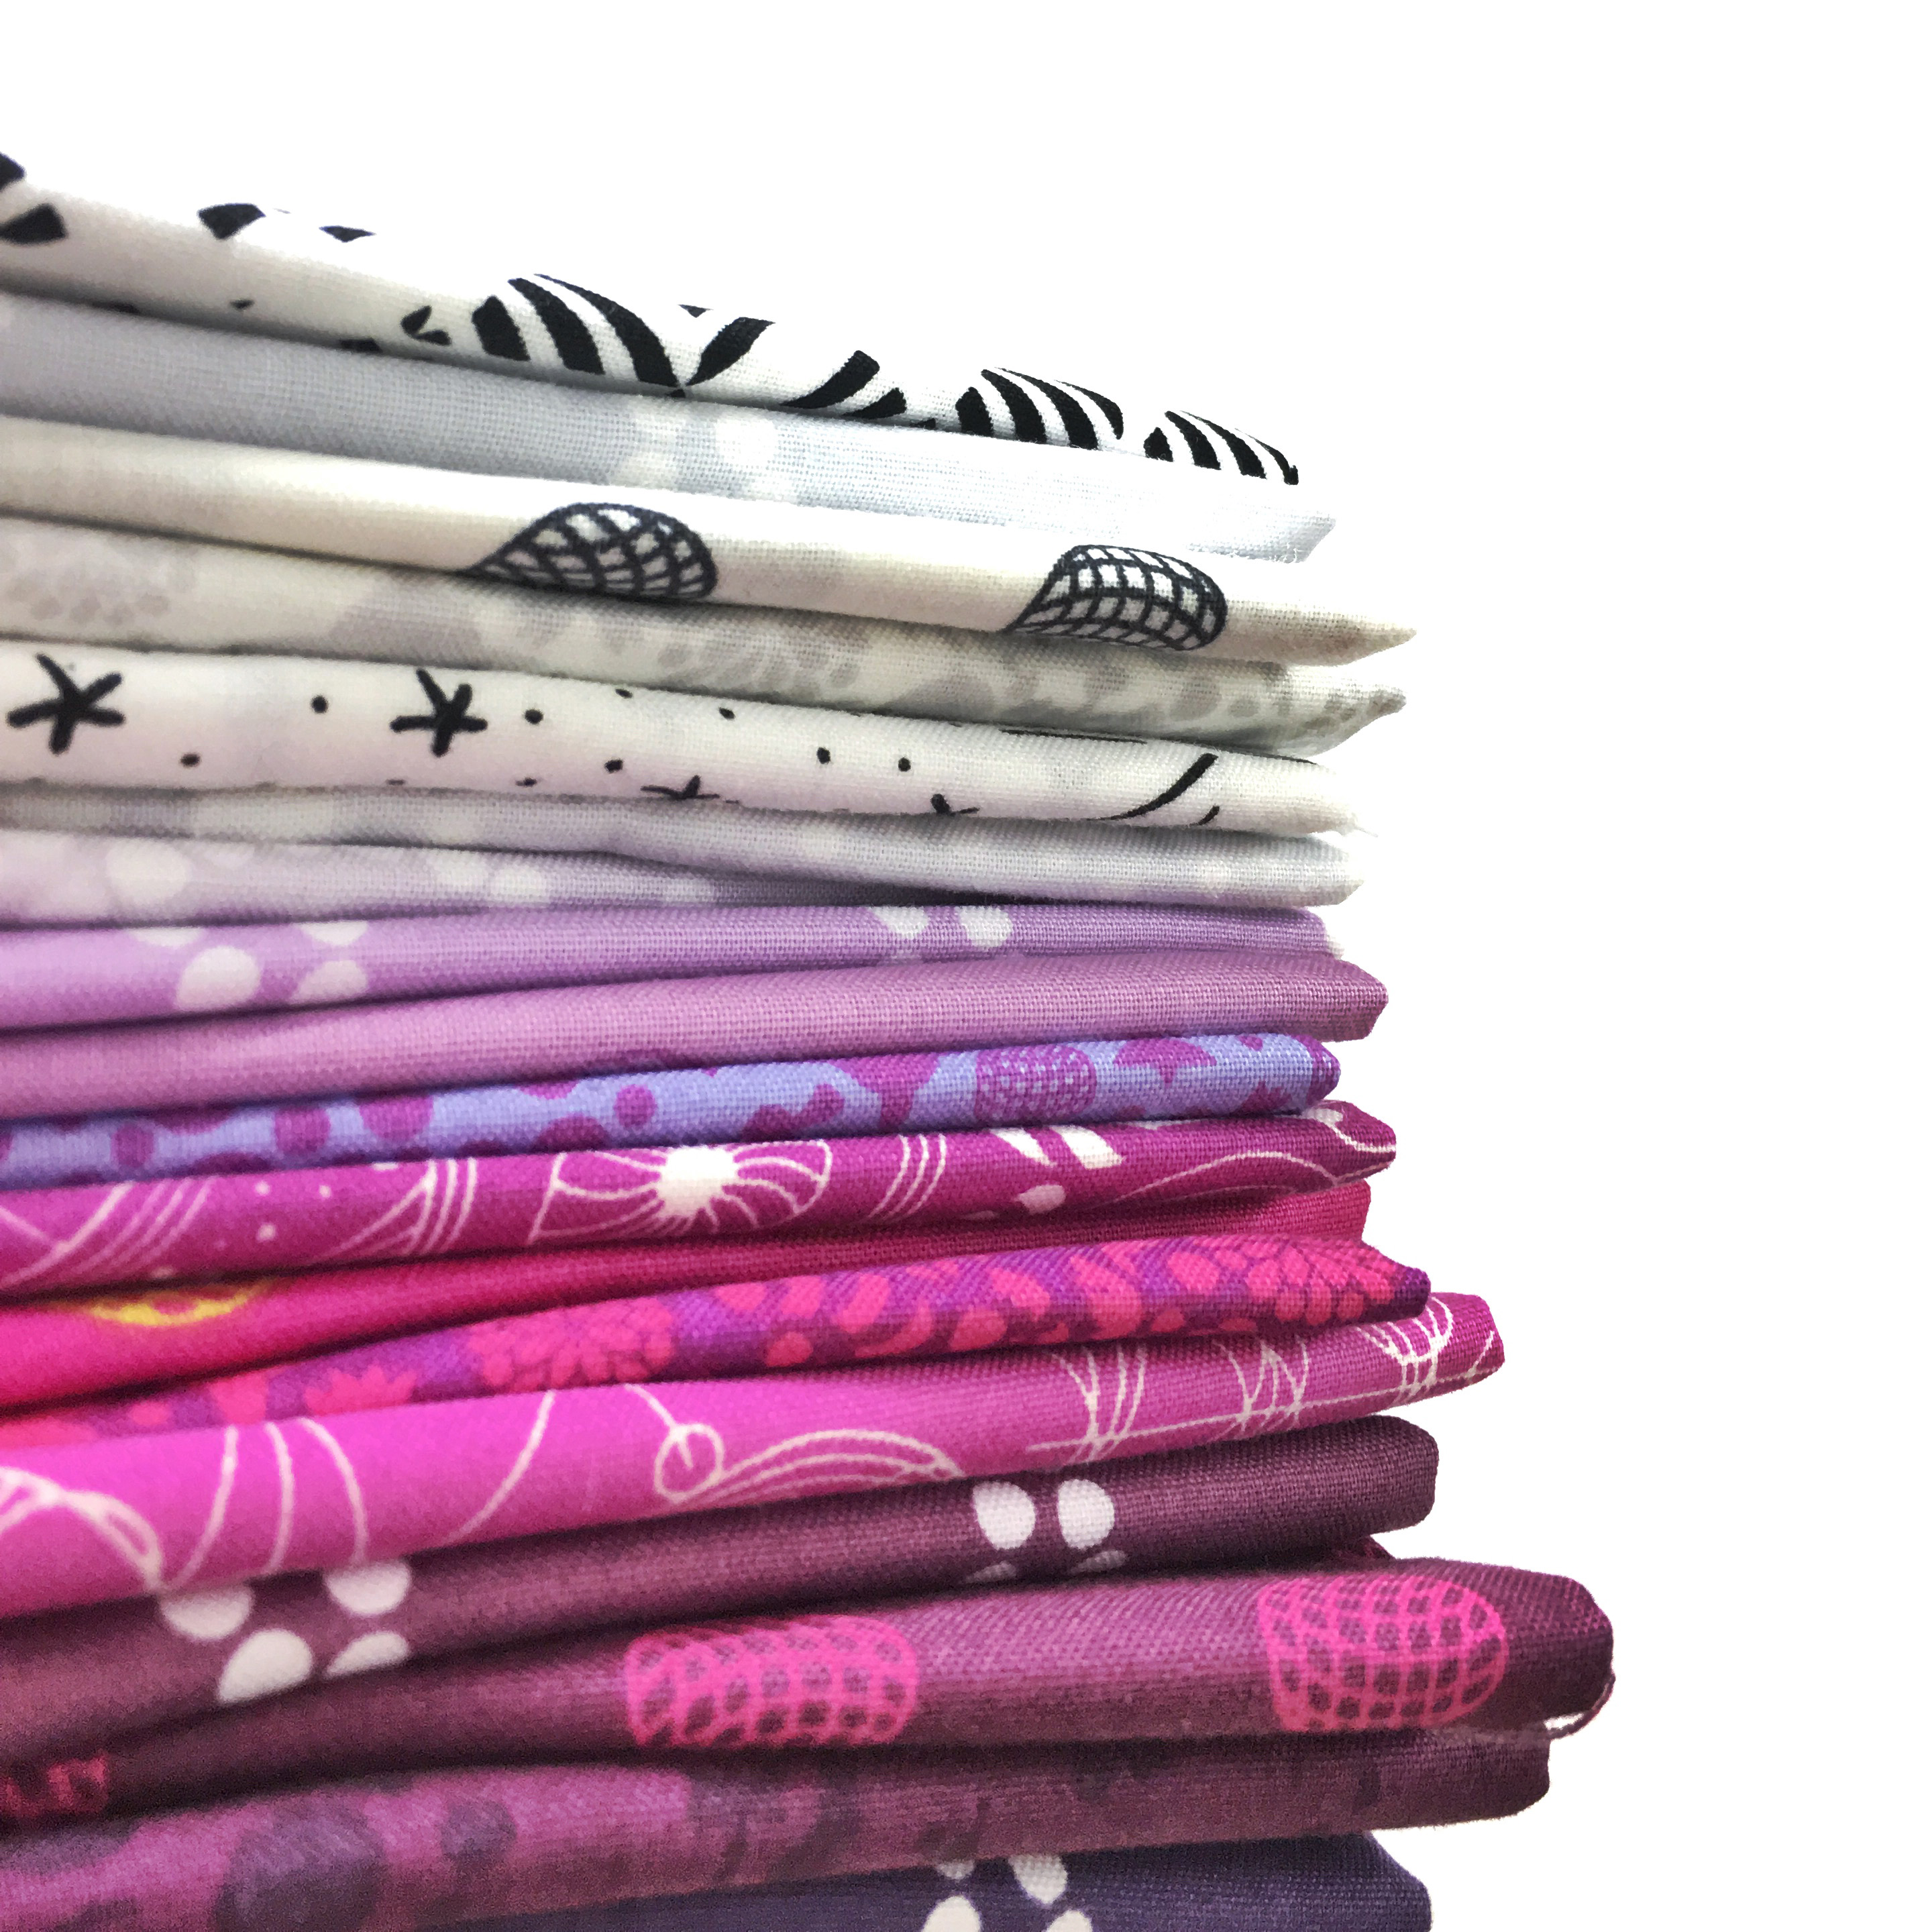
Now how would you like to win a Fat Quarter Bundle of Alison Glass’ Handcrafted Patchwork?
eq7-giveaway-1

To win this beautiful array of fabrics, simply go to Electric Quilt’s blog and enter to win this bundle. Click here to enter. 

eq7-giveaway-3

Both giveaways close September 25th at 9 AM ET, so leave a comment below to win your own EQ7  and head on over to EQ’s blog to enter to win these beauties…


eq7-giveaway-4

Posted in Uncategorized | 345 Comments

Charlotte Newland Sews Lizzy House

I’m Charlotte Newland – a dressmaker, mum and scientific editor living in London, UK. I’ve been making stuff since I was a little kid and love to quilt, sew clothes, and knit. I am the winner of The Great British Sewing Bee 2016, and blog at charlottenewland.com.

photo 1

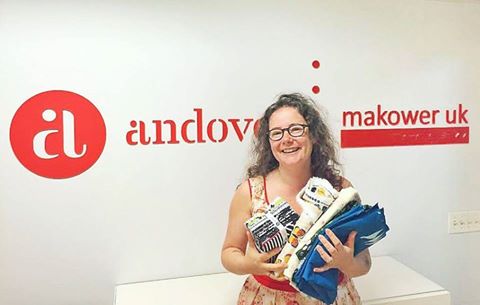
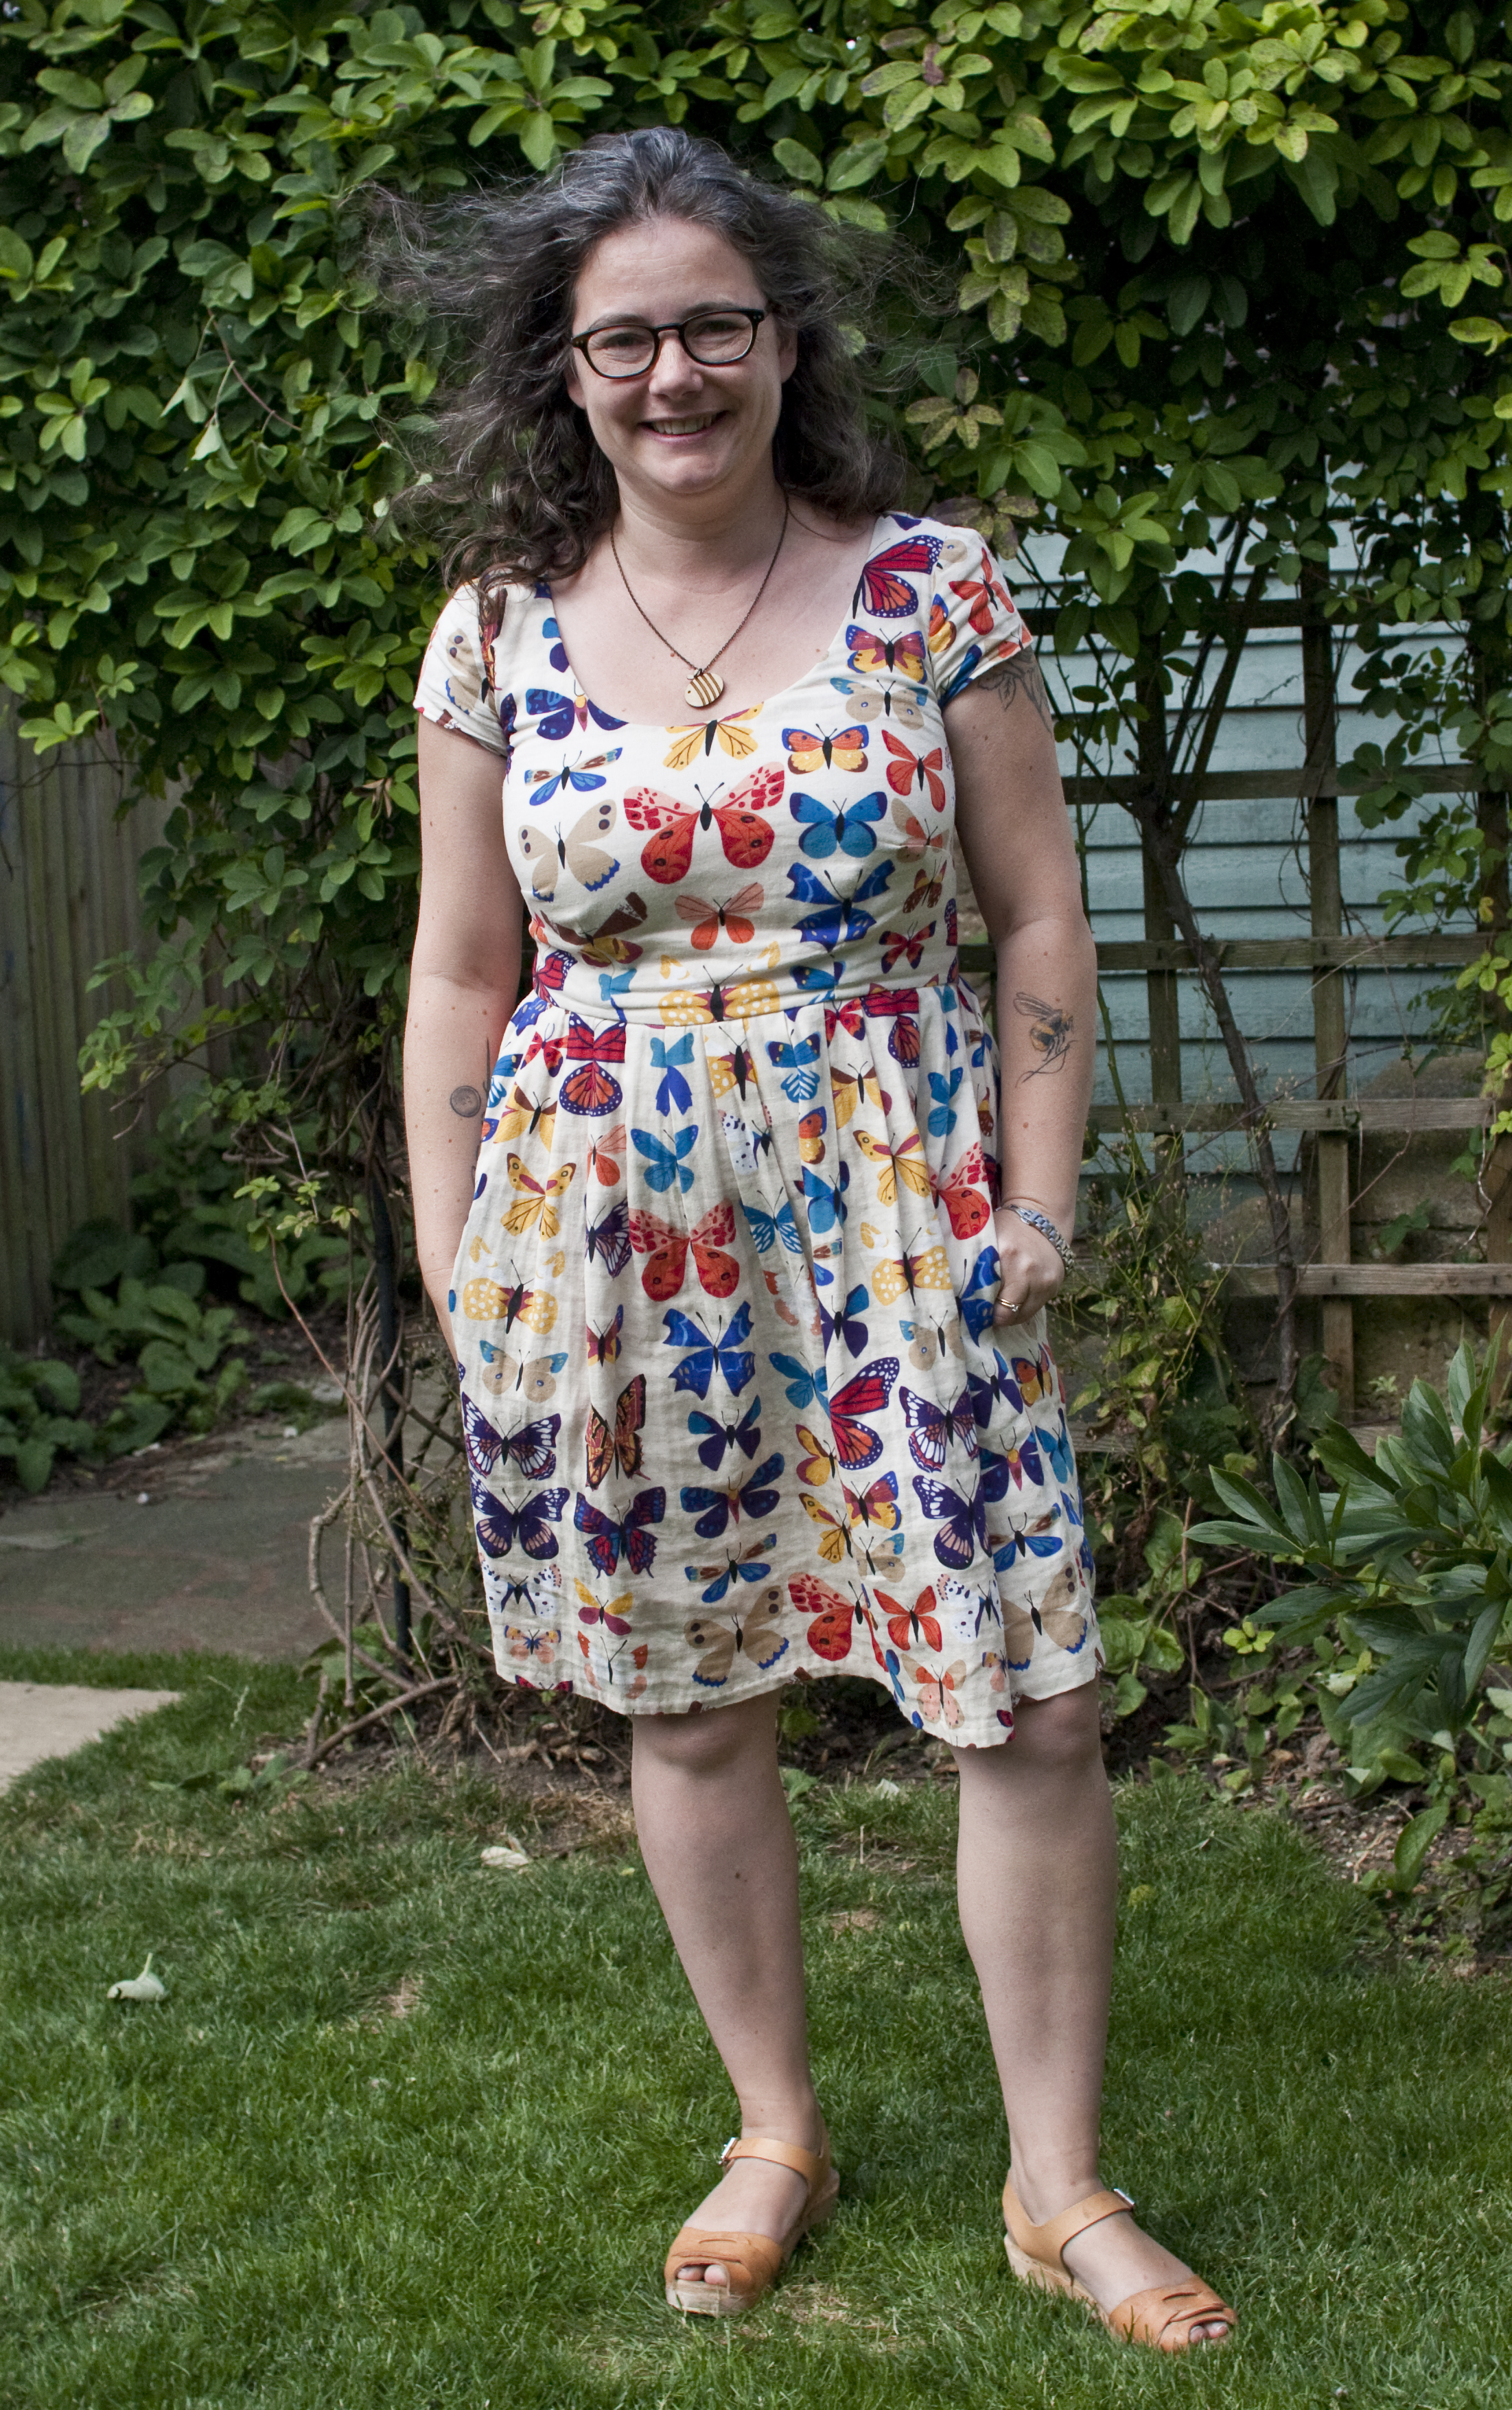
On a recent trip to New York, I was invited to meet the team at the Andover offices where Daryl loaded me up with approximately three metric tons of fabric, including some unbelievably gorgeous Lizzy House double gauze. This was so exciting to me, because it’s nigh on impossible to find in the UK, and I love to make clothes using unconventional prints (foxes, typewriters, fruit – you get the picture).

13567360_10153769055918100_1431077973219943171_n

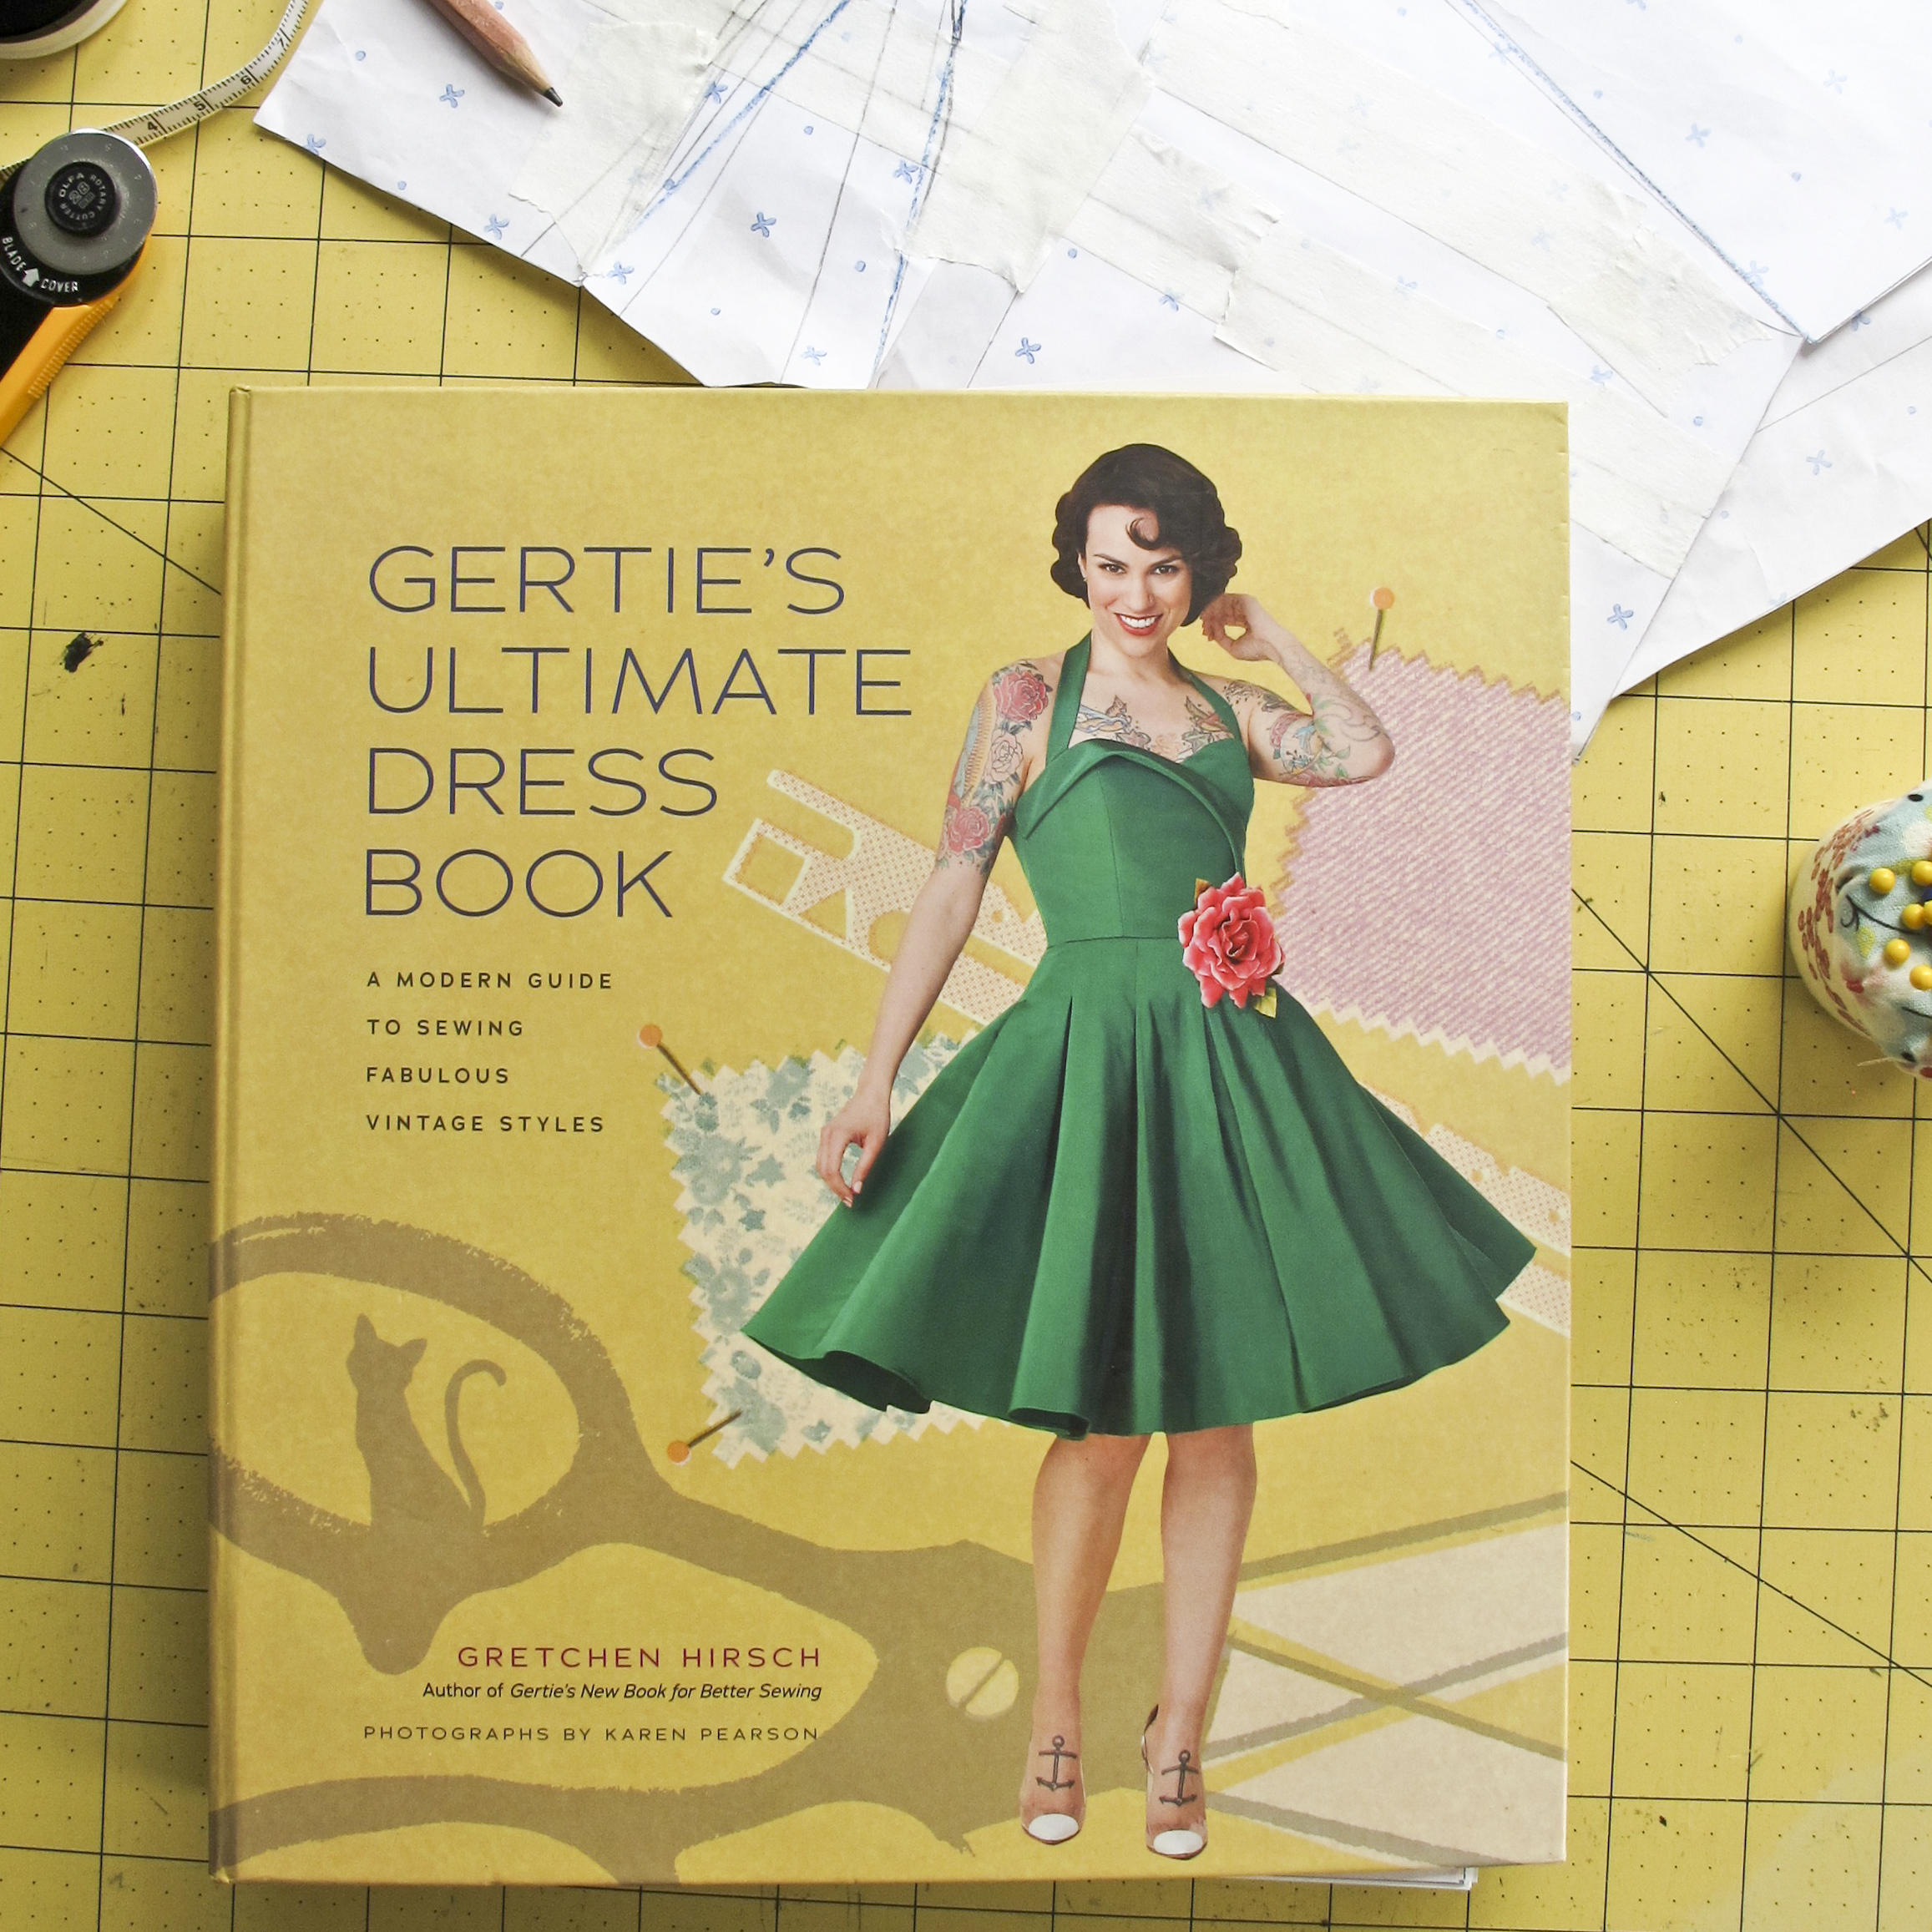
Having never sewn with double gauze before, I spent longer than usual deciding what to make, finally settling on a dress made up of the basic bodice, cap sleeve, and all around pleated skirt from Gertie’s Ultimate Dress Book by Gretchen Hirsch. This book is my current obsession, and I plan on working my way through the whole thing by Christmas, if not before. It includes a whole load of separate bodices, skirts and sleeves, which mix and match to make a huge number of possible dresses. Heaven!

photo 2 (1)

As always, I prewashed the fabric before cutting, and then gave it a good press. Double gauze has a beautiful soft texture and a fair bit of loft, so I found it really helpful to tape the fabric to my cutting table so it stayed nice and straight during cutting. I also used pattern weights and a rotary cutter to make absolutely sure it didn’t shift.

photo 3

Because the fabric was so light in colour and double gauze has a fairly loose weave, I chose to line the bodice with white voile. This had the dual effect of providing extra brightness and contrast to the print on the bodice, and helping to avoid visible undies. I also used the voile for the pockets because I didn’t want to risk the butterfly print showing through to the skirt. The skirt itself was left unlined to make the most of the gorgeous breeziness of the double gauze – perfect in hot weather. Not that we get much of that in the UK, but a girl can dream.

photo 4

All in all, I’m delighted with the fit of this dress. The fabric is so comfortable and the print is just perfect. Thanks so much to the team at Andover Fabrics for the opportunity to sew with this gorgeous substrate!

photo 5 (1)


Posted in Uncategorized | 29 Comments

Foundation Paper Piecing with Kitty Wilkin

GUEST BLOG POST BY KITTY WILKIN OF NIGHT QUILTER

There’s a quilting style near and dear to my heart that often gets a bad rep. I often hear, My brain hurts!… or… it’s too hard for me!… or… Now I have to remove all this paper. Le sigh. That last one all but gave it away, but yes, foundation paper piecing is one of my favorite quilting techniques. I love it. There is no other method that can result in such crisp, clean lines, perfect points, and fabricly composed images of literally ANYthing with such ease. Many patterns are perfect for using up small scraps, too. With foundation paper piecing, you can create two identical blocks without too much muss or fuss about seam allowances. Once you wrap your brain around the process, learn a few tricks of the trade, and put in your few hours of practice, foundation paper piecing is a fabulous skill anyone can add to their fabric-love repertoire, as it opens a whole new world of quilting and fabric play.

Hi, I’m Kitty! I am a quilter, designer, photographer, and the busy mom-blogger behind Night Quilter. When Giuseppe invited me to write a guest post on the Andover blog, I knew I wanted to spread my love of foundation paper piecing. Today I’m excited to share a basic tutorial for how to foundation paper piece, some tips along the way to help you set yourself up for success, a fun peek at how to fit fussy cutting into your FPP projects, and some links to extra surefire tips to ensure your foundation paper piecing journey is smooth sailing.

When I was first getting started with foundation paper piecing, once I wrapped my brain around the fact that I was sewing something backwards while looking through a mirror, it all clicked. I’m a very spatial person, so once I could visualize that the picture was being created on the BACK, I was fine. Yes, the lines along which you sew will be on the back, or wrong-side of your sewn design. Think about that for a minute, and then let’s begin. Take your time, and have FUN!
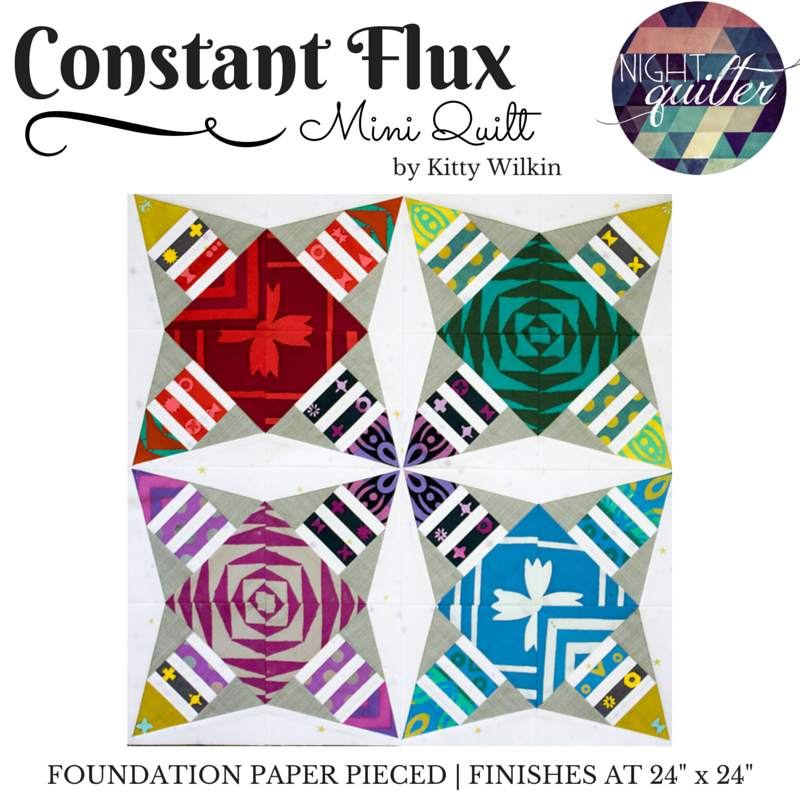
PHOTO 1 - Constant Flux CoverFor this tutorial, I’m using my newest pattern Constant Flux, which is a geometric foundation paper piecing pattern perfect for beginners or advanced FPPers alike. You can buy the pattern in my pattern stores here (Craftsy or Payhip if you’re in the EU), or you can apply these methods to any foundation paper piecing project you choose! Let’s get started!

Preparation
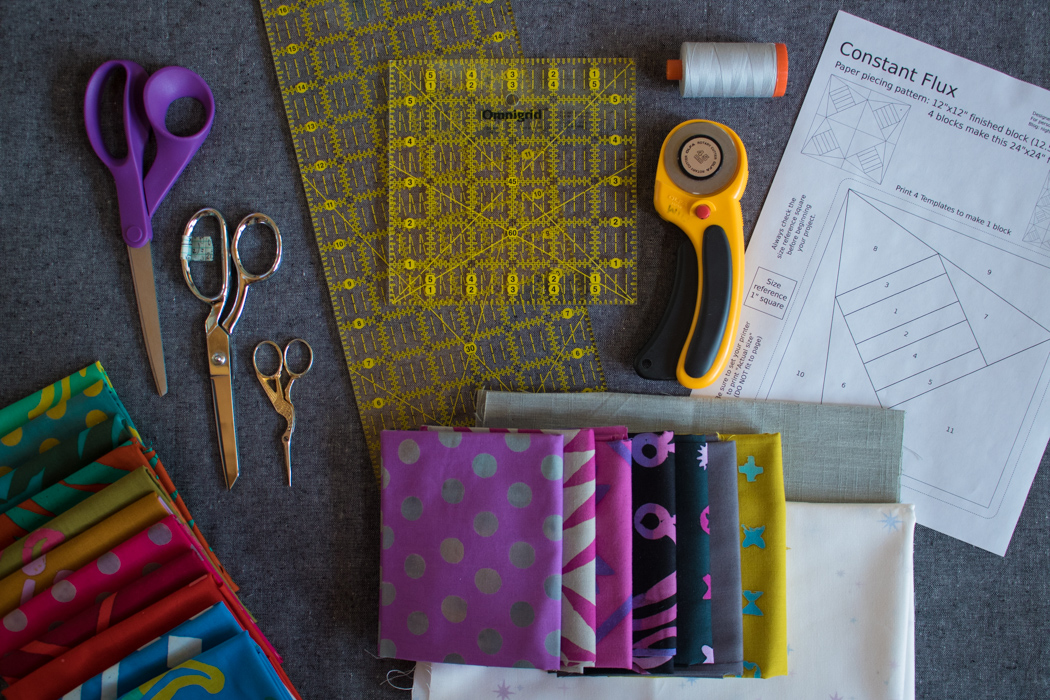
PHOTO 2

Assemble your tools. You will need:
– pattern & paper (I use regular printer paper. Some prefer velum or tracing paper, but I really like the sturdy foundation provided by regular 100% recycled printer paper)
– fabric (I created Constant Flux with Handcrafted Patchwork by Alison Glass in mind, with Lizzy House’s Constellation from her Whisper Palette as a background, and some Andover Textured Solid in grey to round it out. Thank you, Andover Fabrics for the consistently gorgeous fabrics!)
— thread (I do all of my piecing with Aurifil 50wt 2600-Dove, my panacea thread)
– rotary cutter and mat
– scissors (be sure to use non-fabric scissors to cut out your pattern. I suggest having fabric scissors, craft scissors, and small scissors for trimming threads)
– ruler (add a quarter rulers work well, but so do any quilting rulers with a 1/4″ measure)
– iron and pressing surface
– sewing machine (I love my Bernina 560, and use my walking foot for just about everything except sewing curves)
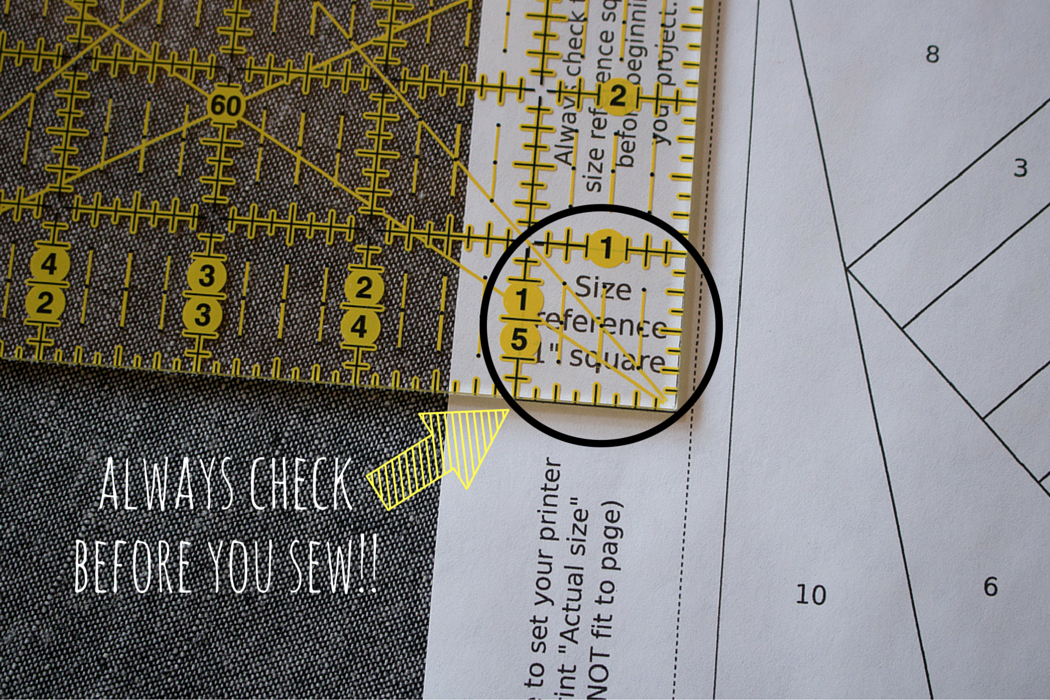
PHOTO 3 - Always check before you sew big

Print your pattern of choice with your printer set on “Actual Size” and check the scale with your ruler. ALWAYS check to make sure the pattern is printed to the correct scale before beginning to sew. Trust me, this step is as important as knitting a swatch before beginning to knit a sweater. Just do it or your sleeves will end at your elbows!

Cut out the pattern pieces using craft scissors (not your precious fabric scissors!). Many patterns have a dotted line showing a 1/4″ seam allowance on the pattern. Be sure to check that the seam allowance is included, and if it isn’t, be sure to add it on before you cut.

Depending on the pattern, some people like to color their pattern with colored pencils to help with accurate fabric piecing. I usually only do this for complicated patterns or when I am using different fabric colors than indicated on the pattern, but you are welcome to get out the colored pencils and do some coloring here if you want! There’s a coloring sheet included with my Constant Flux pattern, and with the potential for endless color play, gradients, and movement, coloring would definitely be a helpful step. Once you have your colors chosen on your coloring page, be sure to transfer those colors to each pattern template. Remember that the pattern templates are mirror images of the final pattern (which doesn’t matter with symmetrical patterns like Constant Flux, but WOULD matter for asymmetrical patterns).

Cutting Fabric

Once your pattern is all planned out, it’s time to add fabric! Often times, I’m a cut-as-you-go kind of foundation piecer. But sometimes, when a pattern is particularly geometric like this one, and I want to meticulously cut (called fussy cutting by most folks) some of the pattern pieces, I do my fabric cutting before getting started.
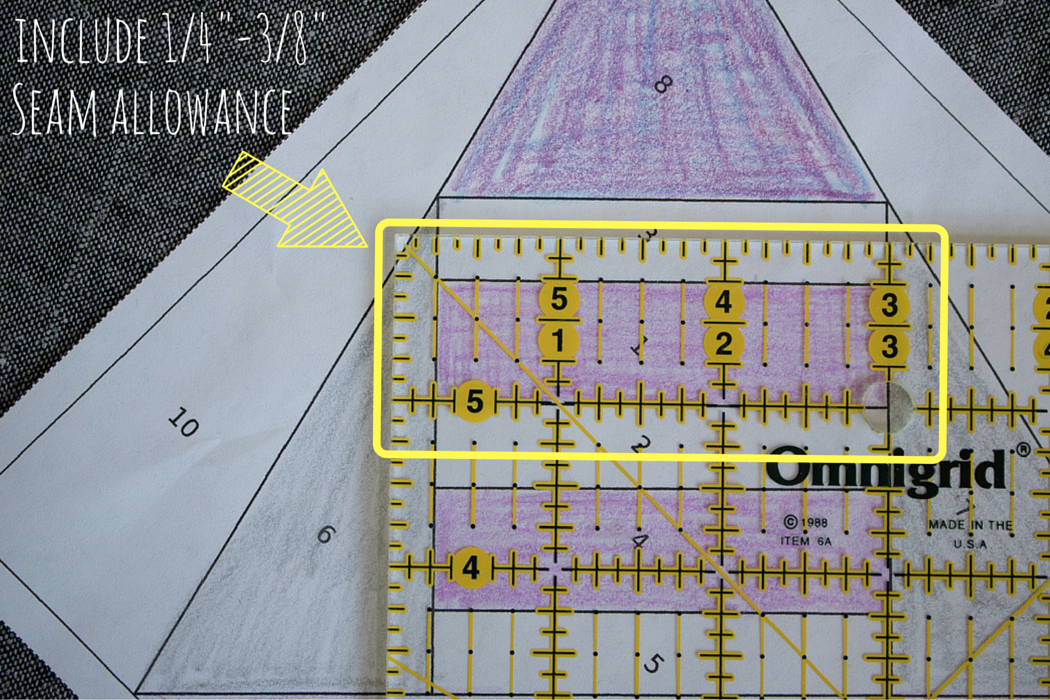
PHOTO 4 - Rotary cutting fabric prep

To determine how large you should cut each fabric piece, lay your ruler on top of your pattern template, with a ¼” (or if you’re a beginner or don’t mind a bit of extra fabric usage to ensure accuracy, a ⅜”) seam allowance on all sides. You can quickly cut the necessary rectangles of fabric using your rotary cutter and ruler, saving time and fabric in the process. I used this method to cut all of my fussy cut strips, too, just making sure to keep the desired motif centered within the pattern piece.

For Constant Flux, here are the sizes of fabric that can be precut for each piece on the template:

Piece # on Template ¼” seam allowance (Pros) ⅜” seam allowance (Beginners)
1, 4 1 ¼” x 3 ¼” 1 ½” x 3 ½”
2, 3, 5 1” x 3 ¼” 1 ¼” x 3 ½”
6, 7 3 ½” x 4”* 3 ½” x 4” *
8 use template use template
9, 10 7 ½” x 3 ½”* 7 ½” x 3 ½”*
11 use template use template

* Note that the rectangles cut for 6 & 7 and 9 & 10 are large enough to cover both triangular pieces. ie., one 3 ½” x 4” rectangle will be enough fabric to cover both piece 6 and piece 7.

Having a stack of pieces ready to go makes the foundation paper piecing process go much more quickly, but always be sure to double check your first piece cut to make sure it covers the intended piece plus a seam allowance on all sides before cutting all of your fabric for a project!

Accuracy tip: Note that the lines on the pattern template should be facing the opposite direction as the right side of the fabric (read that again and let it set in). With the pattern template with lines face up, be sure to cut with the wrong side of your fabric facing up. If your pattern is symmetrical or fabric doesn’t have a wrong side, you don’t have to worry about this detail.

Incorporating Meticulous Cutting into Foundation Paper Piecing

When I first set eyes on Handcrafted Patchwork by Alison Glass, the large scale designs captured my attention. I knew that they needed to play a lead role in this pattern, and meticulous cutting helped make that so.
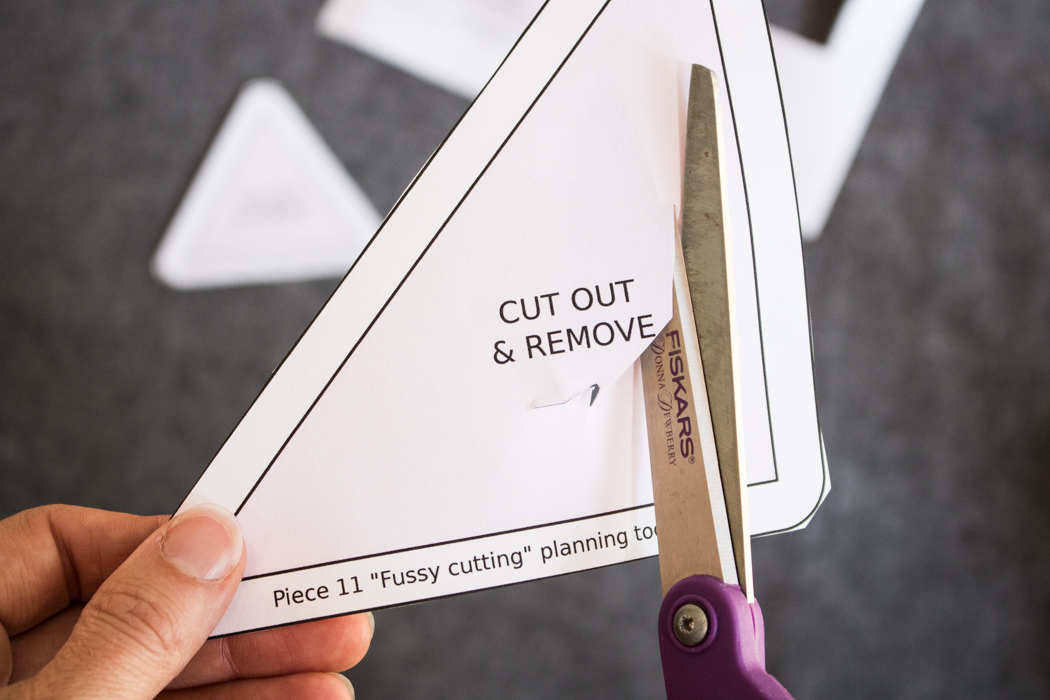
PHOTO 5

Some foundation paper piecing patterns include fussy cutting planning tools in the pattern, but it’s easy to make your own, too. Simply print an extra page of each template piece, mark the individual pattern piece you’d like to fussy cut, trace a ⅜” border around it, and cut it out. Cut out the center piece as well, which will give you a window to help you plan your fabric placement.
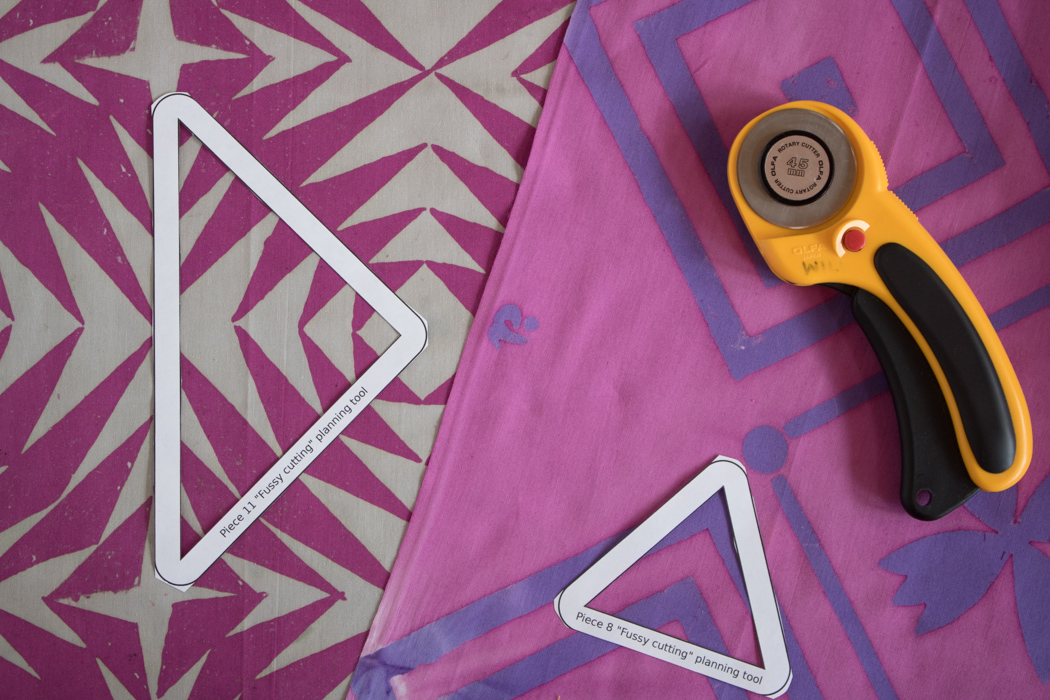
PHOTO 6

Play around with your pattern pieces on the fabric, choosing a little window of the fabric design motif that will work well in repeat. Once you identify the design you want, cut your first piece. Hold the template firmly and carefully in place and trace around it, cutting the fabric with scissors or a rotary cutter and ruler once marked. I like to live on the edge, so I VERY CAREFULLY rotary cut around the edges of each piece. You know yourself best. If this method is asking for a trip to the ER, just take the time to trace and scissor cut each piece. Then, find as many exact repeats as you need for the pattern, and cut away. One of the charms to Handcrafted Patchwork is that it’s handcrafted, so every piece, while containing the same design element, may be slightly different. That’s ok, and is part of the fun dichotomy found with the Constant Flux pattern. Constant = unchanging, the same (like repeat fussy cut elements!). Flux = changing (like the movement elicited in the design of the pattern).

Foundation Paper Piecing – Sewing Time!
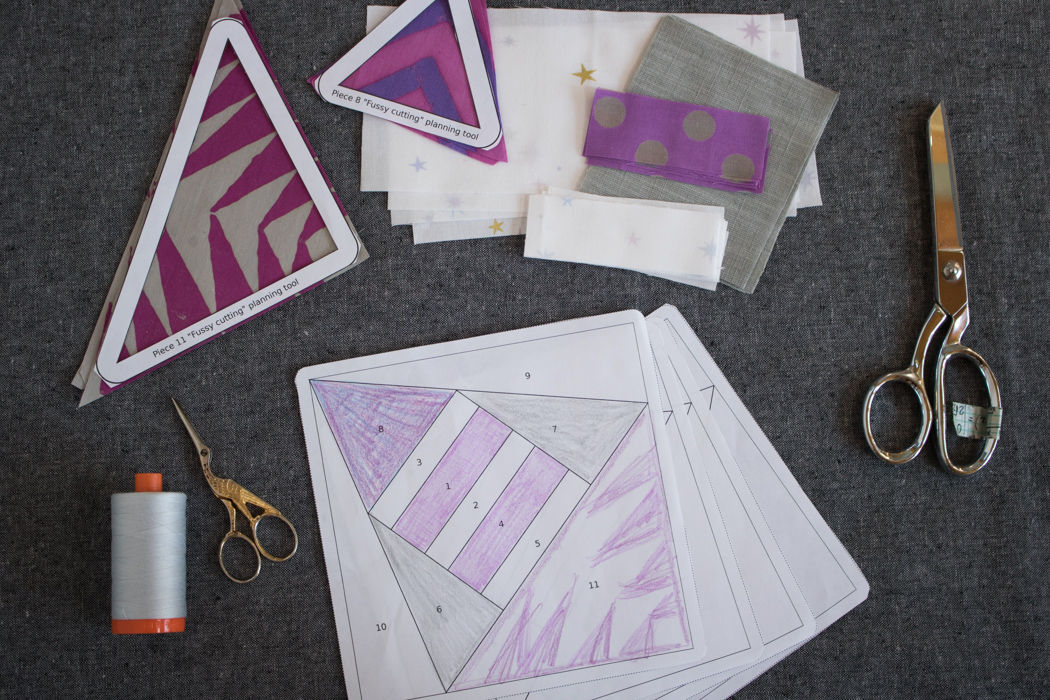
PHOTO 7

Once you have your fabric pieces cut and all of your tools ready, it’s time to start stitching together each pattern piece! Before you sew, shorten the stitch length on your sewing machine significantly. I set mine to 1.2 so that the paper is extremely easy to remove at the end. If you are just getting started, I would recommend setting it at 1.5 or 1.6, since seam ripping 1.2 stitches is enough to send even the most dedicated sewist running for the hills. Once you get the hang of it, shorten down to 1.2 and your paper will melt off like butter on a hot day.
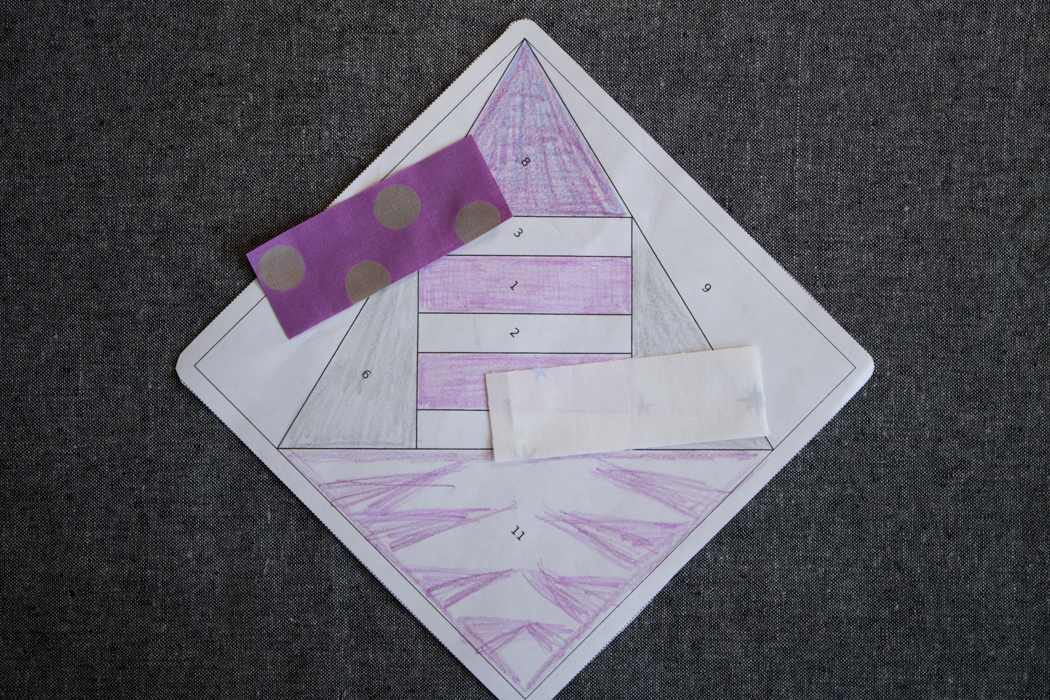
PHOTO 8

Grab your first foundation template and the fabric pieces you cut to fit spaces 1 and 2 on the pattern. Paper piecing is kind of like paint by number, but with sewing, and always in order. You start with piece 1, sew on piece 2, then piece 3, etc.
Beginner’s tip: When cutting fabric for paper piecing, it never hurts to be generous in your cutting. If you are just beginning, cut pieces that are amply large enough to cover the space and seam allowance and then some–lots of wiggle room. Yes, it may waste a bit more fabric, but it makes the process a lot smoother. To me, smooth (no seam ripper required) sewing is worth more than a few tiny scraps of fabric. Also, for some patterns, when you trim your seam allowances, any large pieces of excess fabric can be used for other pieces of the pattern. Go big!

Here’s where the spatial part comes in, so get ready. Remember, you are using the paper foundation to help you make the pattern on the back, as if you are looking through a mirror. Ready?
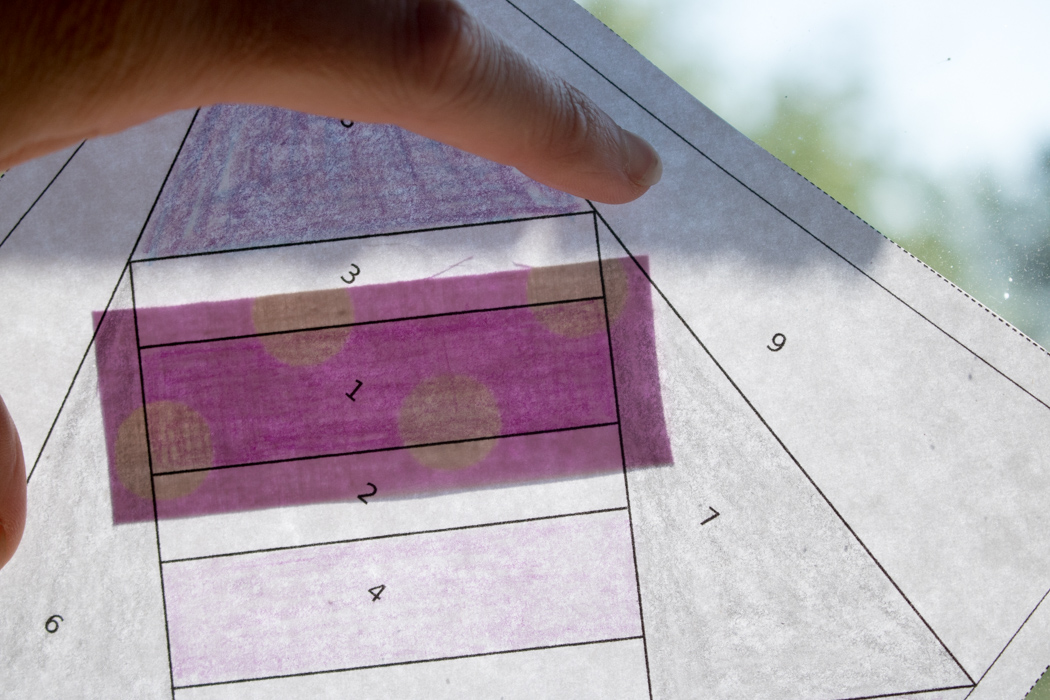
PHOTO 9

Place the fabric for piece 1 on the back of the paper, wrong side of the fabric facing you (against the paper). Hold it up to a window or a light-box to ensure the fabric fully covers the #1 space, plus seam allowances.
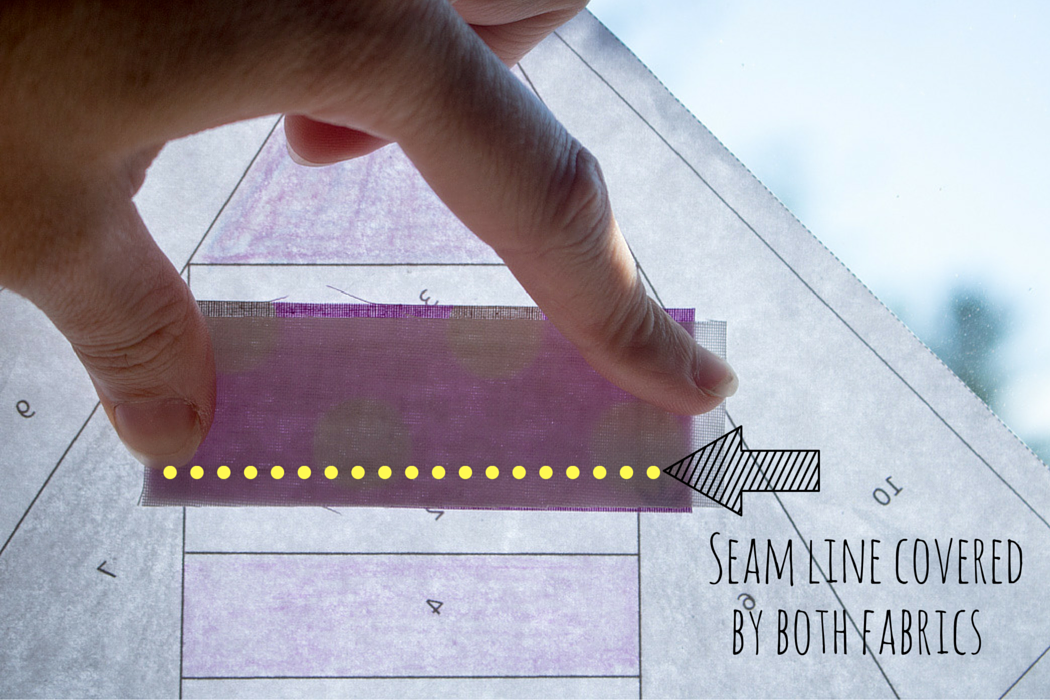
PHOTO 10 Seam Allowance

Holding fabric 1 in place, position the paper so that the printed side is away from you. Take the fabric scrap for space #2 and place it right side down, on top of fabric 1. Be sure the seam line between 1 and 2 is covered by both fabrics, holding up to the light if needed. The fabrics should now be right sides facing each other, and when you sew along the seam line and fold fabric 2 up, it should cover the #2 space plus seam allowances.
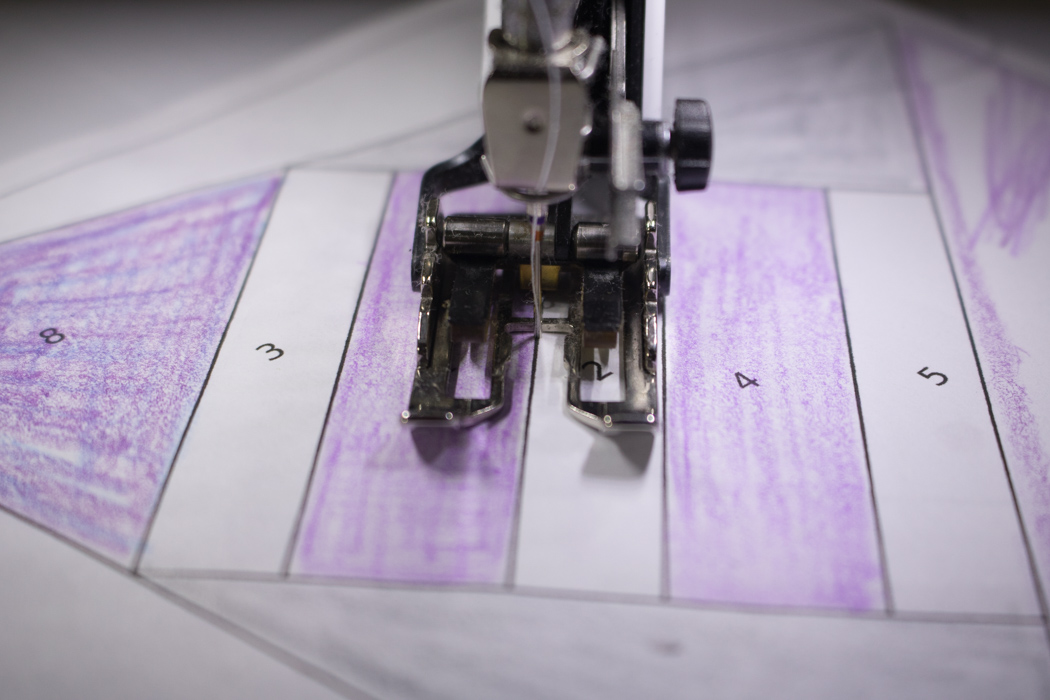
PHOTO 11

Holding both pieces of fabric in place, sew along the line between spaces 1 and 2, with the paper on top. Some people like to pin or even glue their pieces in place before sewing, since the fabric is underneath the paper. I personally just carefully hold them in place with my finger. I haven’t had a problem yet, and it’s one less step if that works for you.

Accuracy tip: Lower the needle by hand for the first stitch, ensuring that your sewing will be straight along the line. Back-stitch for 1-2 stitches at the beginning and end of each line to secure your threads.

Trim your threads. When you fall head over heels for foundation paper piecing, you’ll want to make a pretty thread catch to catch the scads of threads you’ll trim. Good news, I share a free tutorial how to make a great weighted thread catch & pincushion combo on my blog here.
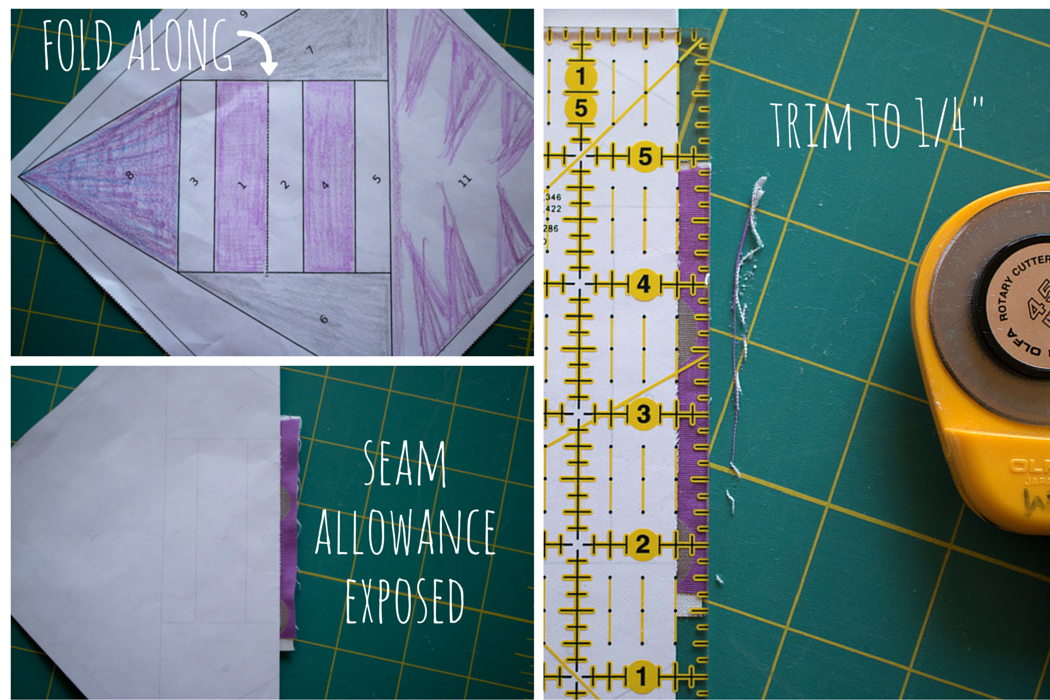
PHOTO 12 Seam Allowance Trim

Next, fold the paper down along the seam you just sewed, with the seam allowance extended. Trim the fabric to 1/4″. With your precut rectangles, there might not be much if any seam allowance to trim off on this step, since you are able to line up your seam allowances *just right*. The larger the seam allowance for the piece of fabric you begin with, the more you will be trimming during this step.
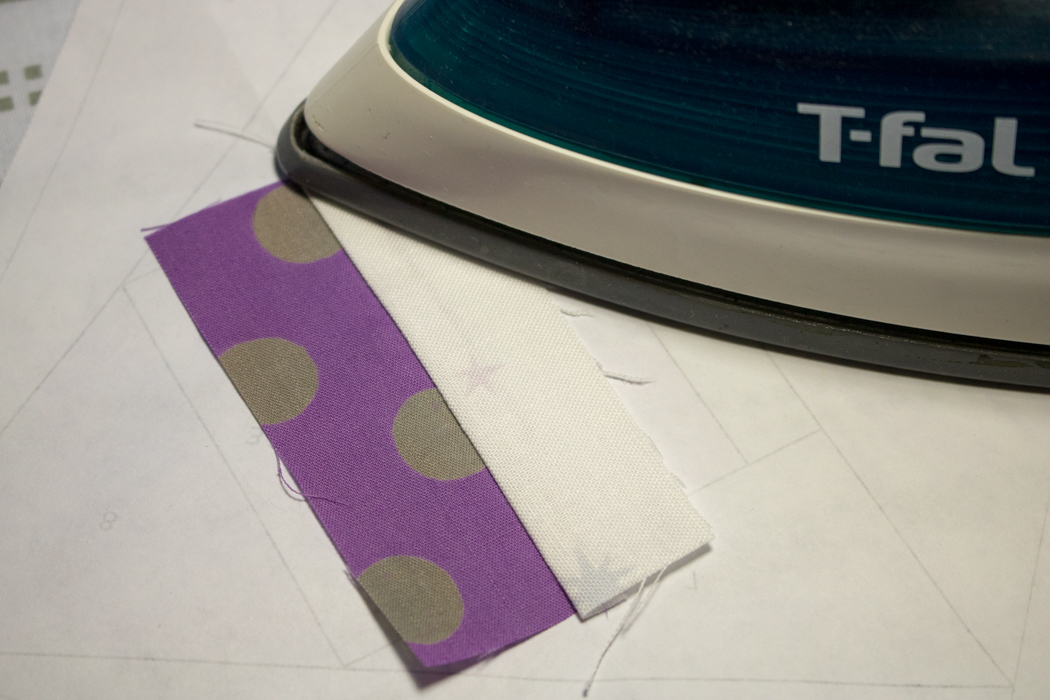
PHOTO 13

With the foundation paper flat and unfolded, press and set the seam with a hot iron (no steam). Finger press fabric 2 up to cover its space and press again.
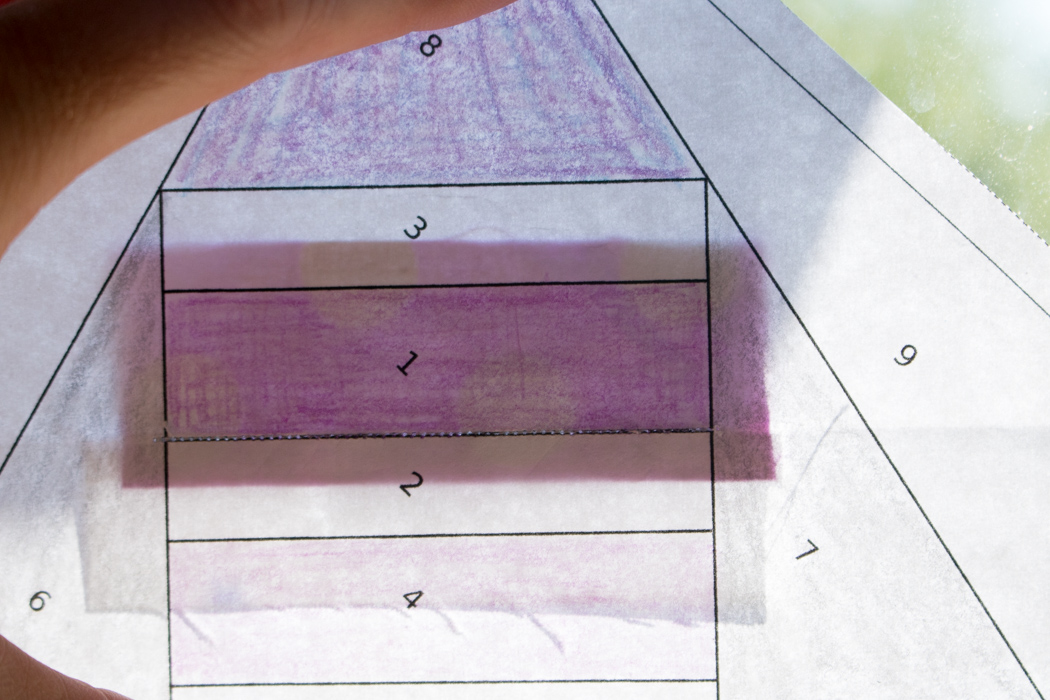
PHOTO 14

When you hold the paper up to the light, you should see that fabric 1 covers the #1 space and fabric 2 covers the #2 space, with seam allowances.

Continue this method for the rest of the pattern pieces. Cut, line up, sew, fold & trim, press. (Replace “cut” with “grab the proper fabric square” if you did all of your cutting ahead of time). Grab next fabric piece, line up, sew, fold & trim, press. Repeat. It won’t be long before you’re a pro!

Tips for Lining Up Seams

There are a few tricks of the trade that can help improve the consistent accuracy of your piecing, greatly reducing the number of frustrating bouts with your BFF seam ripper. This particular tip is also great for the frugal ones among us who just can’t bear to waste too much fabric despite the potential tiny stitch seam ripping that may ensue, and cut our pieces *just* right. Note that this works best for straight-forward seams, and not nearly as well for long, skinny, tricky angles.

Additional Resources for Tricky Angles: I touch upon some tricks for tackling tricky angles in my tutorial HERE, and Lee Heinrich from Freshly Pieced has a fantastic post on the Bernina blog with a tip that promises you will never tear out stitches again HERE. Trust me, it is entirely worth the read and paired with some solid practice in the basics of foundation paper piecing shared here, will change your paper piecing game for the better.
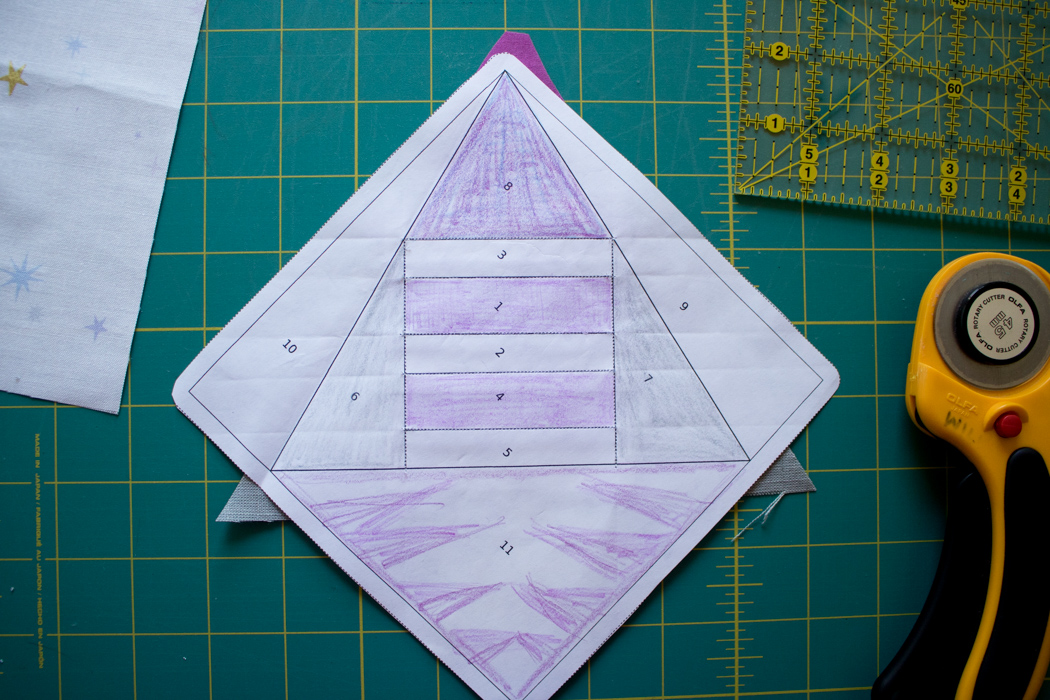
PHOTO 15

Back to my tip for accurately lining up seams. For this example, I have just finished sewing on pieces 1-8 and am getting ready to sew on piece 9.
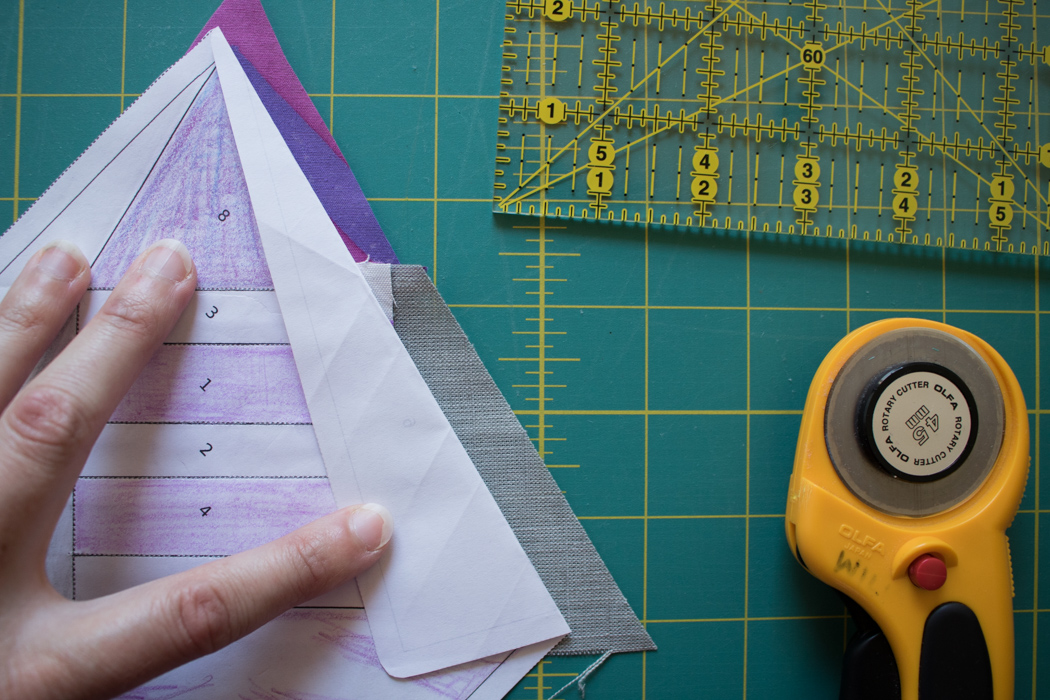
PHOTO 16

First, fold the paper along the seam line between pieces 1-8 and 9.
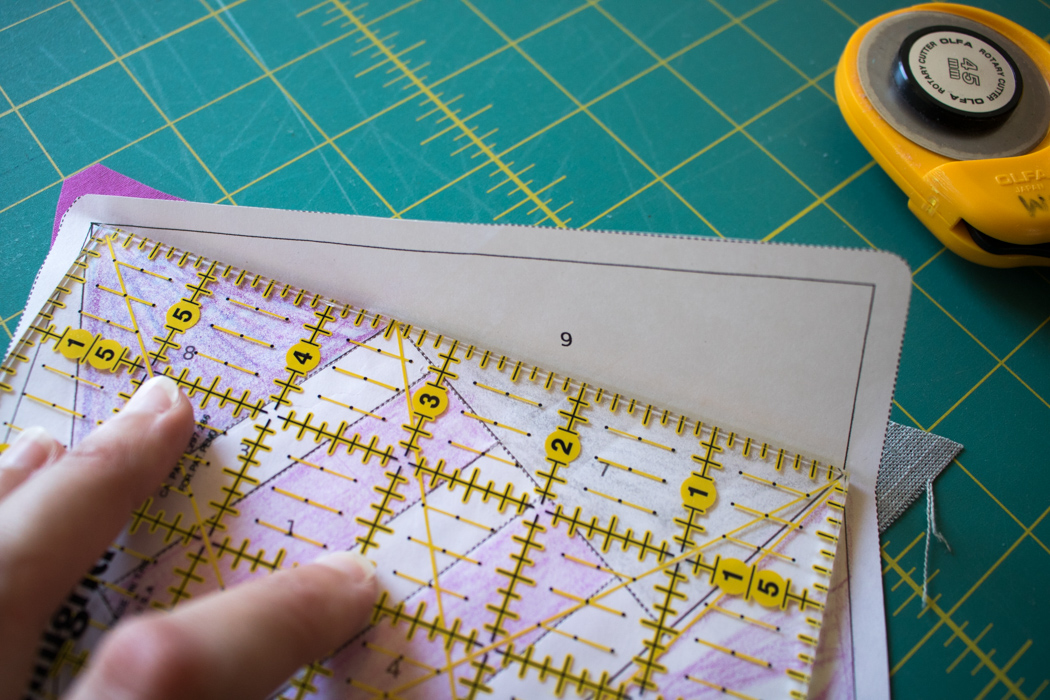
PHOTO 17

I like to use the edge of one of my rulers to ensure that I crease the paper exactly on the seam line. Line up your ruler’s edge with the seam line, hold it firmly in place, and fold the paper up along the edge of the ruler, creasing it with your fingernail.
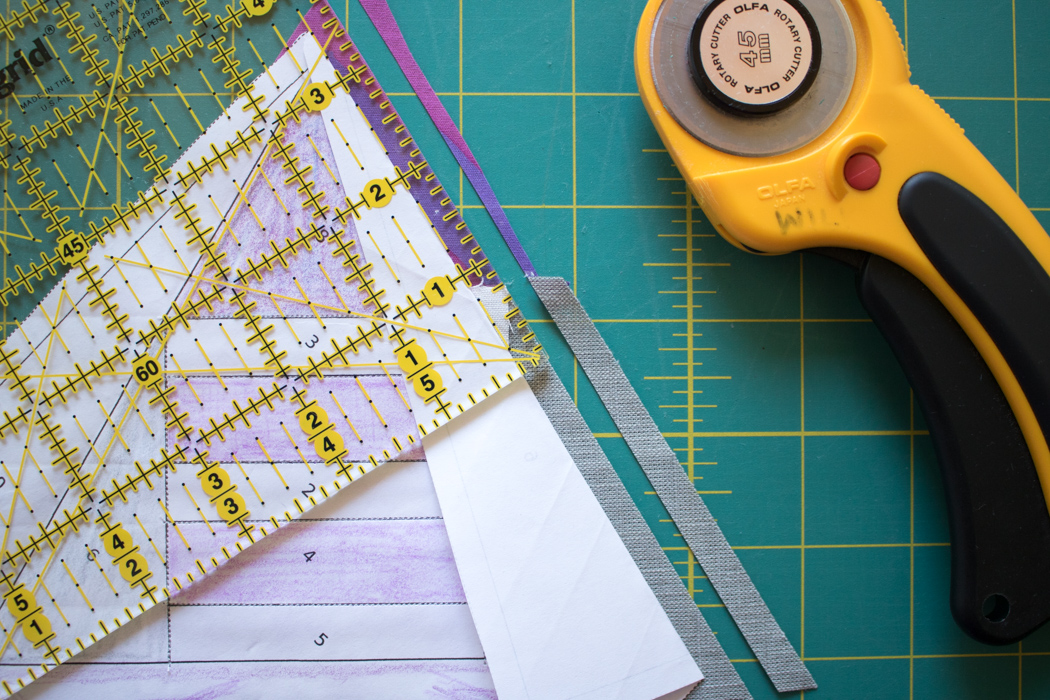
PHOTO 18

With paper folded over, trim the extending fabric to 1/4″ beyond the fold. This is defining your seam allowance and will give you an accurate edge with which to line up the edge of piece 9.
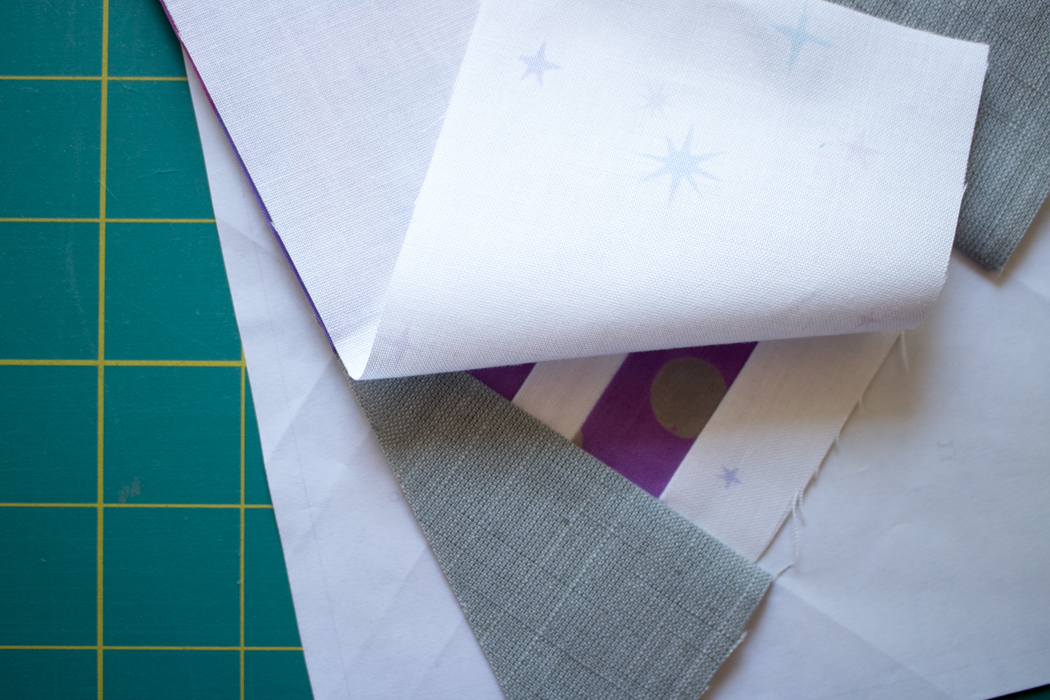
PHOTO 19

When lining up piece 9 (white) with the edge of the existing fabric edge, if you match the edges, the seam will be exactly 1/4″.  Note that the right side of fabric 9 is facing the right side of the existing pieced block. Be sure to unfold the paper, hold the fabric pieces in place, sew along your seam line, and you’ve got as close to a perfect seam as you’re going to get! For this particular fabric in the pattern (just like with pieces 6 and 7), once you press it in place, trim the excess along the edge of the block and use the remaining piece for position 10.

Finishing & Joining Template Pieces
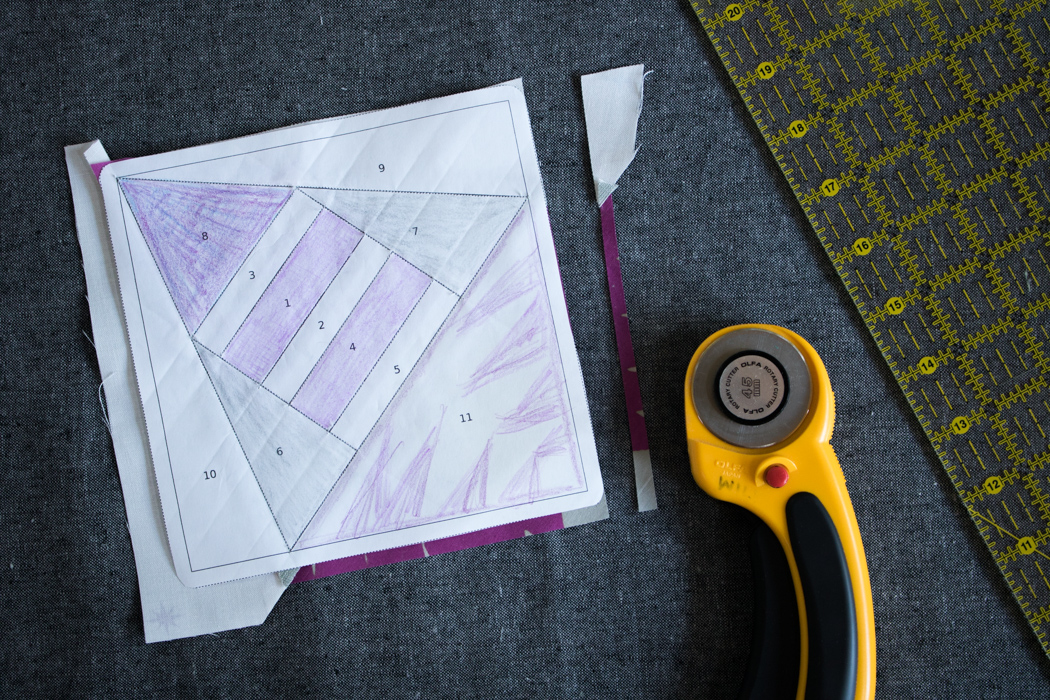
PHOTO 20

Once all of the fabric pieces for a particular template piece are sewn and pressed in place, it’s time to trim the edges. Be mindful to keep the ¼” seam allowance along each piece (this is why it is particularly helpful to draw on the seam allowance for any pattern pieces that do not already include them before you begin sewing).
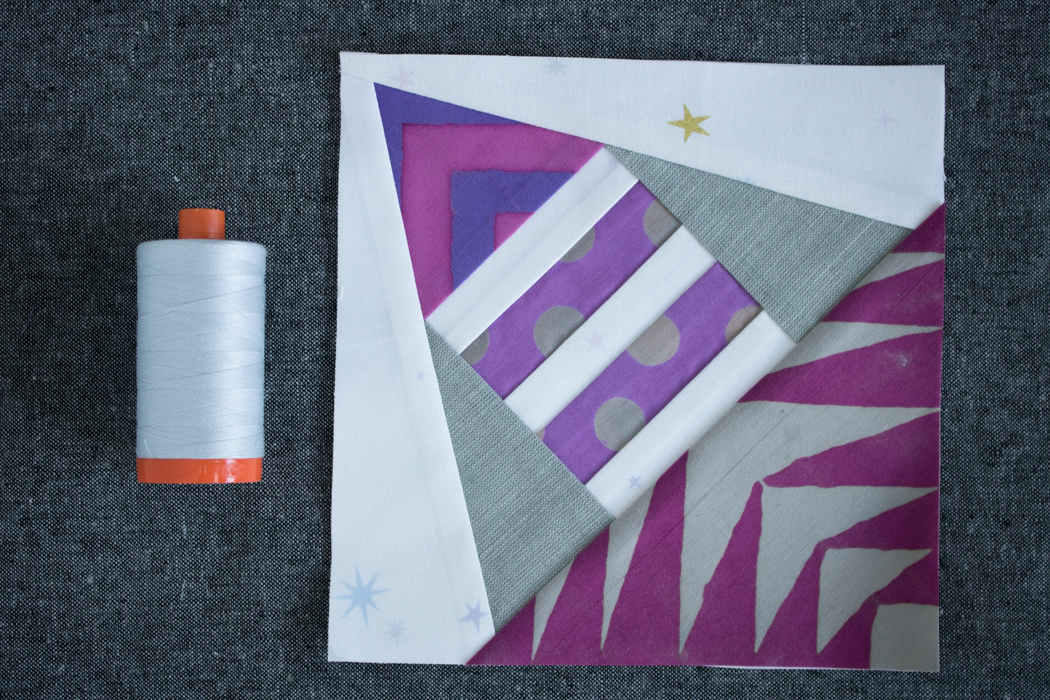
PHOTO 21

You’ve completed one quarter of a block! Make three (3) more according to your color plan. Trust me, the more you practice foundation paper piecing (grab fabric, line up, sew, fold & trim, press. Repeat.) the smoother it goes. By the time you are finished with the Constant Flux quilt, you will have it down!
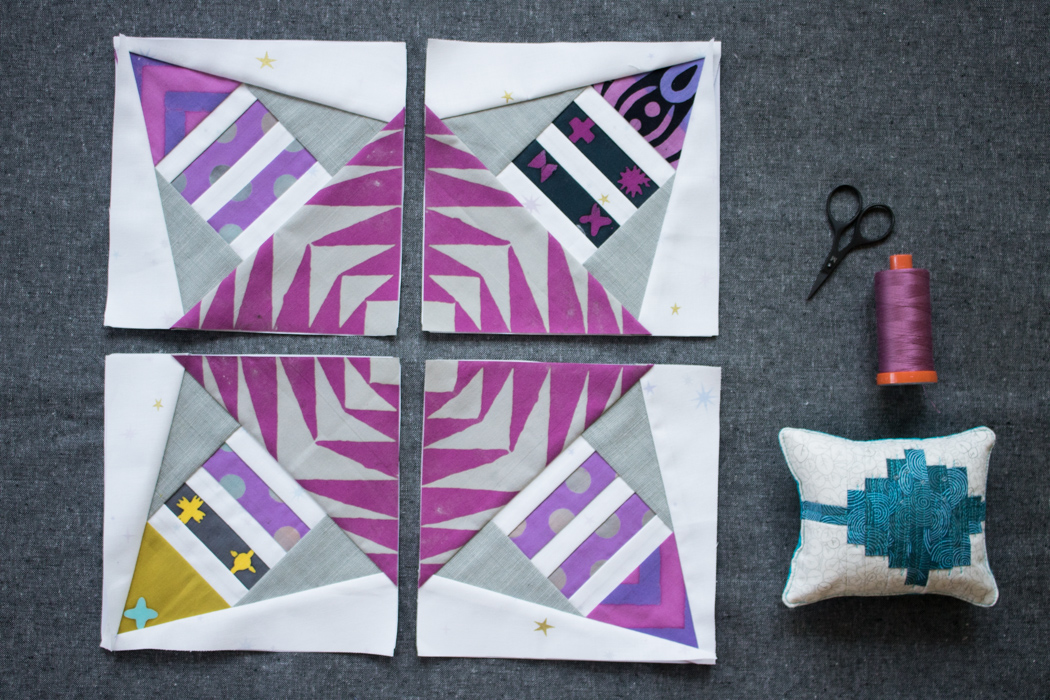
PHOTO 22

Once you have all four quadrants of a block sewn, it’s time to join the pieces. I like to keep the paper on while joining the different components of a block, since following the ¼” seam allowance is easy when you can just sew along a line!
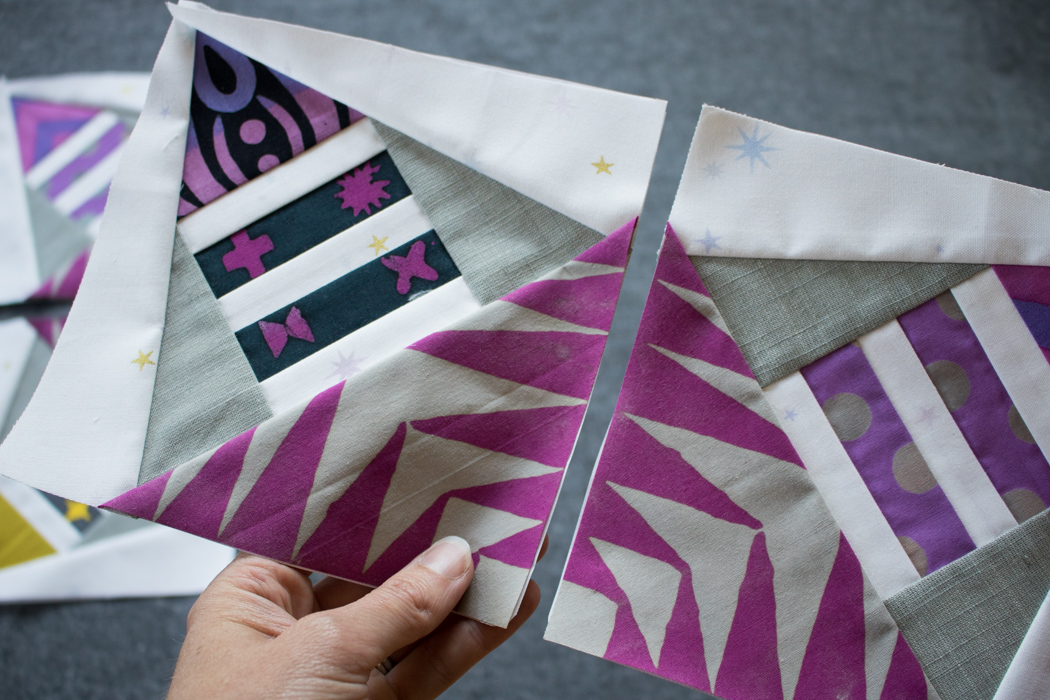
PHOTO 23

Grab the first two pieces you want to join and note any important seams you’ll want to match. For Constant Flux, there is one main seam that needs matching attention. I rarely pin in sewing, but this is a time when I always use a pin to help me get that match perfect.
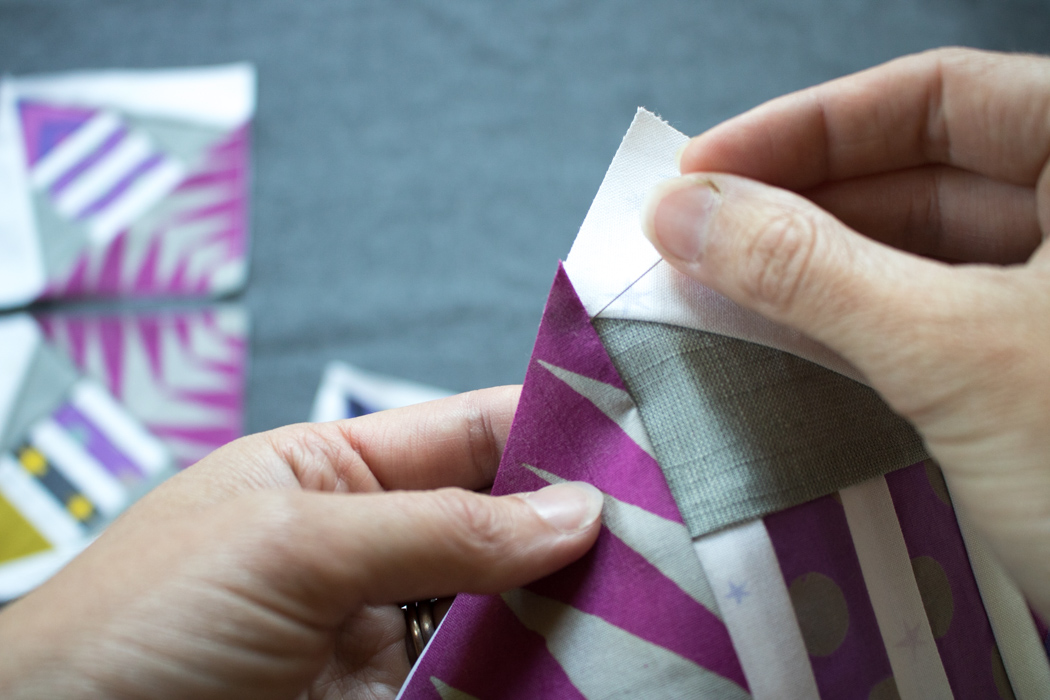
PHOTO 24

Here’s how. Identify the point that you want to match (my pin is pointing to it in the photo above. Note that I’m not putting the pin in from the right side, I’m simply showing the point we want to match.)
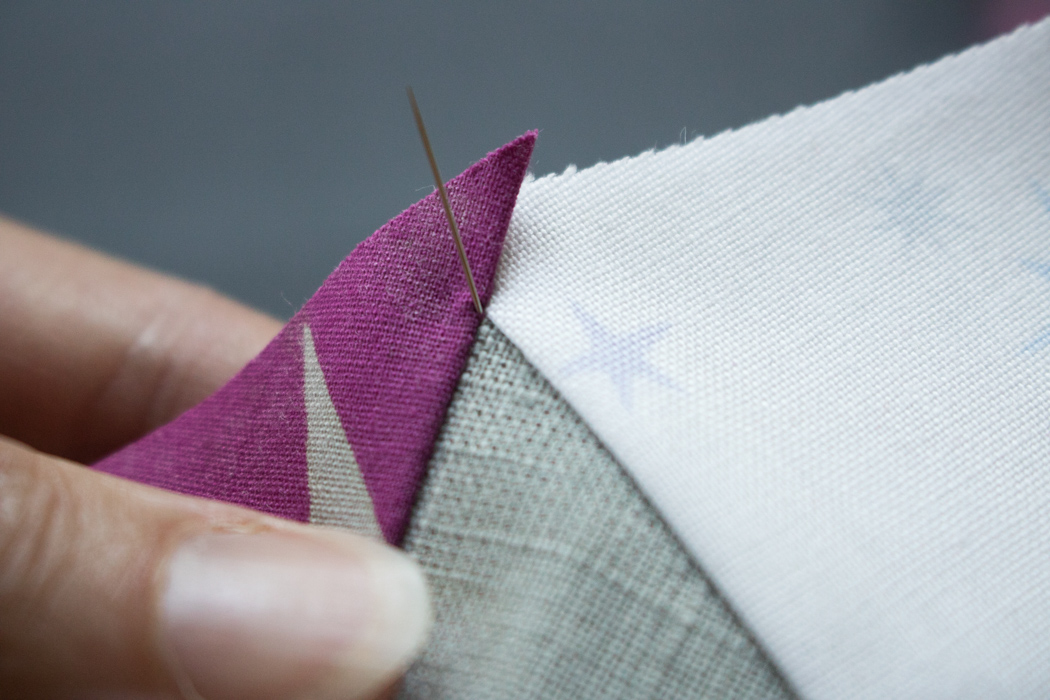
PHOTO 25

Inserting the pin into the wrong side of that pattern piece, extend the pin out from that exact point.
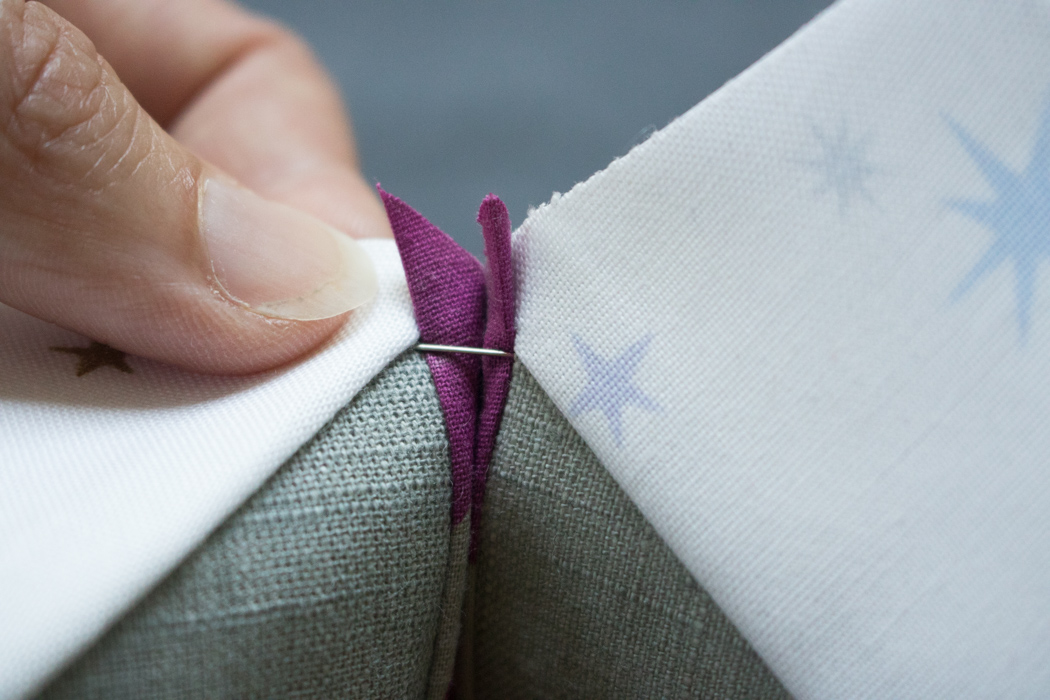
PHOTO 26

Then, insert the point of the needle directly into the matching point on the second piece. The pin will act as a direct link from point to point. Hold the pin perpendicular to the pattern pieces and line up your seam line.
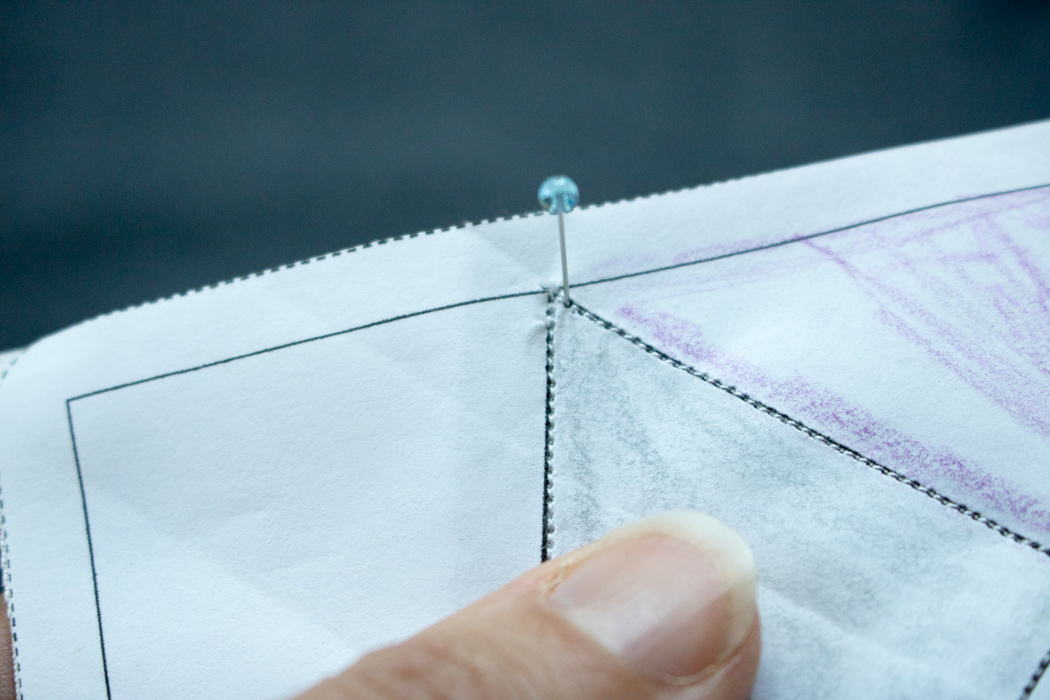
PHOTO 27

Note that in theory, the pins would enter and exit exactly on the seam line intersection on the pattern pieces. However, depending on how crisply you press your fabrics, this point *might* be a bit offset. No worries! Just make mental note of where in relation to the line the pin is located and slightly adjust your seam accordingly. As long as they are all consistent, it will work out! I sewed my joining seam *just* inside the seam line, since the pin indicated that the seam match was a bit inside the seam line.

I don’t keep the pin in when sewing; I use it to perfectly match points, then firmly hold my two pattern pieces together and remove the pin. I’ve found that with the added bulk of the papers, actually pinning often will offset your seam rather than keep it perfectly together.

Accuracy tip: When you’re aiming to perfectly match seams, use the pin trick above to get your points lined up first.
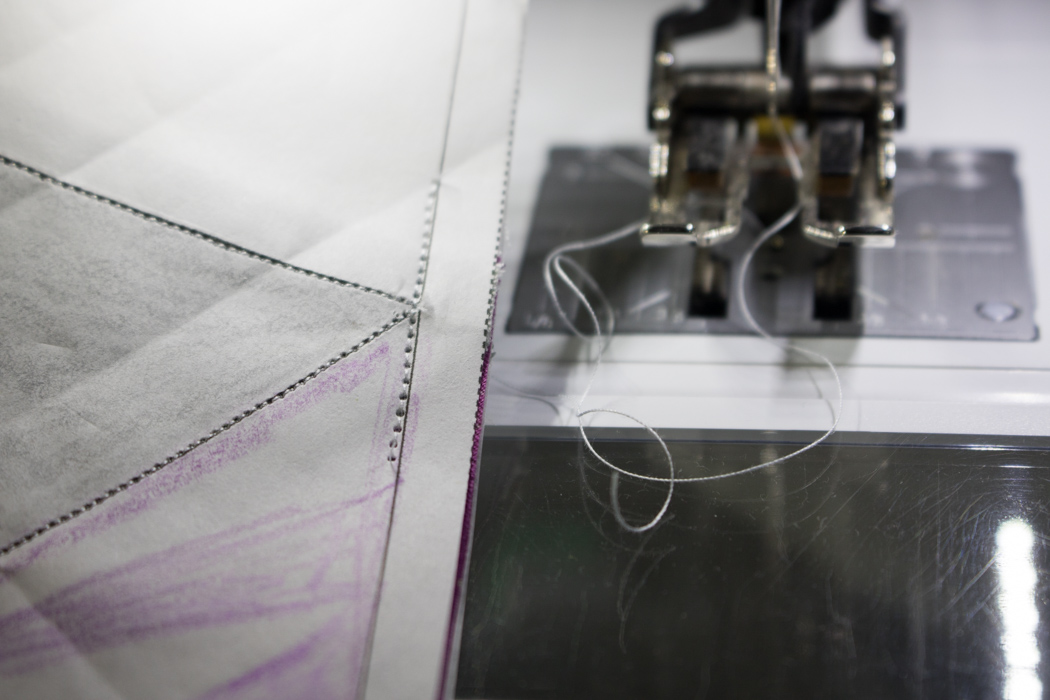
PHOTO 28

THEN, (and this part is important!) change your stitch length to 1.6 or 1.7 before stitching from a bit before until a bit after where you want your seams to match (shown in the photo above).
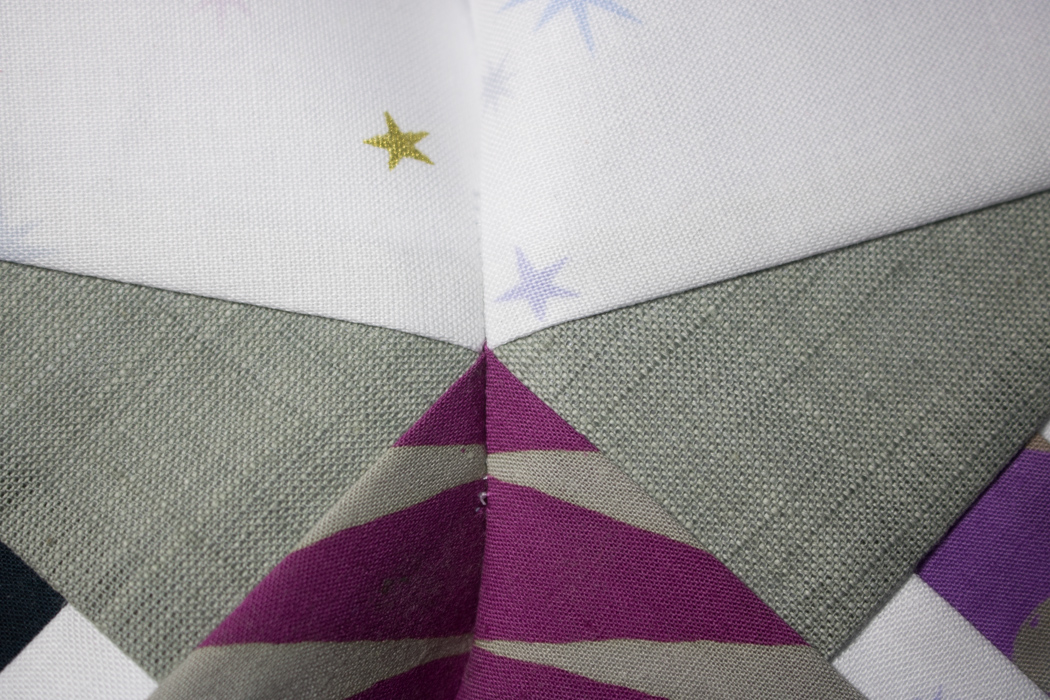
PHOTO 29

Check to make sure your seams match to your standards. THEN change back to a shorter stitch length and sew along the entire seam, sewing right over (or just outside) your tester seam. Trust me, you do NOT want to have to rip 1.2 stitch length stitches to fix a not quite matched point!!
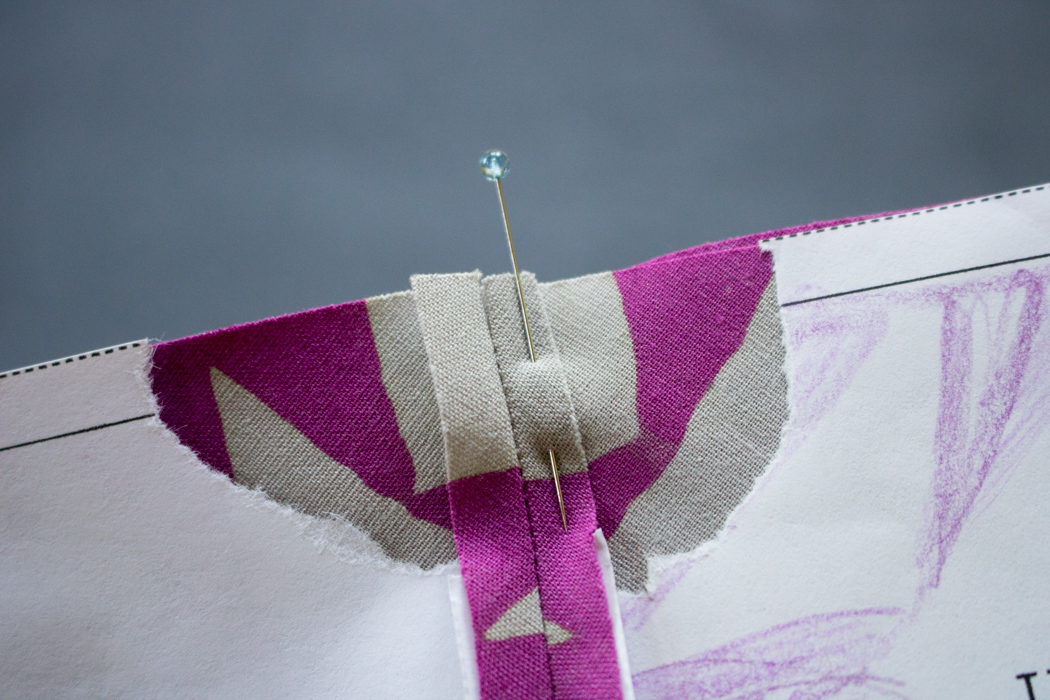
PHOTO 30

When sewing the two halves of the block together, remove just a bit of paper near the seam intersection and pin just after where the seams match. Use the same longer-length tester stitch over each seam match, then sew it all the way across. I like to keep the vast majority of the paper on until the entire quilt is together. It provides such a great foundation!
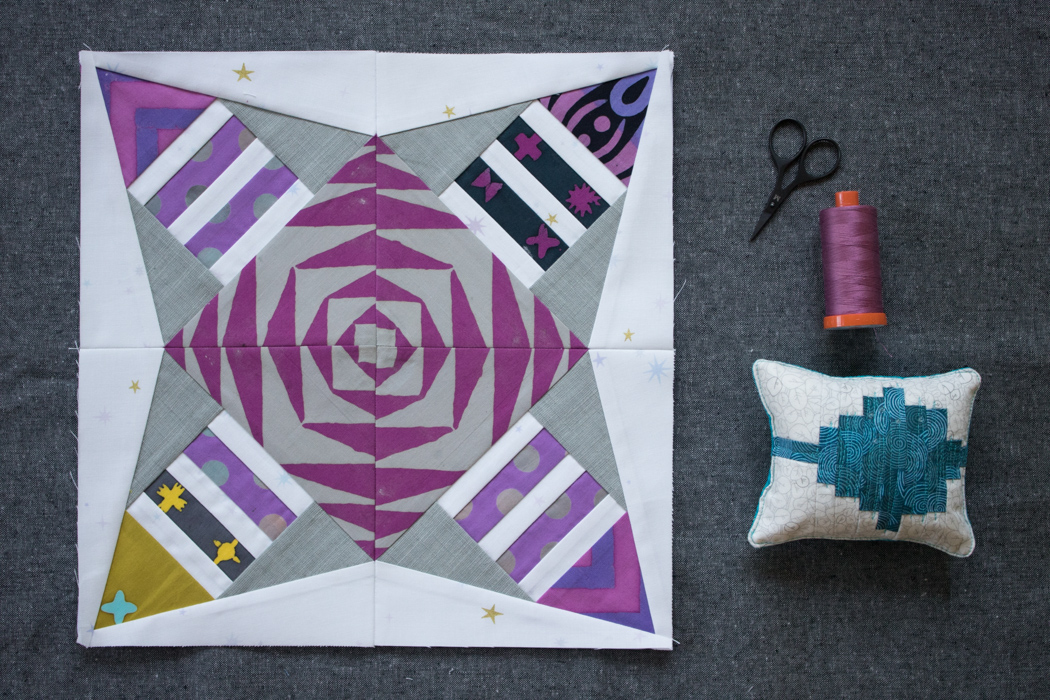
PHOTO 31

Ta da! You now have one full block together! Sew three (3) more to complete your Constant Flux quilt.
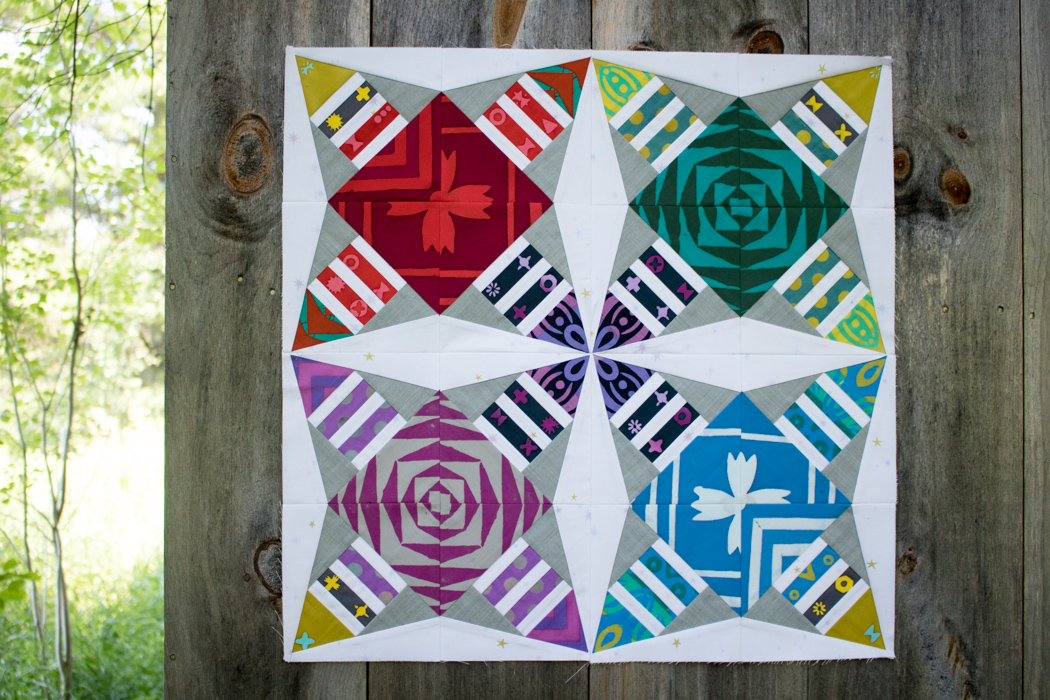
PHOTO 32

Now comes the fun part–removing the paper! To remove the paper, gently tear away, holding the main block in place and pulling gently away and to the side, similar to how you would tear any perforated piece of paper or remove a check from a checkbook. With your narrow stitch length, the paper should come away easily. Once one side of the paper is off, the other side often will just pop out. Go slowly and tear gently to ensure your seams stay tight. If you end up with bits of paper stuck in the seams, carefully use blunt tweezers to remove the final bits. Alternately, I’ve heard that spraying the paper with water helps with removal. I haven’t had to try it yet, though, so can’t vouch for the method. Take your time with removing the papers, reveling in those perfect points, the fun meticulously cut bits, and thinking about what foundation paper piecing pattern you will make next.

So now you’ve got the basics of foundation paper piecing! I share even more tips to make your foundation paper piecing experience as smooth as possible on my blog, so if you’re ready to tackle using directional fabrics, or a pattern with particularly tricky angles, check it out.

Many thanks to Andover for inviting me here today! I hope this tutorial was helpful, and that you enjoy paper piecing as much as I do. If you have any questions along the way, feel free to drop me an email at thenightquilter@gmail.com or contact me through my blog, Night Quilter. If you make a Constant Flux quilt, please use #constantfluxquilt and tag me @nightquilter so that I can see it, too! Happy stitching!

Posted in Alison Glass, Guest Post, Quilting, Quilting Techniques, Sewing, Tutorial | 3 Comments

Andover Textile History Notes: Chintz

A NOTE ON THE AUTHOR: Margo Krager, owner of ReproductionFabrics.com, a website and storefront located in Northfield, MN, has been a fabric retailer since 1984. She has spent over 20 years researching historic cotton printed and yarn-dyed fabrics used in quilts and garments, gives lectures on historic dye, and print technologies and does hands-on workshops on Center Medallion Quilts.

Margo received a Bachelor’s of Science degree in Medical Technology in 1970 from Michigan State University and worked in that field for 15 years. In 1984 she switched needles and became a fabric retailer. Since that time she has also done graduate level work in History at Montana State University, distance learning through the Quilt Studies Program at the University of Nebraska-Lincoln and published a professions paper, The Calico Trade Shirts on the Journey with Lewis and Clark, with the Textile Society of America.

Her design inspiration comes from the 9 antique fabric sample books she owns.

Andover Textile History Notes: Chintz

by Margo Krager

FullSizeRender (7)

Chintz or calico…can be a pattern, a finish, or just plain muslin.

In early merchant ledgers (17th/18th Century) the terms chintz and calico were often used interchangeably. Even today some of my customers refer to muslin as calico. Generally 19th century calicos featured a printed pattern on cotton fabric in the foulard style (small motifs on a diagonal…think menswear ties) and were used as dressgoods.

72dpi-A-8298-Y

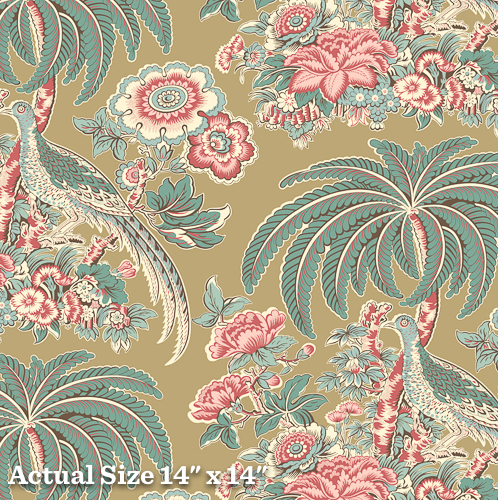
PHEASANT & TRACERIES: A-8298-Y 

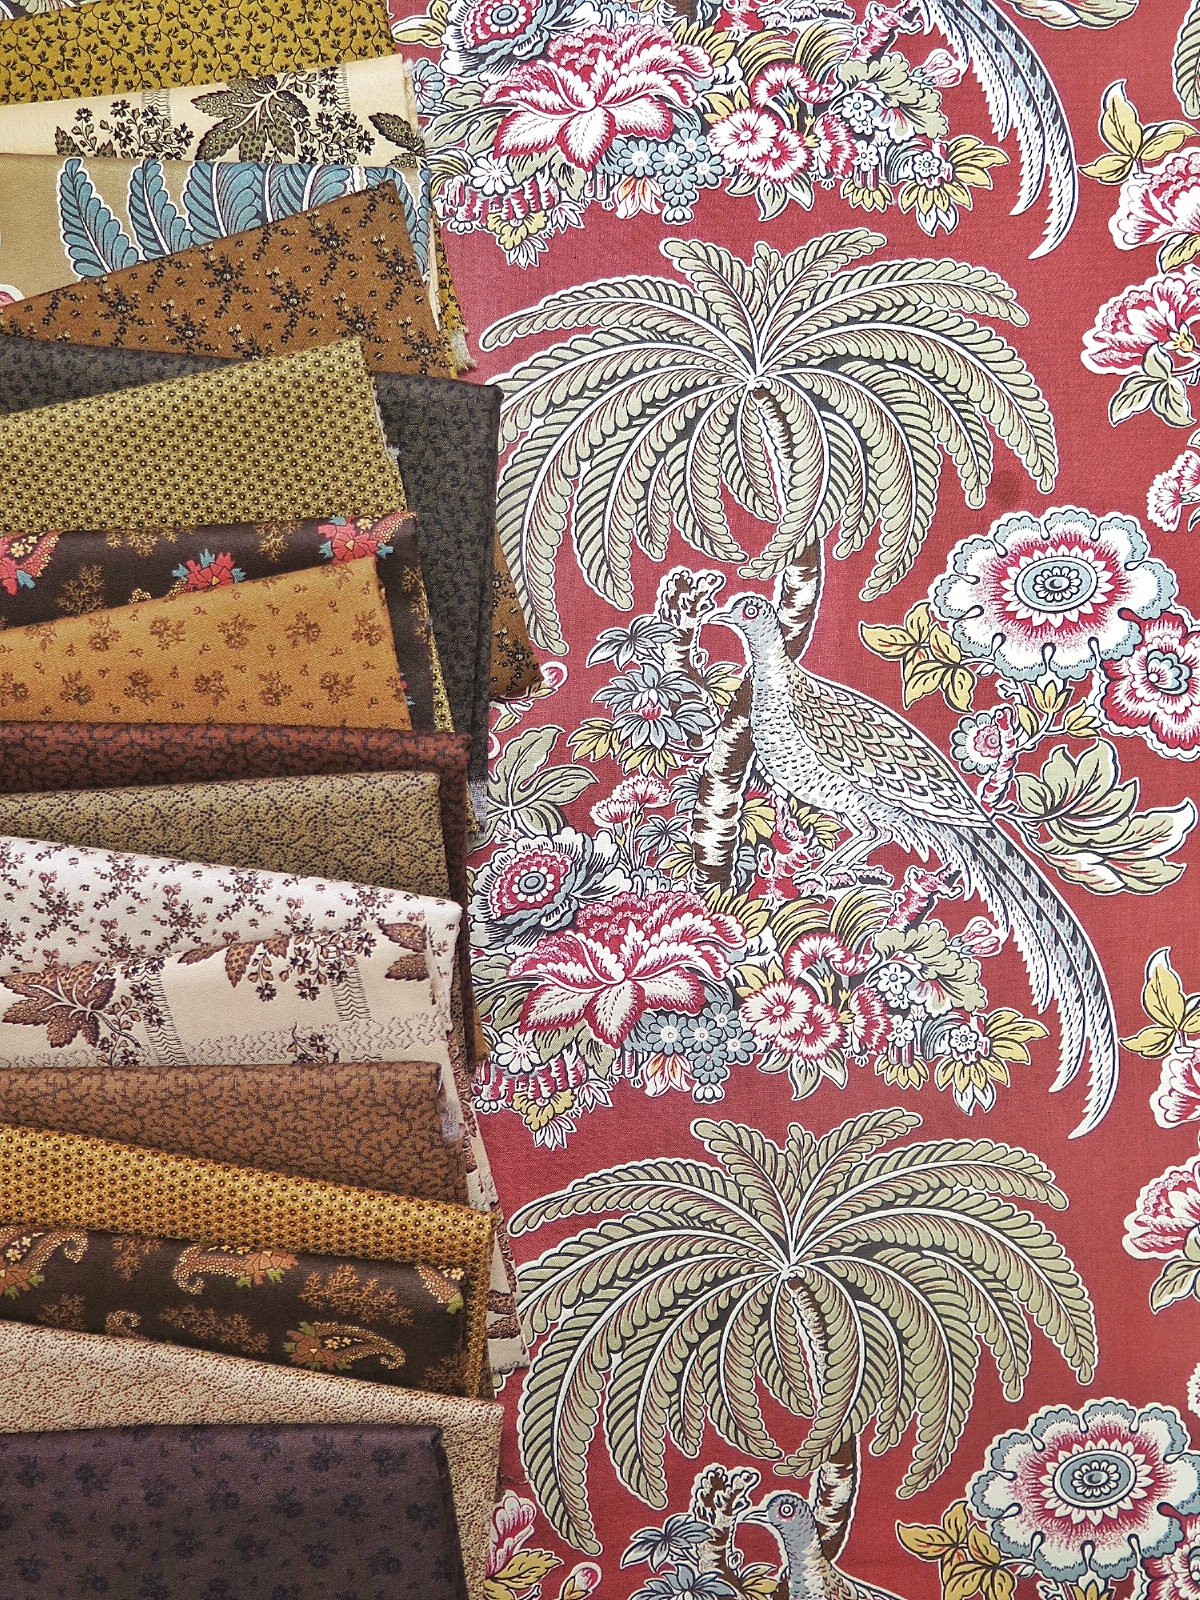
Large complex multi colored floral patterns or realistic birds in a natural setting, sometimes with a shiny finish, were called Furnishing Goods or chintz. The surface glaze applied to these early fabrics could be from a natural product like beeswax or a mechanical polishing and was used to both brighten the colors and to imitate the shine of silks. Early chintzes were used for garments, women’s dresses and men’s dressing gowns as well as bed coverings. Today we generally think of large complex chintz patterns as Decorator Fabrics.

72dpi-A-8217-N

GIGGLESWICK MILL: A-8217-NG

The establishment of numerous American textile mills early in the 1800s not only fueled the American Industrial Revolution, but also provided competition for imported textiles, especially those from Great Britain. In 1836 American domestic print production was 120 million yards. These were largely small scale prints for clothing. Roller printing of two colors had been the main product in 1835; by 1840 the mills here were capable of 3 color designs. The reaction to loss of American market share in England was a dramatic decline in artistic standards for their cotton prints coupled with a large increase in production. (The lower cost, bigger volume approach) In 1835 British mills had exported just under 280,000 million yards of printed cottons to the United States, by 1845 that had risen to 413,000 million yards.

The first edition of John James Audubon’s Birds of America was printed in London in 1827. It had a large influence on textile design. His illustrations inspired the popular Bird Style chintzes of the period. Pheasant Under Palm Tree, one of those prints, was offered in several different background colorations. The high point of the English chintz industry is often considered to be 1840-50. By the American Civil War Era (1850-1880)…small neat foulard style calicos and plaids, plaids and more plaids (printed and woven) were fashionable.

Pheasant Under Palm Tree Chintz has an amazing chintz finish! It will last through several washings.

72dpi-A-8292-N

PHEASANT & TRACERIES: A-8292-N

72dpi-A-8292-R

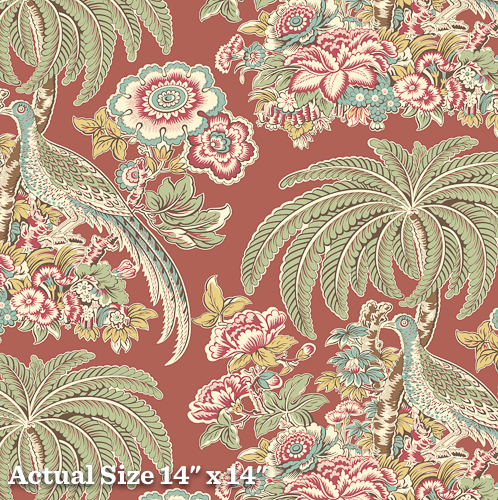
PHEASANT & TRACERIES: A-8292-R

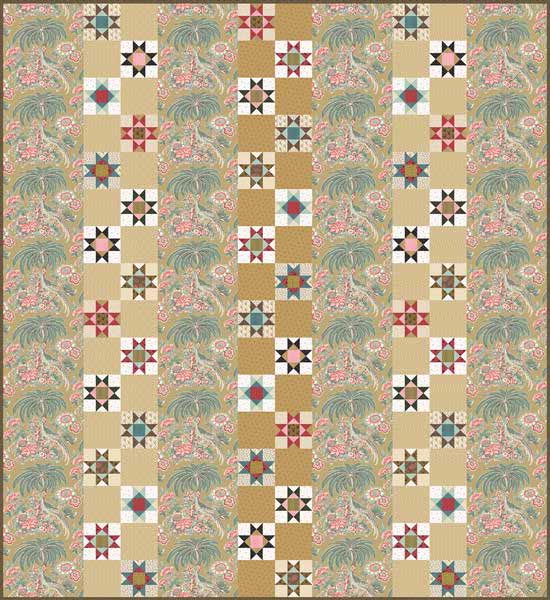
The print style is an ‘island’ pattern in a drop set. This means one horizontal row will have 2 of the pheasants and palm tree motifs and then the ‘half row up’ will have one motif in the center with 2 partials on each side. This arrangement works beautifully for a strippy style quilt, especially popular from 1800-1860.

Pheasant & Traceries-5 pages

FREE PHEASANT & TRACERIES PATTERN: STARRY PATH

The term Chintz can mean a print style, large colorful florals or birds, or a finish. When the American market was flooded with those poorly designed, cheaply printed goods in the 1840s, those fabrics were often referred to as ‘chintzy’…gaudy and cheap.

Margo Krager’s new collection Pheasant & Traceries is available now. Be sure to tell you’re local quilt shop that you can’t wait to get your hands on the line!


Posted in Uncategorized | Comments Off on Andover Textile History Notes: Chintz

Andover Textile History Notes: Indigo Dye

A NOTE ON THE AUTHOR: Margo Krager, owner of ReproductionFabrics.com, a website and storefront located in Northfield, MN, has been a fabric retailer since 1984. She has spent over 20 years researching historic cotton printed and yarn-dyed fabrics used in quilts and garments, gives lectures on historic dye, and print technologies and does hands-on workshops on Center Medallion Quilts.

Margo received a Bachelor’s of Science degree in Medical Technology in 1970 from Michigan State University and worked in that field for 15 years. In 1984 she switched needles and became a fabric retailer. Since that time she has also done graduate level work in History at Montana State University, distance learning through the Quilt Studies Program at the University of Nebraska-Lincoln and published a professions paper, The Calico Trade Shirts on the Journey with Lewis and Clark, with the Textile Society of America.

Her design inspiration comes from the 9 antique fabric sample books she owns.

Andover Textile History Notes: Indigo Dye

by Margo Krager

Antique dark blue and white printed cottons are my favorites. I had an indigo dye house, Stifel Calicoworks, in my hometown, Wheeling, WV, from 1835-1957. Johann Ludwig Stifel was born 1807 in Germany and arrived in Wheeling in 1835 to begin an indigo dyeing business.  He soon added block printing to his repertoire and by 1874 the business was one of the largest calico printing companies in the country.

Natural indigo dye is derived from a tropical/subtropical shrub (genus… Indigofera) and has a natural affinity for cotton. The classic 19th century European and American blue and white indigo prints we so love were all printed and dyed with this very stable natural dye. A commercial synthetic indigo textile dye was finally produced in 1897.

Early European indigo prints (indigo dye replaced Woad late in the 17th century in Europe) involved applying a resist pattern on undyed cloth.  The resist paste (flour, starch, clay, wax or resin) mechanically blocked the dye from adhering to the fabric.

The fabric was thoroughly air-dried, then dipped into a cool indigo dye vat. The first dip might last only a few minutes. Just under the surface, the dye bath and the fabric were a pea soup green color. As the fabric emerged, oxygen in the air turned the cloth blue! Additional immersions and oxidizations produced a darker blue hue.

The dyed fabric was once again thoroughly dried and then passed through a warm weak sulfuric acid solution. This step removed the resist paste and whitened the printed pattern

A second method of ‘blue dyeing’, the discharge style, involved printing a design with a bleaching agent such as oxalic acid paste on a length of cotton fabric that had already been dyed indigo blue. The result is again a white pattern on a blue background. Indigos printed in the discharge style were seen in England around 1813. By midcentury, this technique was commonly used throughout Europe and America.

A-8284-BA-8288-B

An additional step could easily produce a Two Blue design….a light blue motif or background along with a darker shade of blue.  A portion of the resist would be removed and the fabric redyed.

A-8289-W
A fancy or illuminated indigo print had a bright chrome yellow or orange element on a deep blue ground. Discharge pastes that included lead chromate produced indigo prints that were illuminated with a sparkle of chrome yellow. A subsequent rinse of the fabric in an alkaline solution converted the yellow figure to chrome orange. These sparkly indigo prints had good registration, meaning clean, sharp figures without halos on a dark blue background. Today’s reproductions have that showy orange sparkle.

A-8287-B A-8289-B

Beginning in the last quarter of the 19th century a new grayed blue, often called Cadet or Soldier blue, became fashionable.  It was printed in the classic style with an off white pattern on a blue ground.

A-8285-W

The ultimate example of complexity in blue dying is a polychrome print, meaning multiple colors in the design.  Numerous intricate steps in the dying process made these very expensive dressgoods of the 1830s.  Design source was my c. 1830 Dargate book.

A-8017-B A-8019-B

Synthetic indigo dye was commercially successful by 1897. Adolf von Baeyer was instrumental in this development and received the Organic Chemistry Nobel Prize in 1905. Synthetic indigo is exactly the same formula as the natural product but without impurities. Because this new dye was so reliable (always the same strength and delivery was not dependent on weather conditions/harvest in the growing regions) and cheaper, it replaced natural indigo dye within a decade. Many indigo plantations in the East and West Indies and Central America were put out of business.

Posted in Uncategorized | Comments Off on Andover Textile History Notes: Indigo Dye

SLC Spring Market Recap

We are back from the long weekend recovered from the Quilt Market frenzy! We had such a blast in Salt Lake City. We have so many photos to share with you of the amazing projects our makers have made. Just take a look at all of the incredible eye candy Andover had to offer in SLC.

People showed up in droves to check out our newest licensed collection, Outlander. Everyone was so excited to take photos with Jamie and Claire. But mostly they just took pictures with Jamie…

152

062065

We had some beautiful projects featuring another new license, An American in Paris.

080

And of course we had to show off these spectacular Little House on the Prairie projects.

177085

Di Ford-Hall and English paper piecing hit the perfect chord in our booth. Check out these stunning EPP projects featuring Di’s collections.

054

Renee Nanneman’s beautiful new Pumpkin Spice collection got us all excited for Fall!

046 (2)The always classic reproduction prints of Margo Krager were beautifully showcased in these elegant projects.


083

Lizzy House impressed with projects featuring many of her current collections including, Whisper Palette, Mini Pearl Bracelets, and The Hit Parade: Double Gauze.

181 040 (2)

Libs Elliott made quite a splash with her first collection, True Love.

094

Just look at all of these amazing bags!

098

As always, Alison Glass stunned with an amazing array of bright and colorful projects showcasing Handcrafted Patchwork and Sun Print 2016.

175104109We are already hard at work coming up with ways to top this show in the Fall. We have so many great ideas and cannot WAIT to see you there!

061

Posted in Uncategorized | Comments Off on SLC Spring Market Recap

Katie Hennagir’s The House that Jack Built

The House that Jack Built

by Katie Hennagir

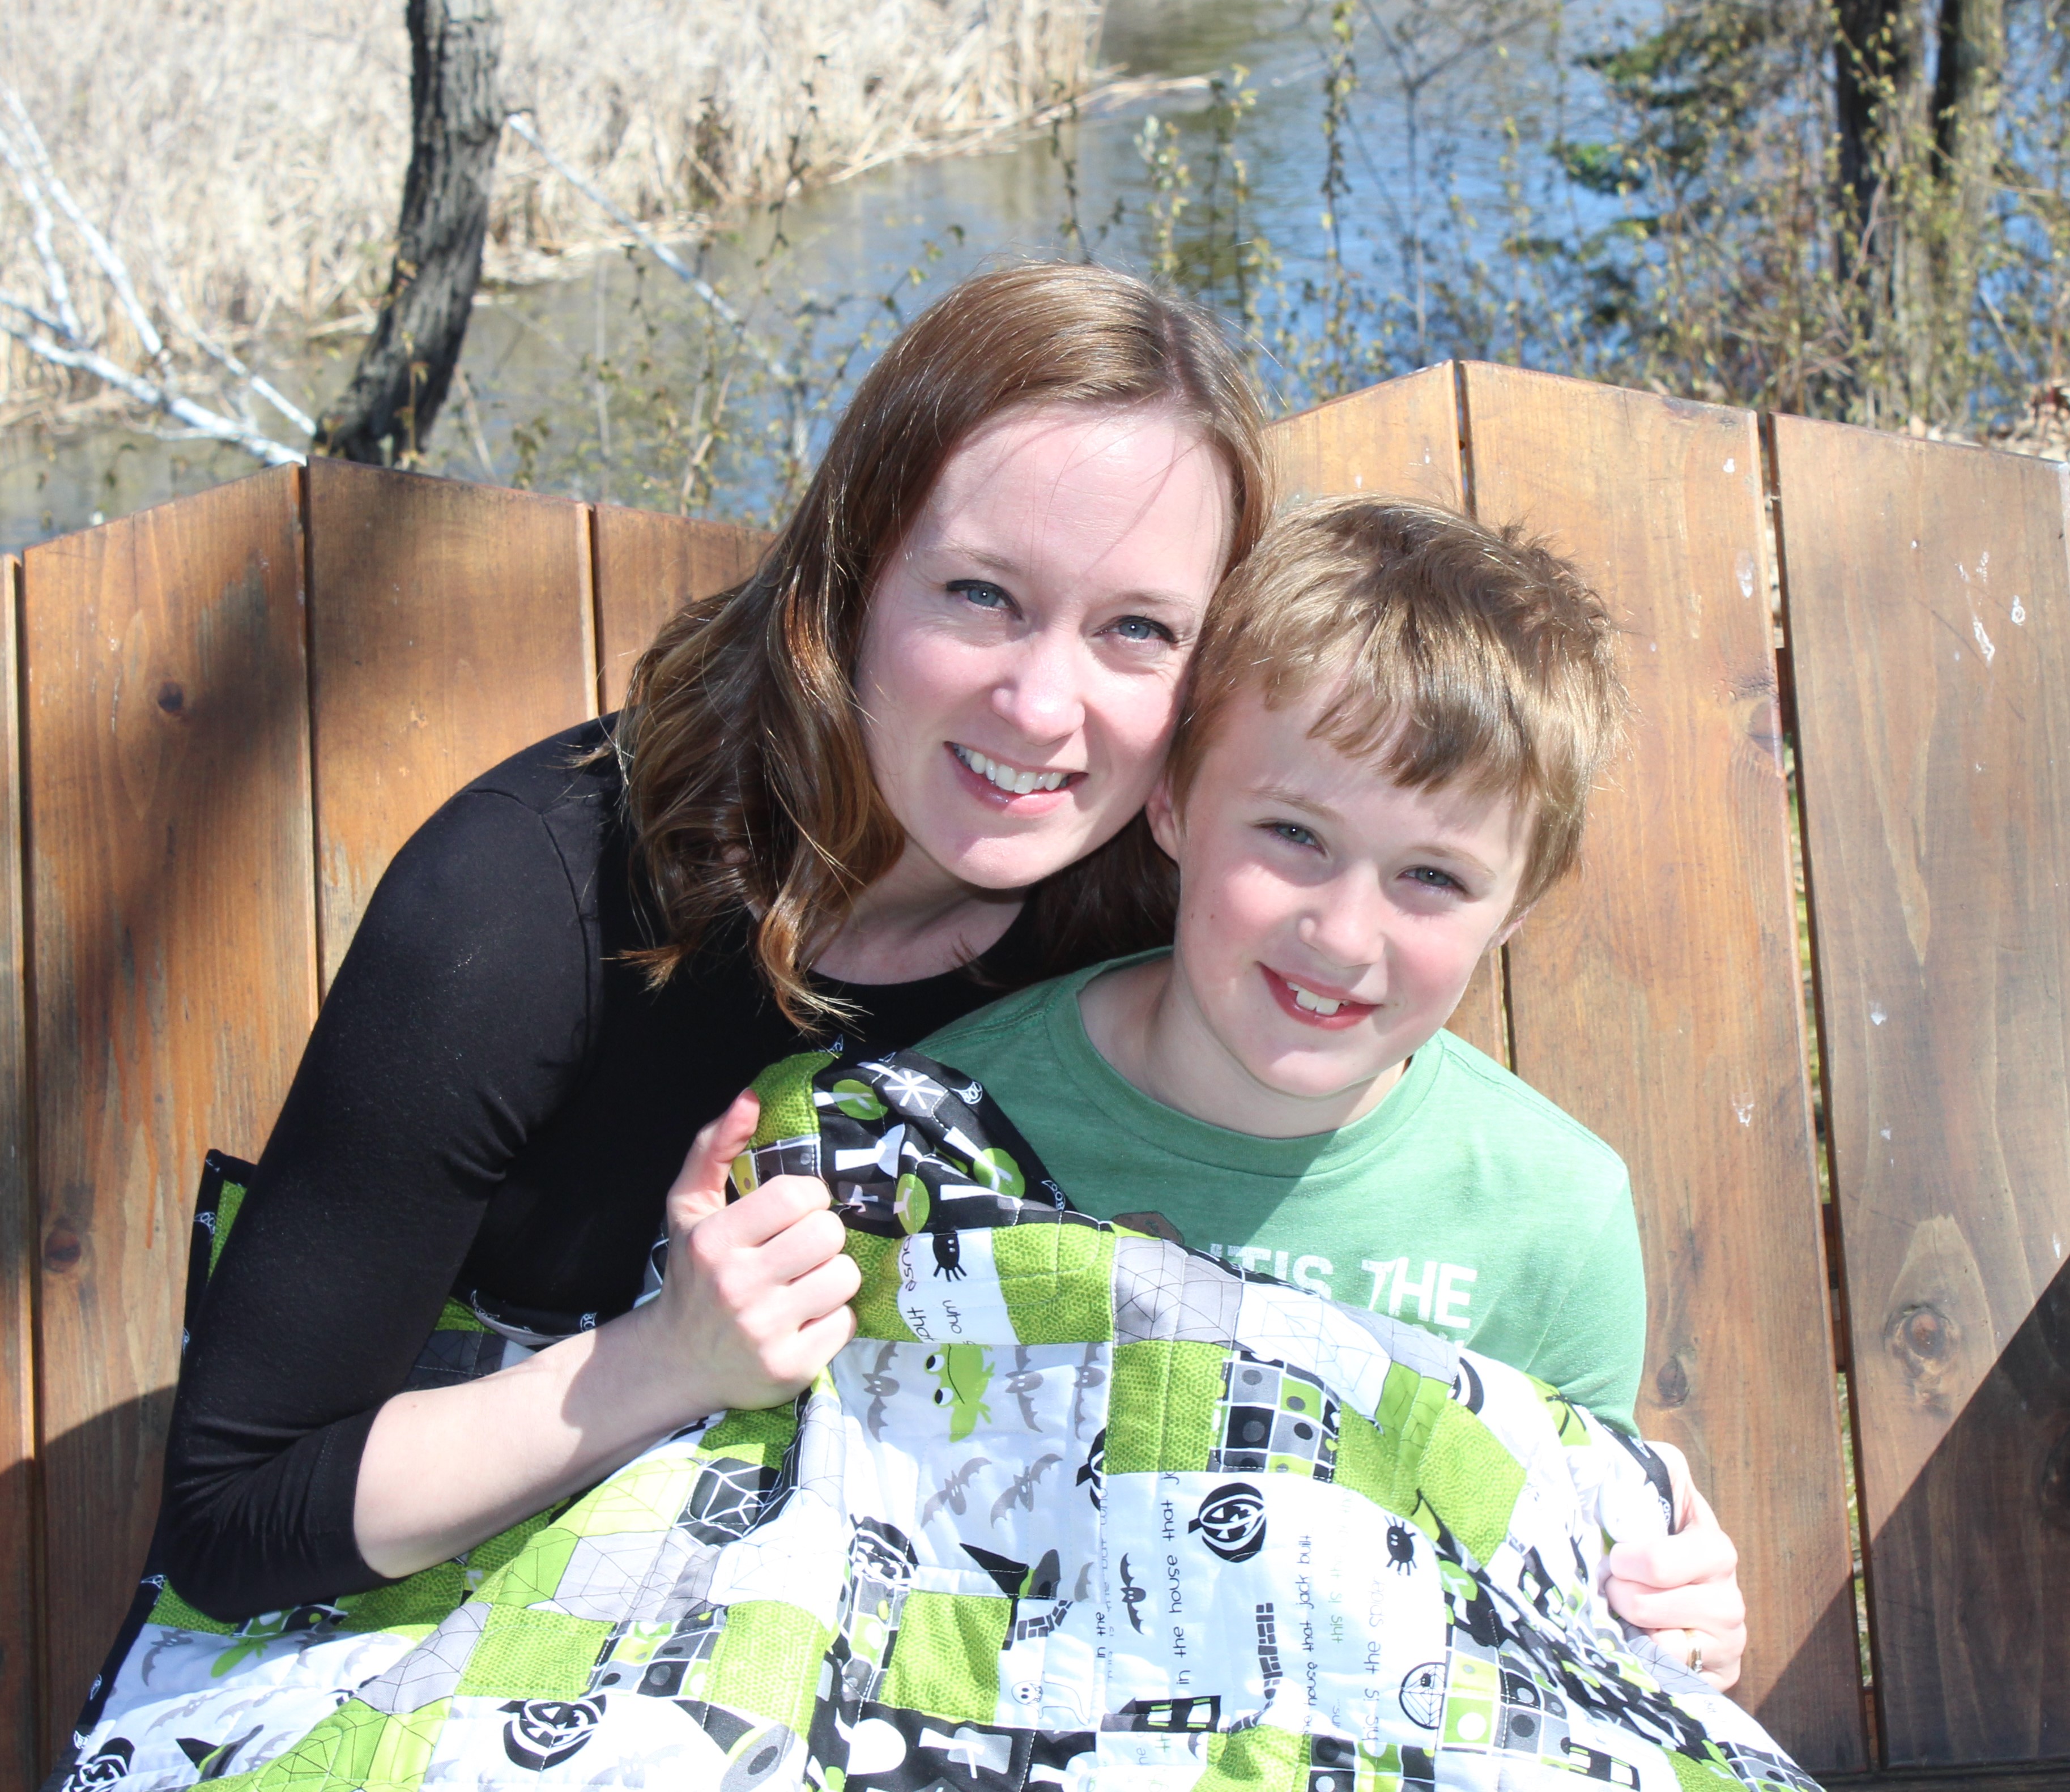
Hi! My name is Katie Hennagir and this is my son, Jack.

Jack- 1

And this is “The House That Jack Built.”

Jack- 2

Ever since my son Jack was little his “thing” has been Halloween. While other kids would have chosen dinosaurs or super heroes, Jack gravitated towards anything spooky. He loved bats, spiders, ghosts, and of course jack-o-lanterns. As our Halloween decorations started to outnumber our Christmas ones, I knew we were in deep. When he asked if he could decorate his bedroom in Halloween all year round I said, “why not.” Don’t get me wrong he’s not the only one who loves Halloween; I also love celebrating this holiday with fun sort-of spooky decorations. It wasn’t long before my love for Halloween and my love for Jack mixed together to create an idea in my head to design a line of fabric that would be a clever play on words with the nursery rhyme The House That Jack Built.

I knew right away that I wanted to create a fabric that would include my new version of the traditional nursery rhyme. I didn’t have to go far to find someone who was eager to help me write it. Jack and I brainstormed our own version with phrases like, this is the cat that chased the ghost… this is the door that creaked in the night… the is the witch who turned into a toad… in the house that Jack built. From there I added in prints that include Jack’s spooky house, a hexie spiderweb, and funky trees.

Jack- 3

As a fabric designer, my favorite part of the process is figuring out what projects to make. I love creating free quilt patterns that coordinate with the line so that you can get right down to the business of sewing.

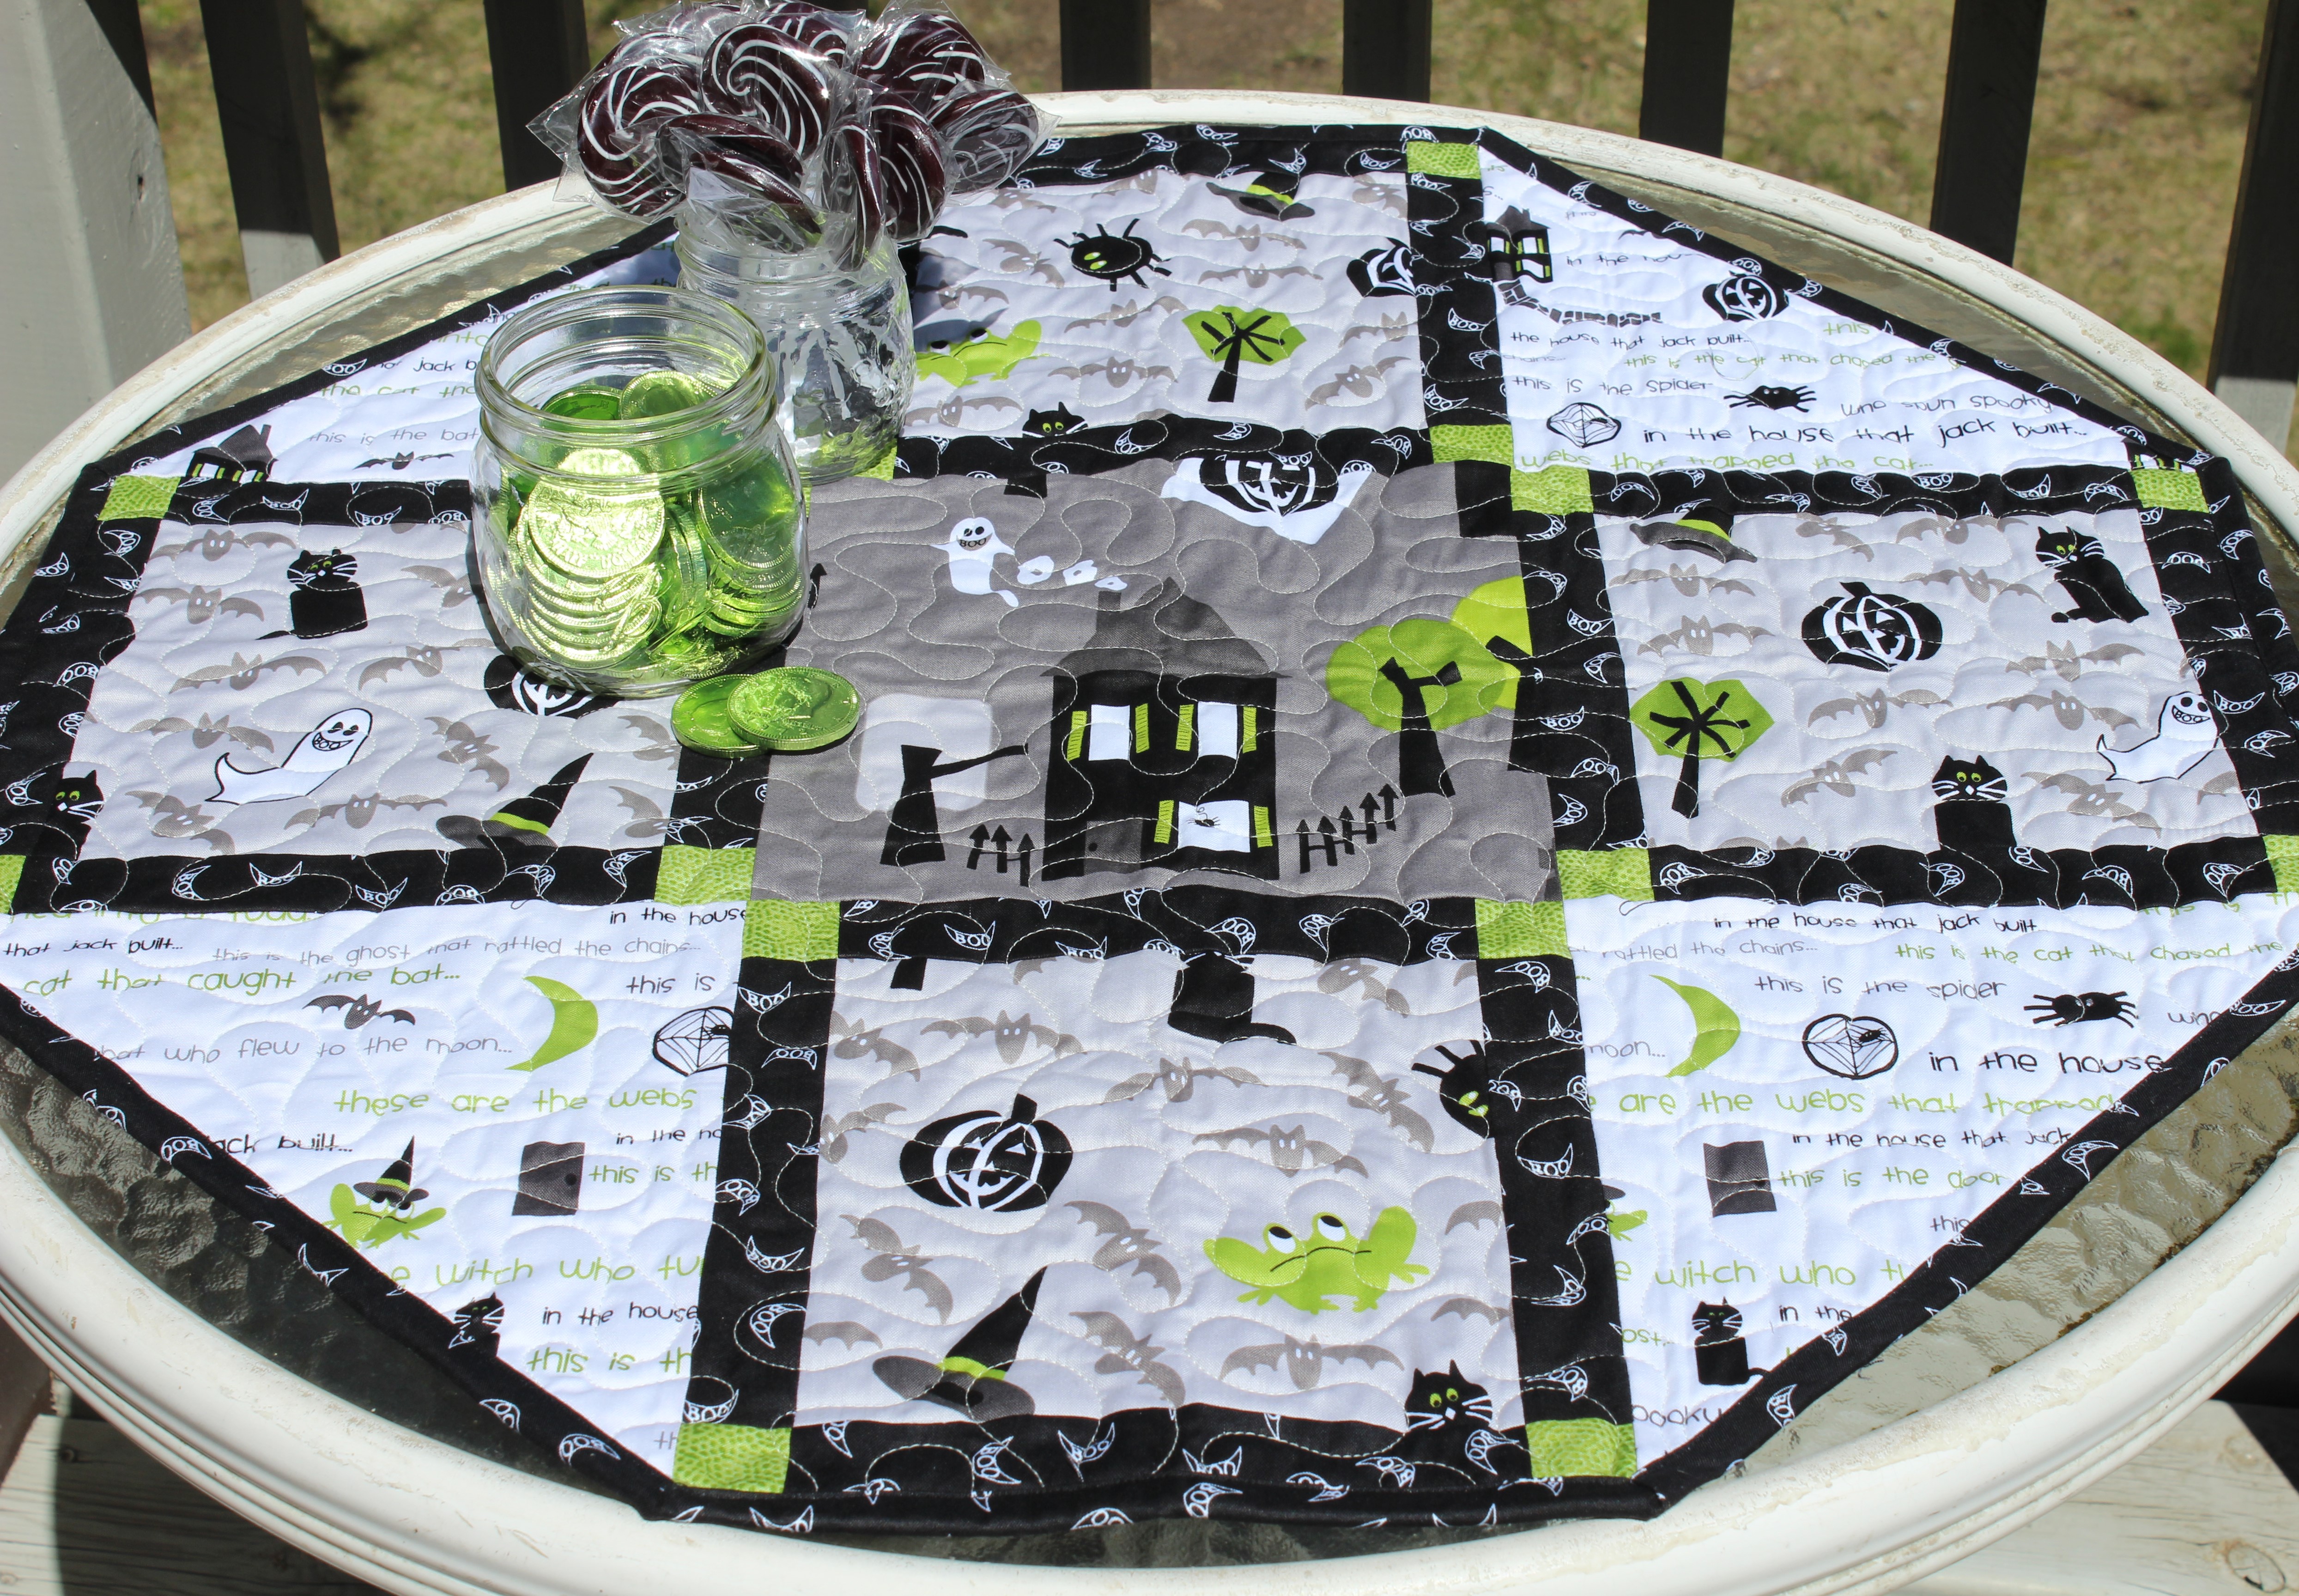
This time I created three different patterns that can be found on Andover Fabric’s website (just click on the Quilts and Downloads tab to find them). Above you will see Jack’s Centerpiece. This is the perfect little table topper for adding a splash of Halloween to your décor. I love the gray and green combo and had a blast shopping for coordinating candy! It’s never too early to start getting ready for a party, right? I’m also pretty smitten with the orange colorway.

Jack- 4

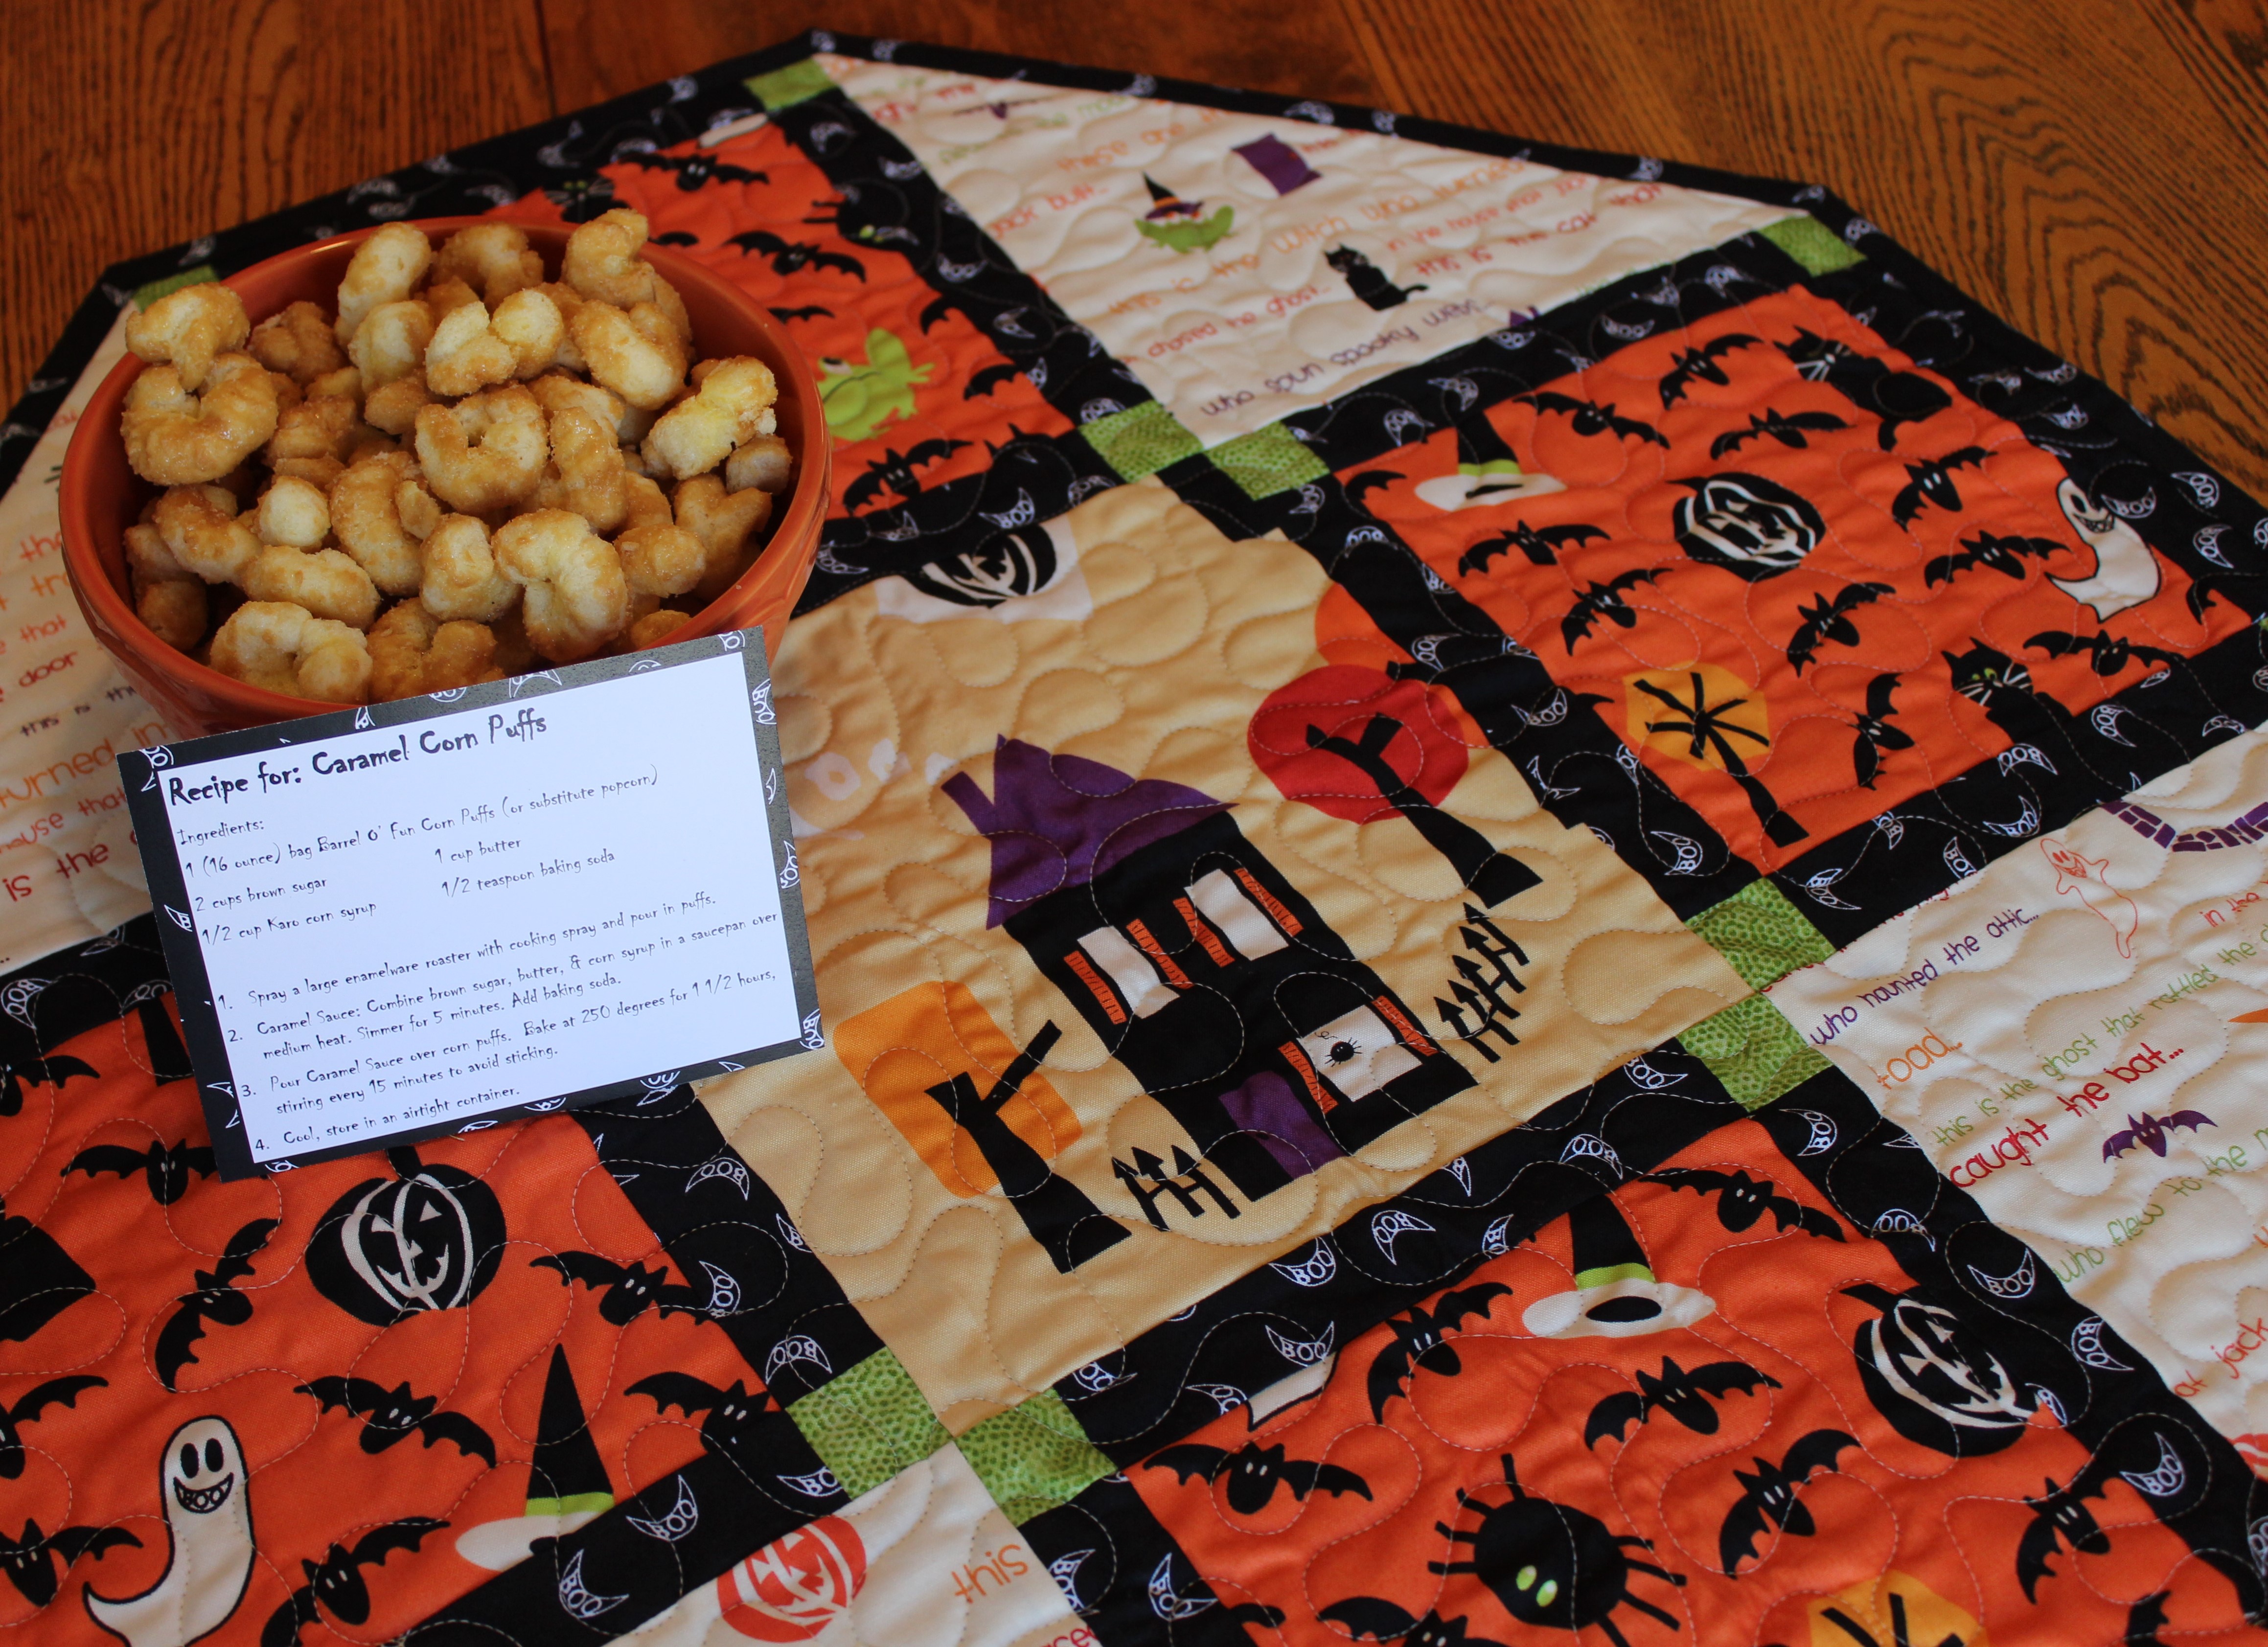
I know we’ll use this centerpiece when we celebrate Halloween along with one of our favorite snacks: Caramel Corn Puffs. This is something my mom has made for years and it is just the perfect amount of sweet and salty. Head on over to my blog for this recipe as well as a couple more spooky time favorites: Monster Cookies & Buckeyes!

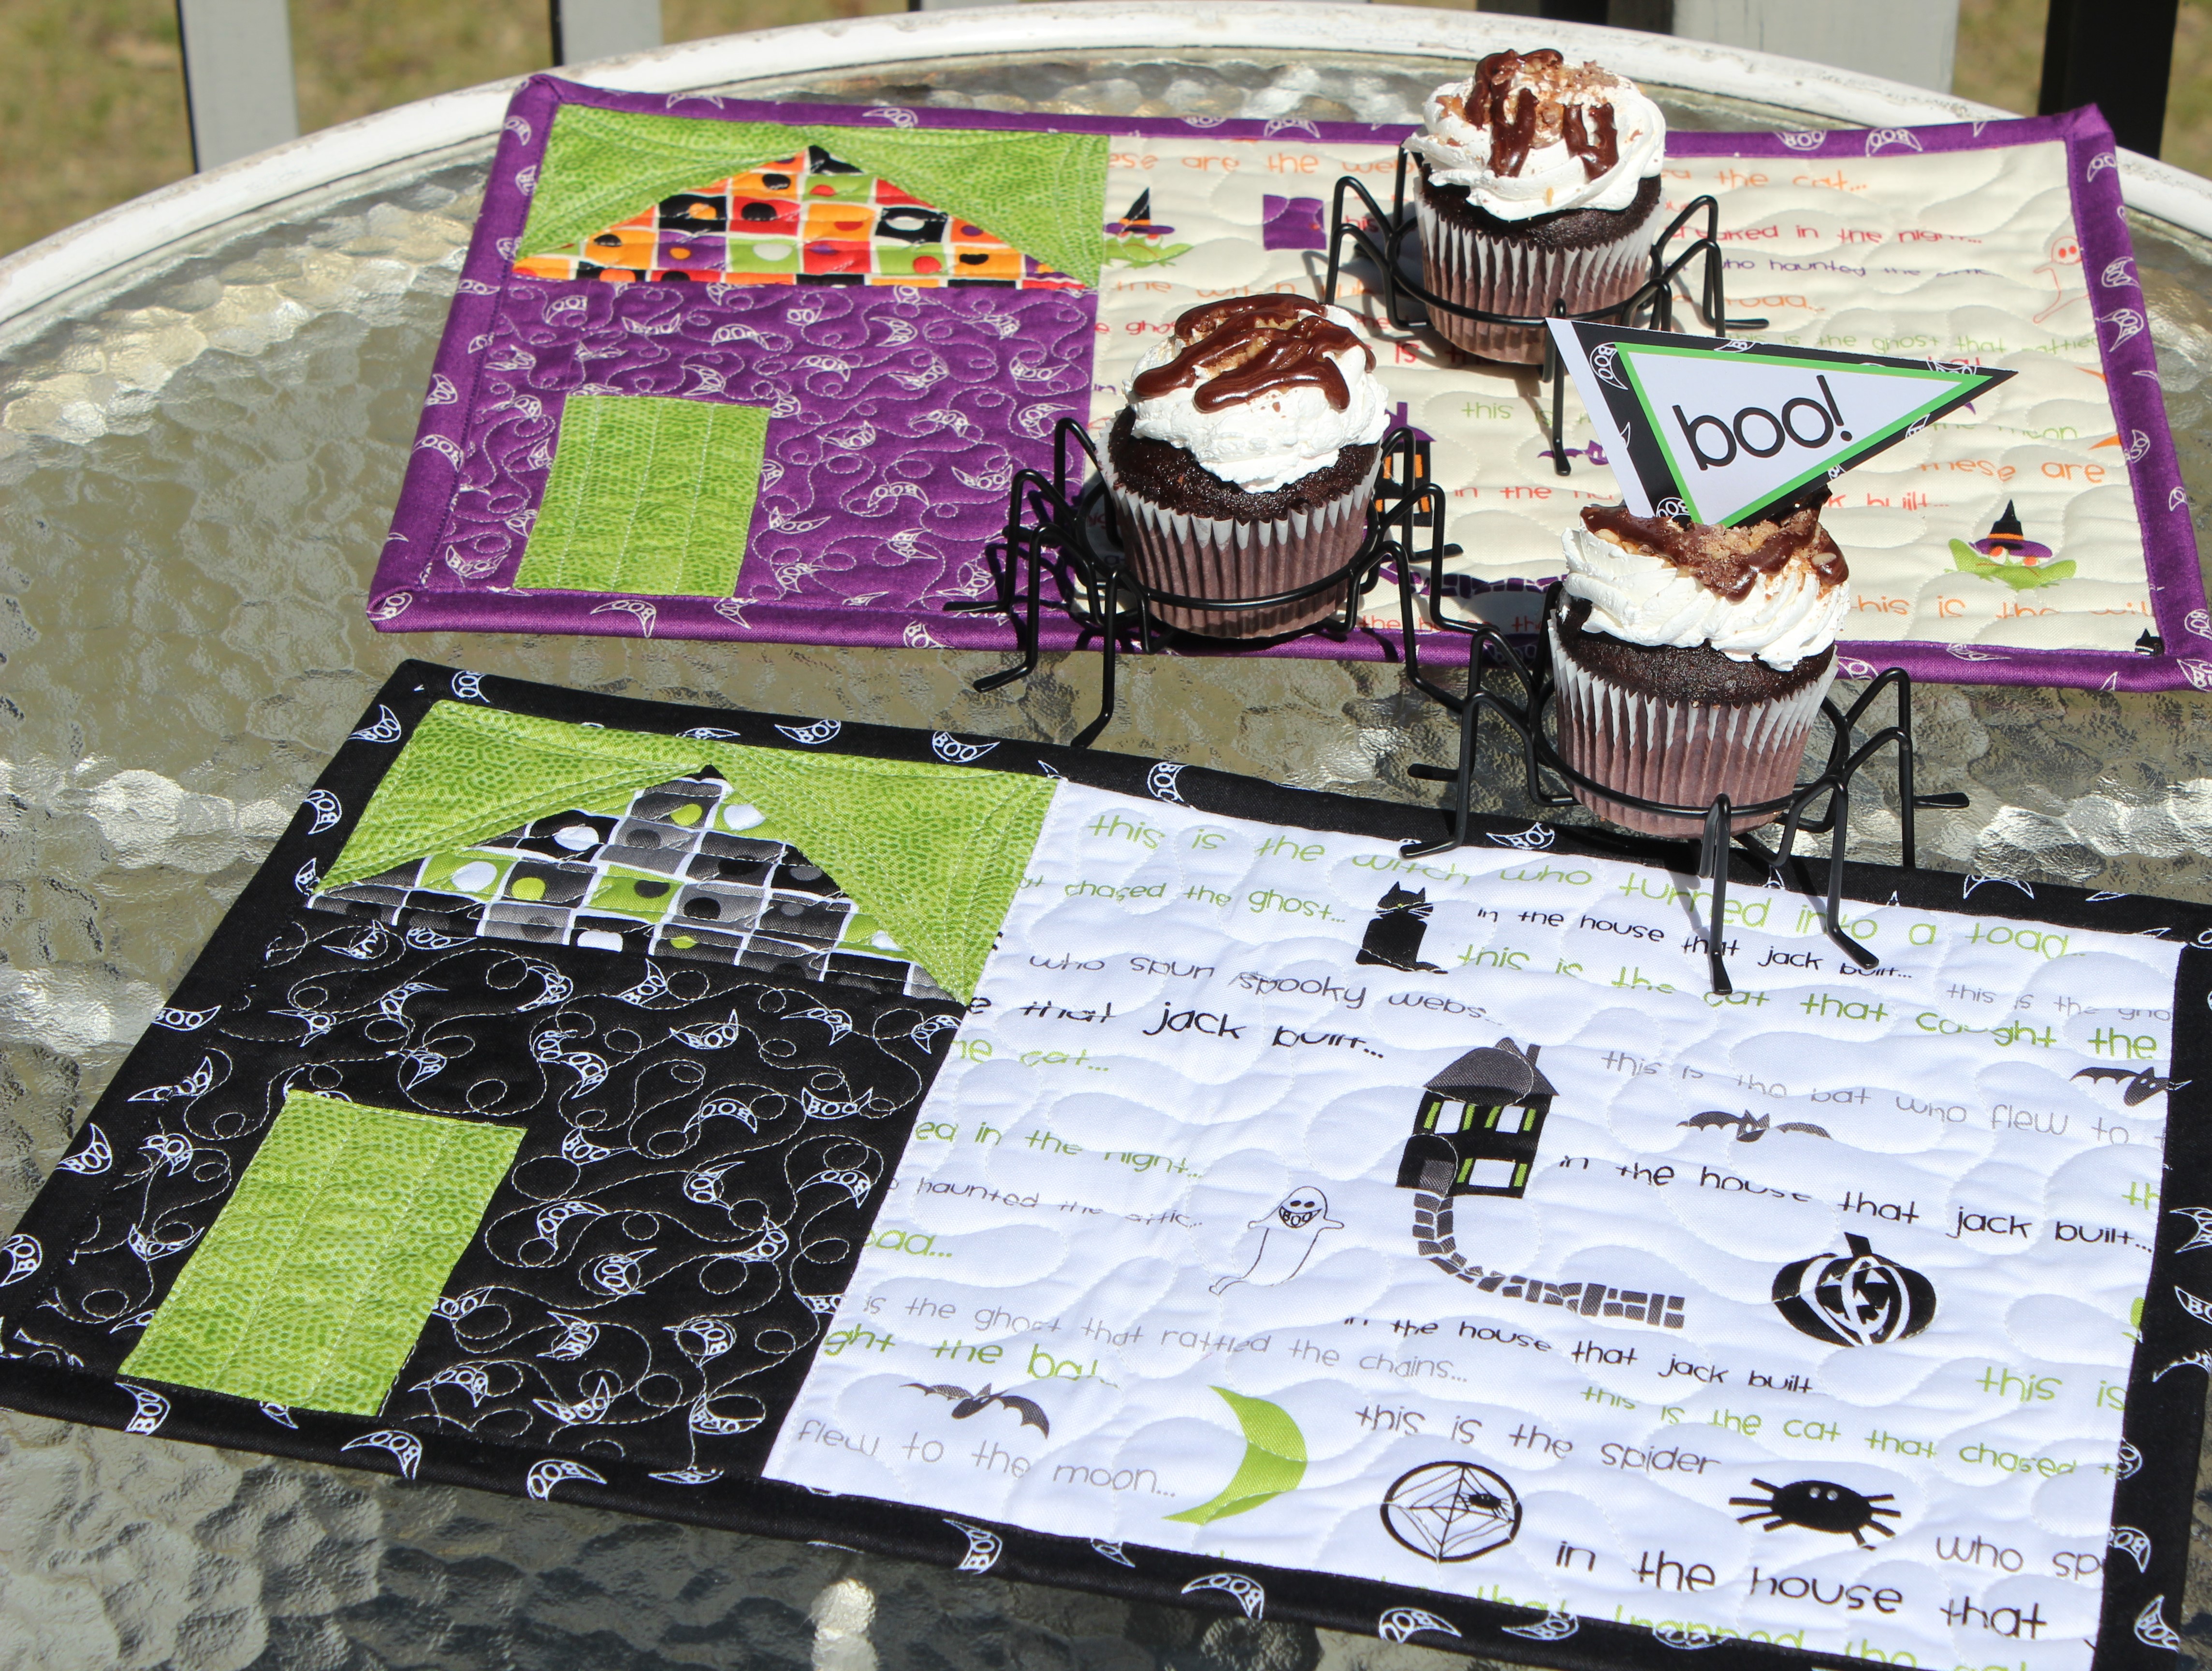
I also created these adorable candle mats or placements that feature a pieced house on one side and the story on the other side.

Jack- 5

I think these would make a great gift. You could tie one around a bottle of wine or include it with a cute coffee mug. It would be a great hostess gift if you’re headed to a Halloween party!

This girl said, “those cupcakes were a great prop mom!”

Jack -6

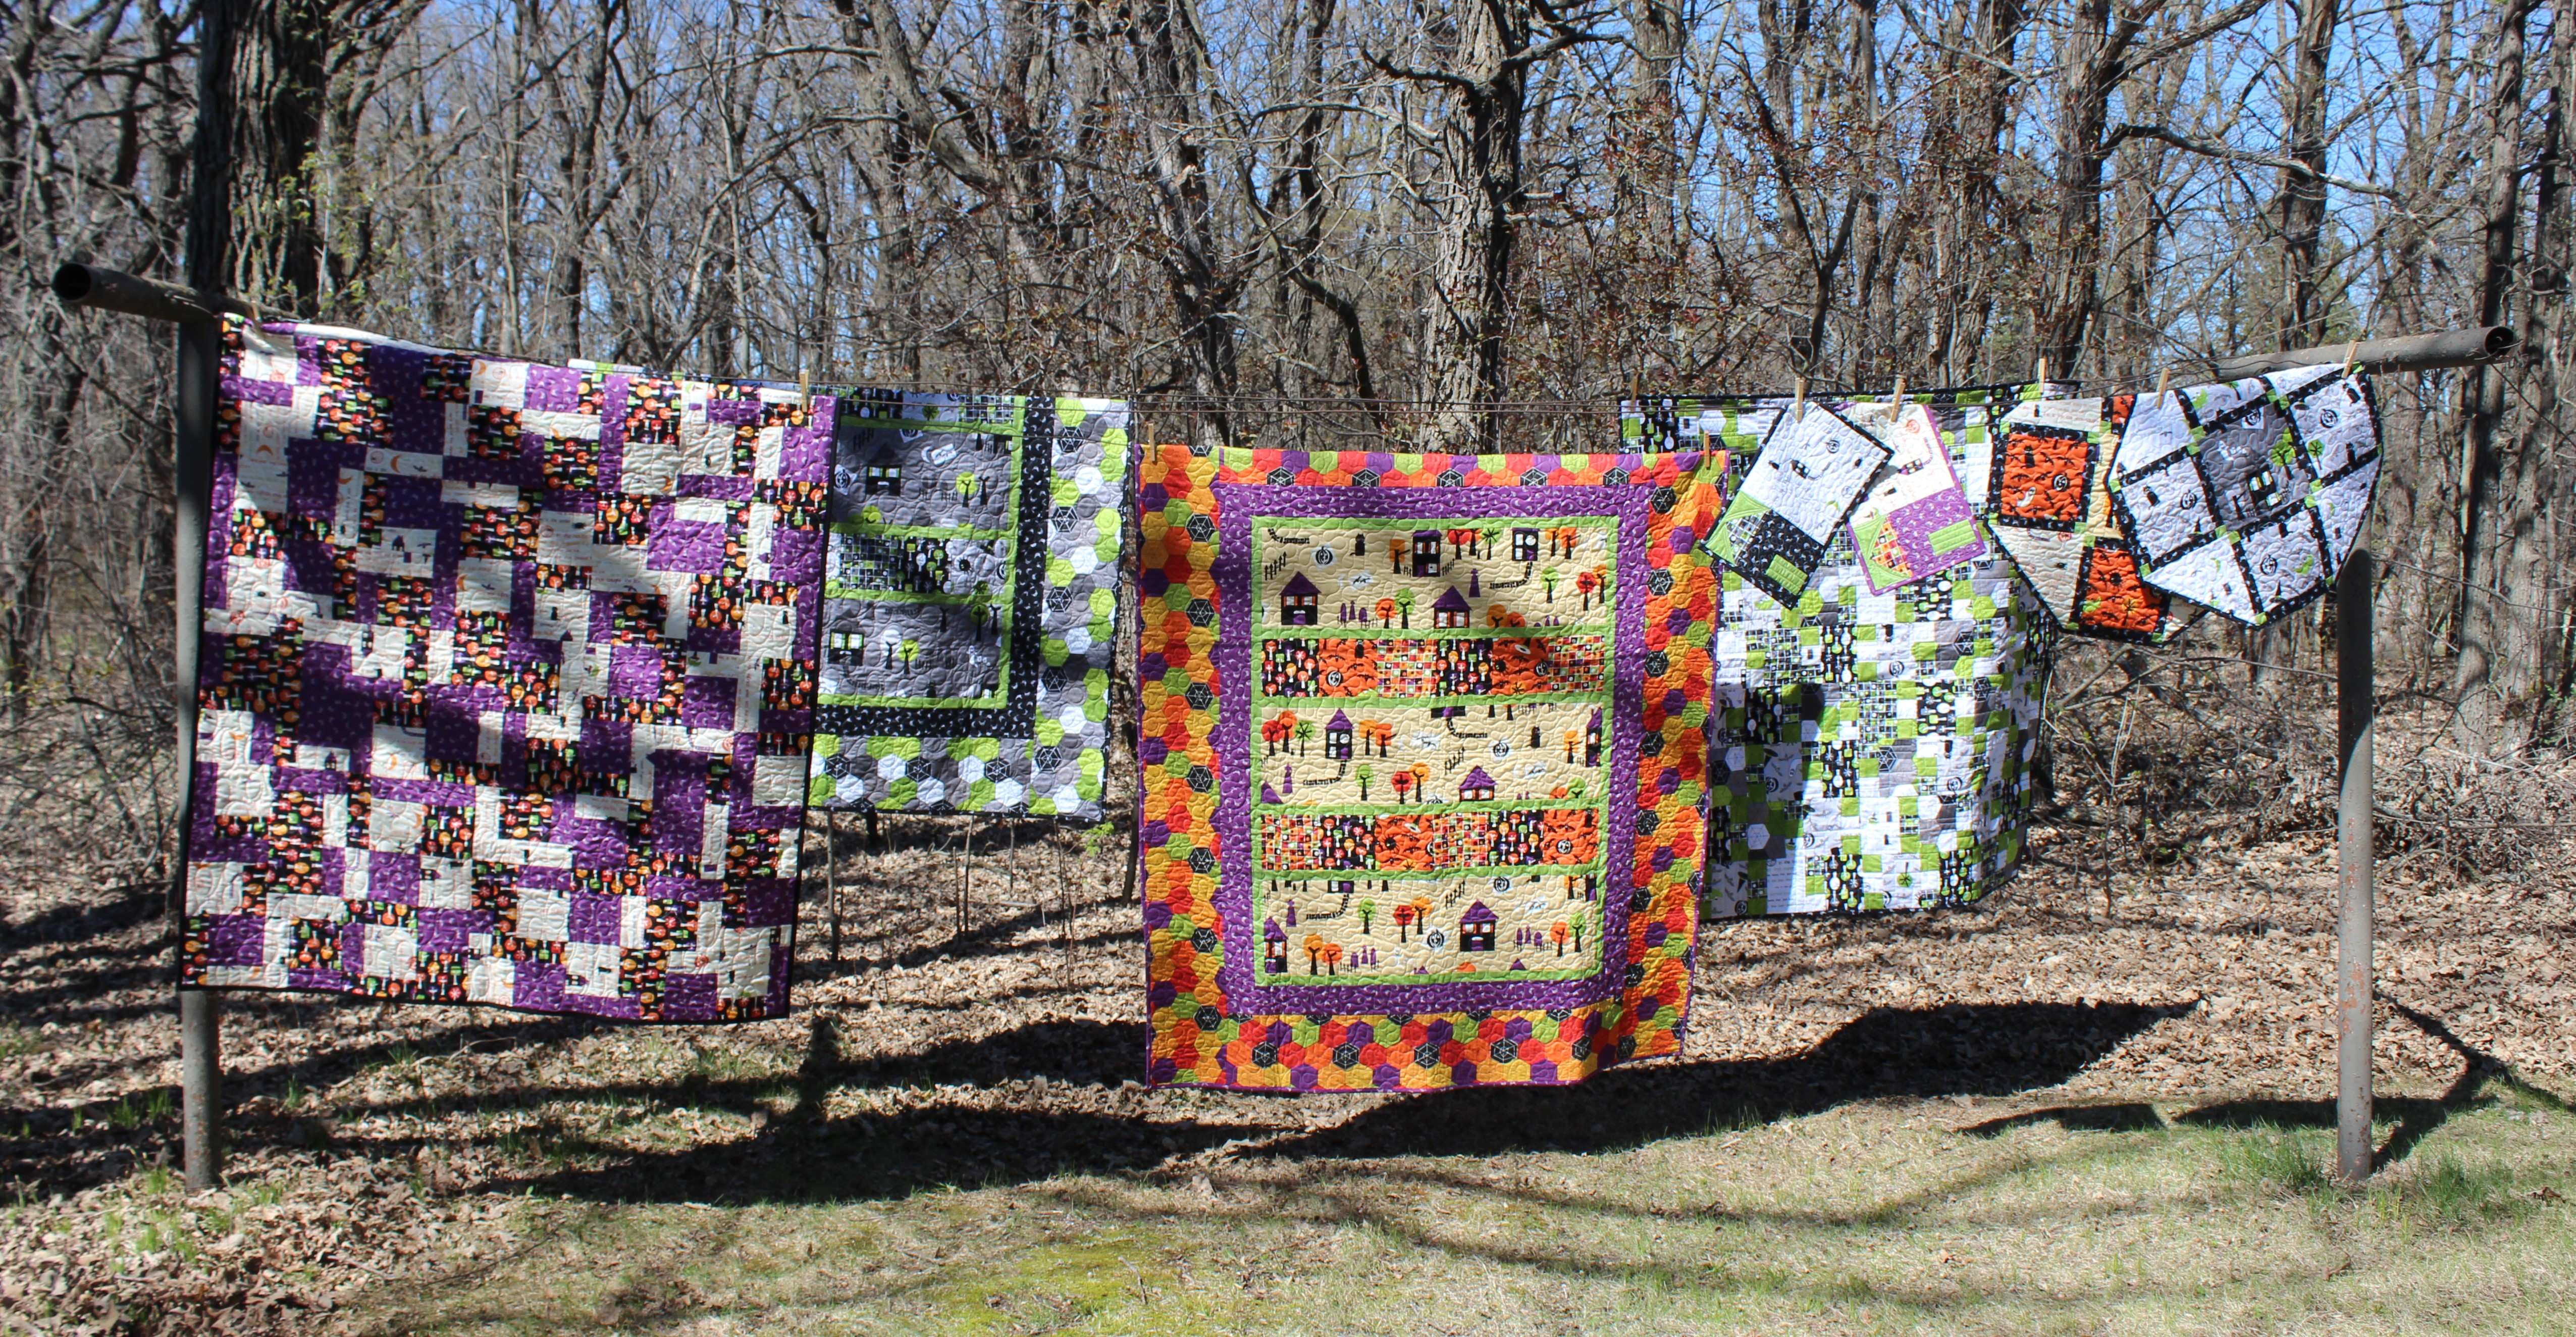
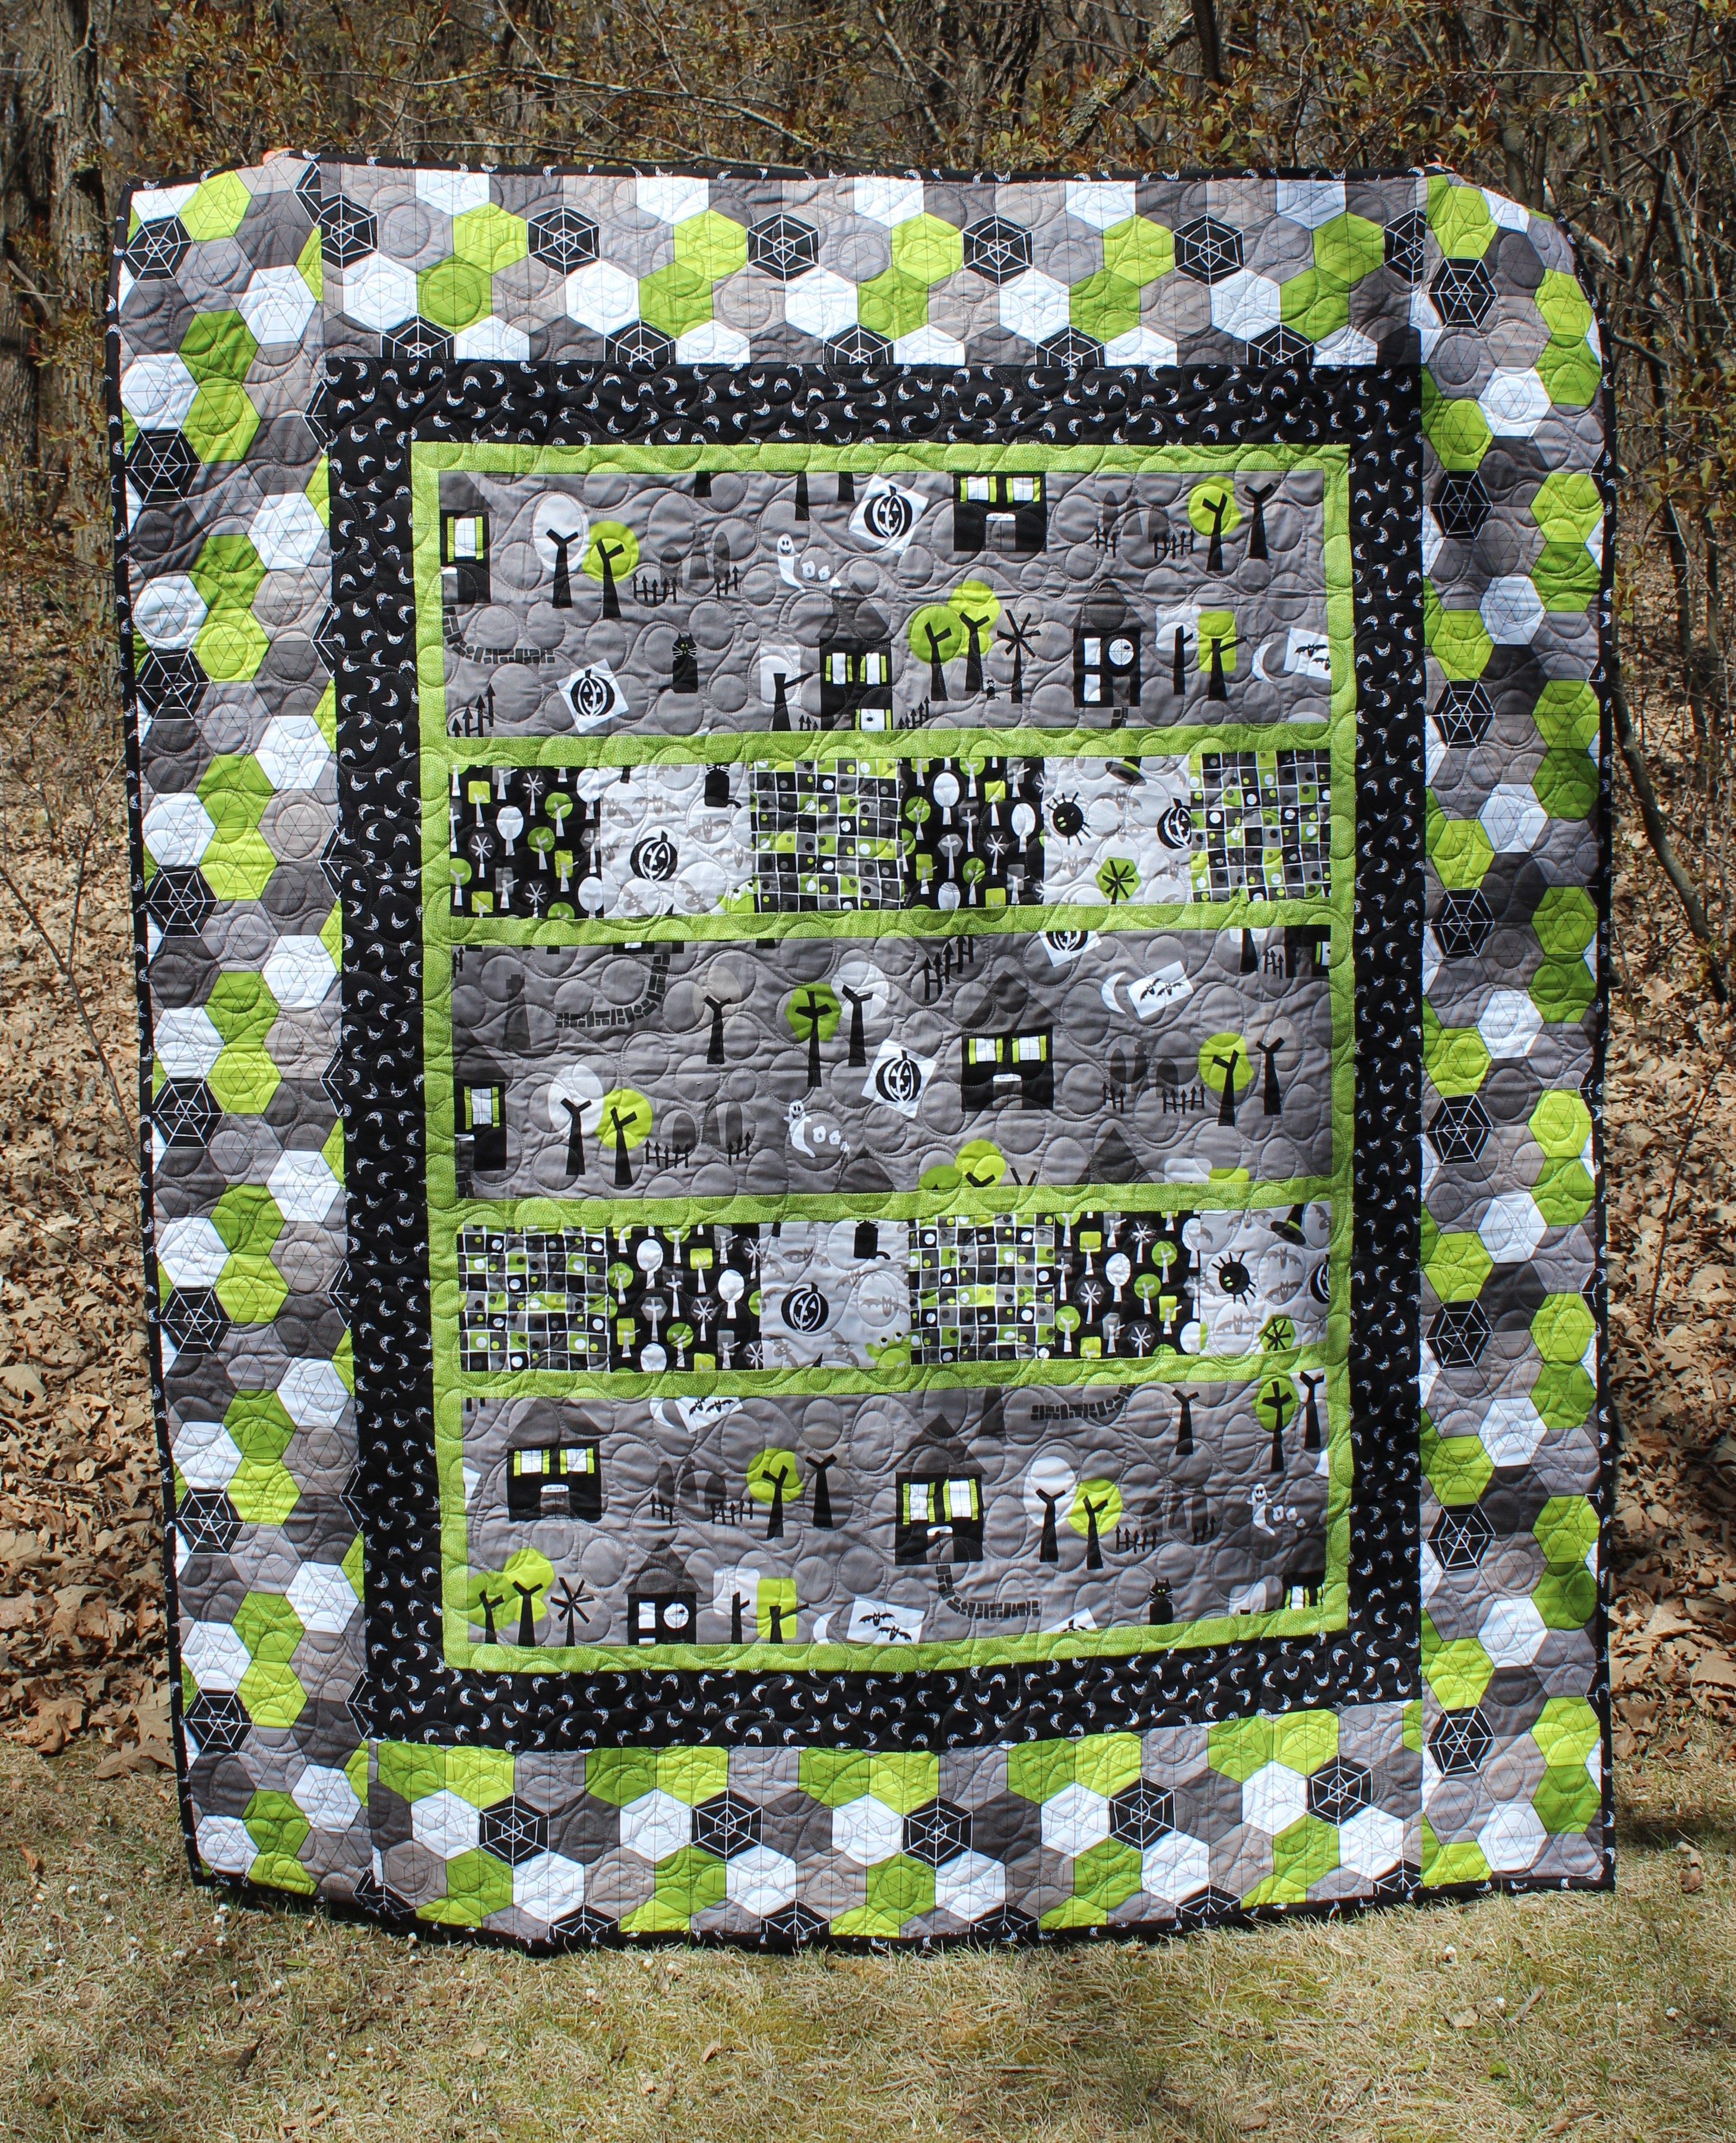
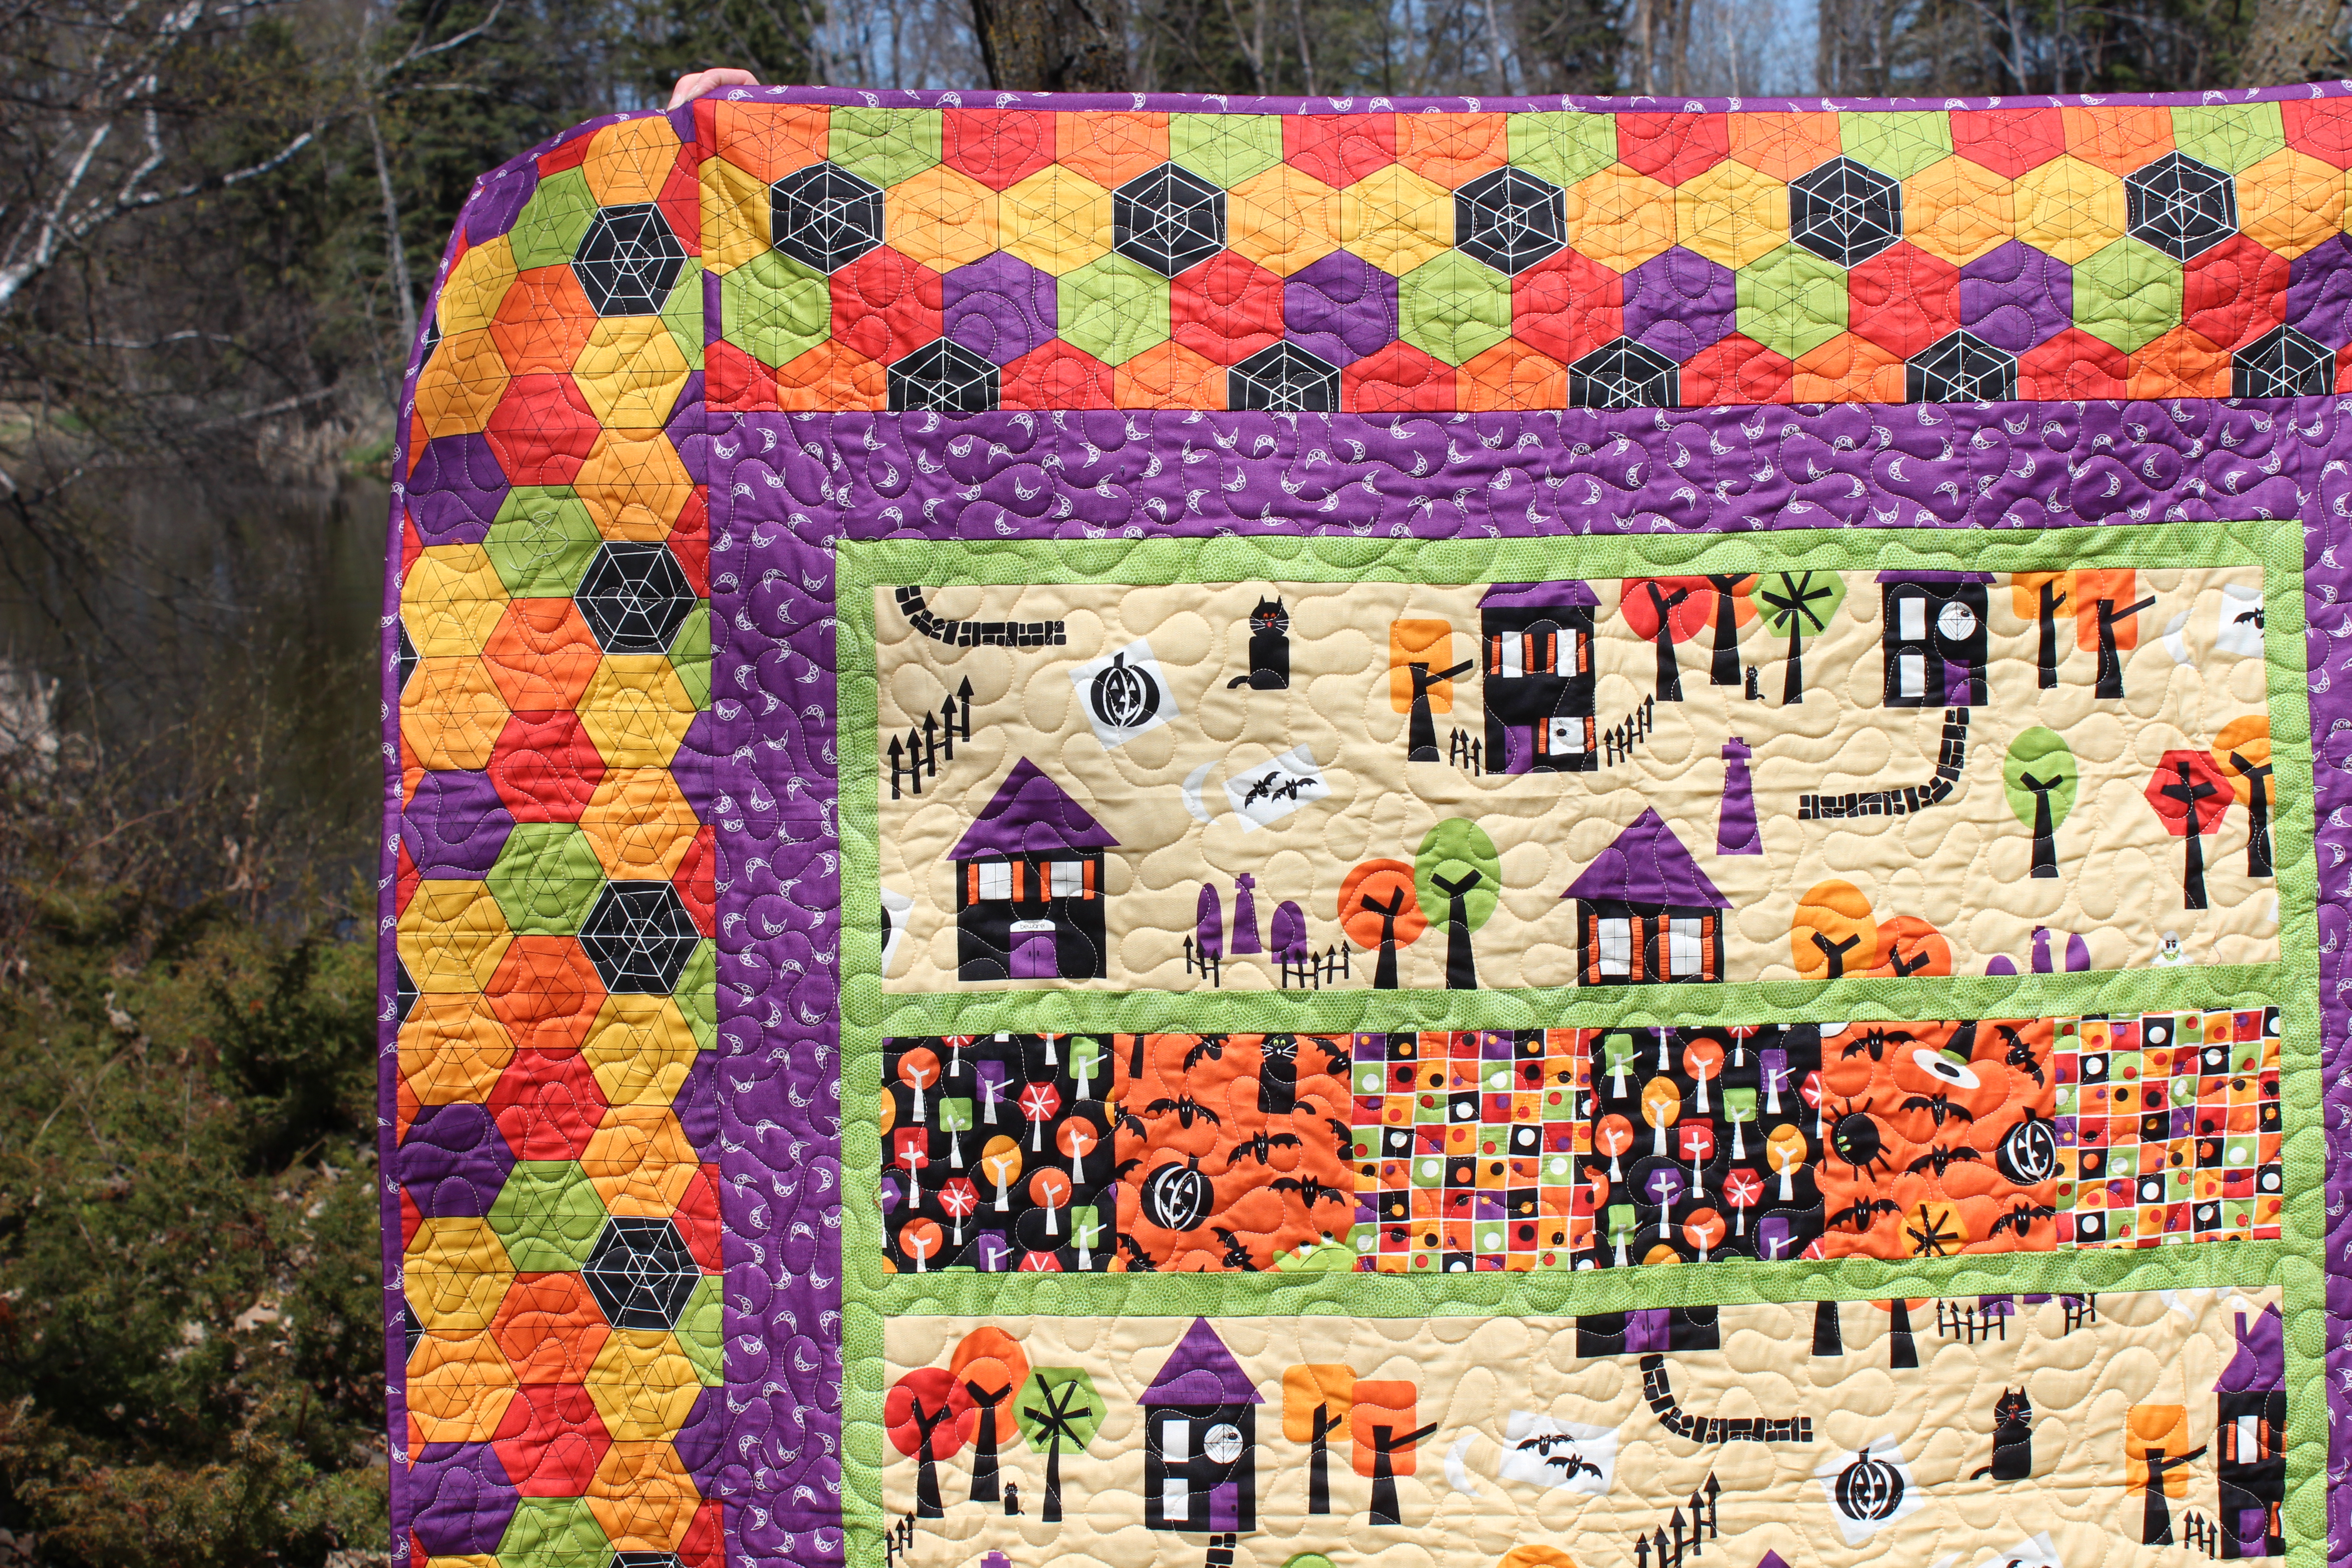
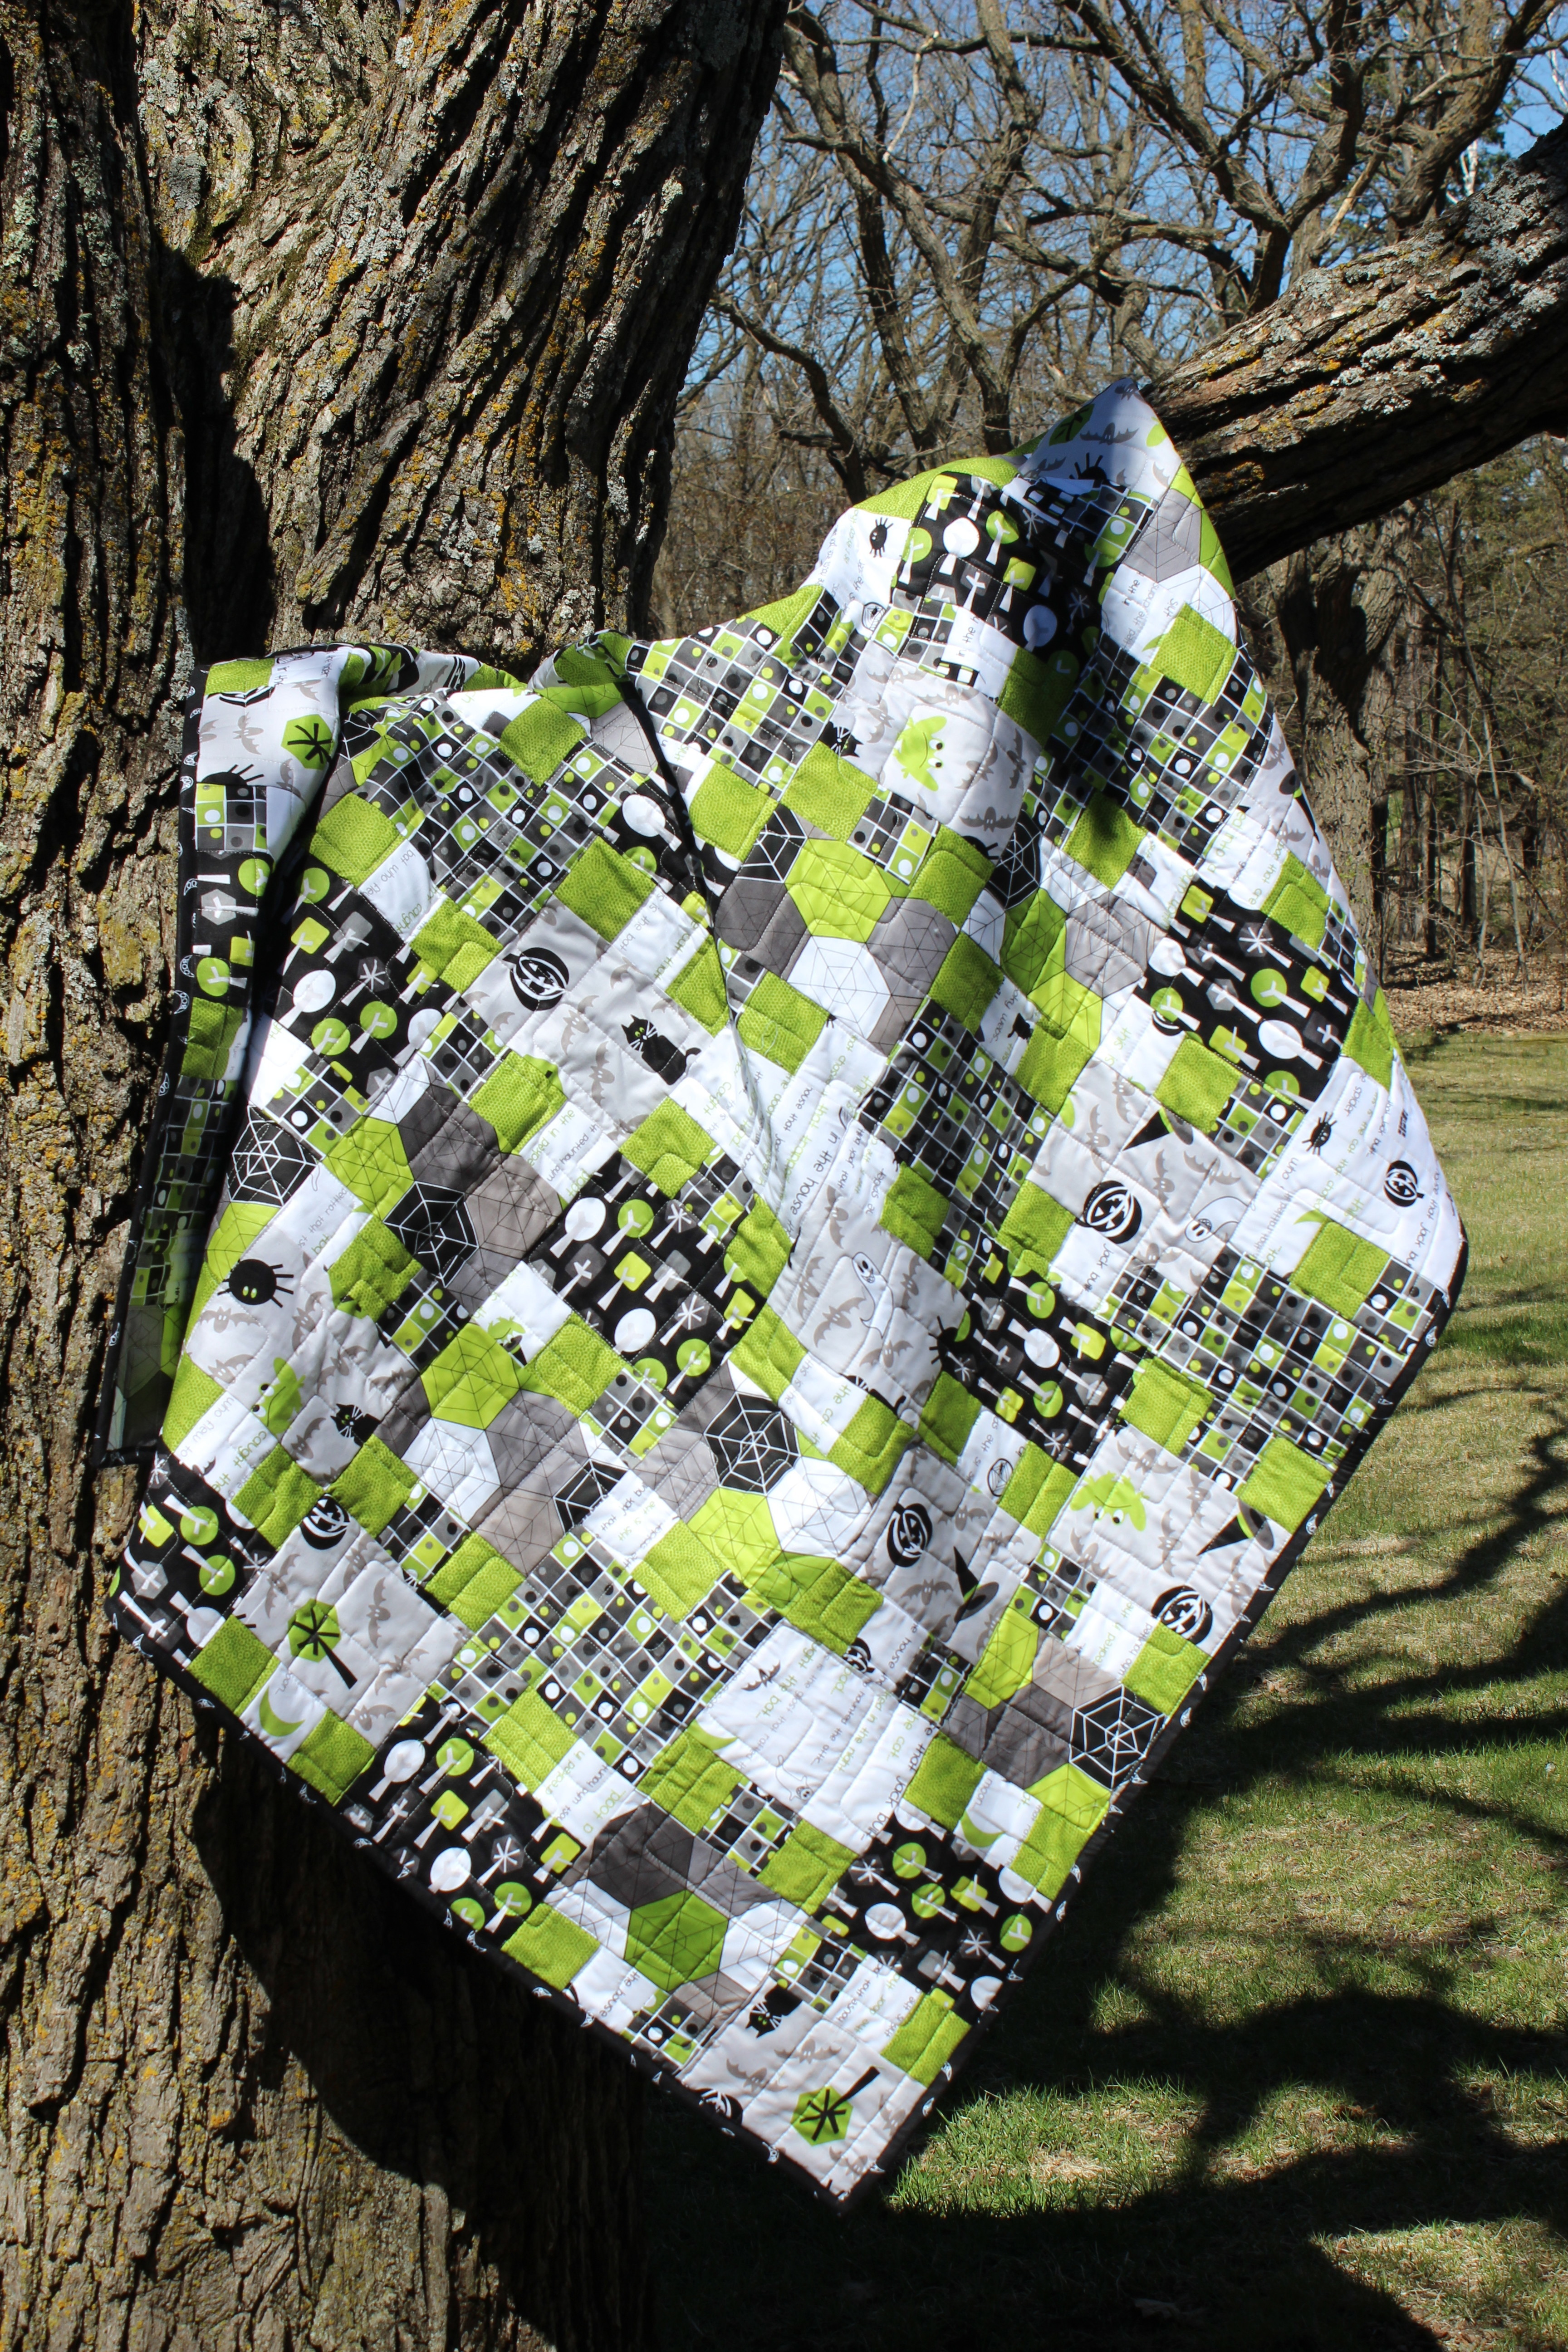
And of course there had to be quilts!! Jack’s Quilt is a quick and easy sewing project that lets the fabric do all of the work.

Jack- 7

This pattern is also a free pattern on Andover’s site so be sure to go and download it.

Jack- 8

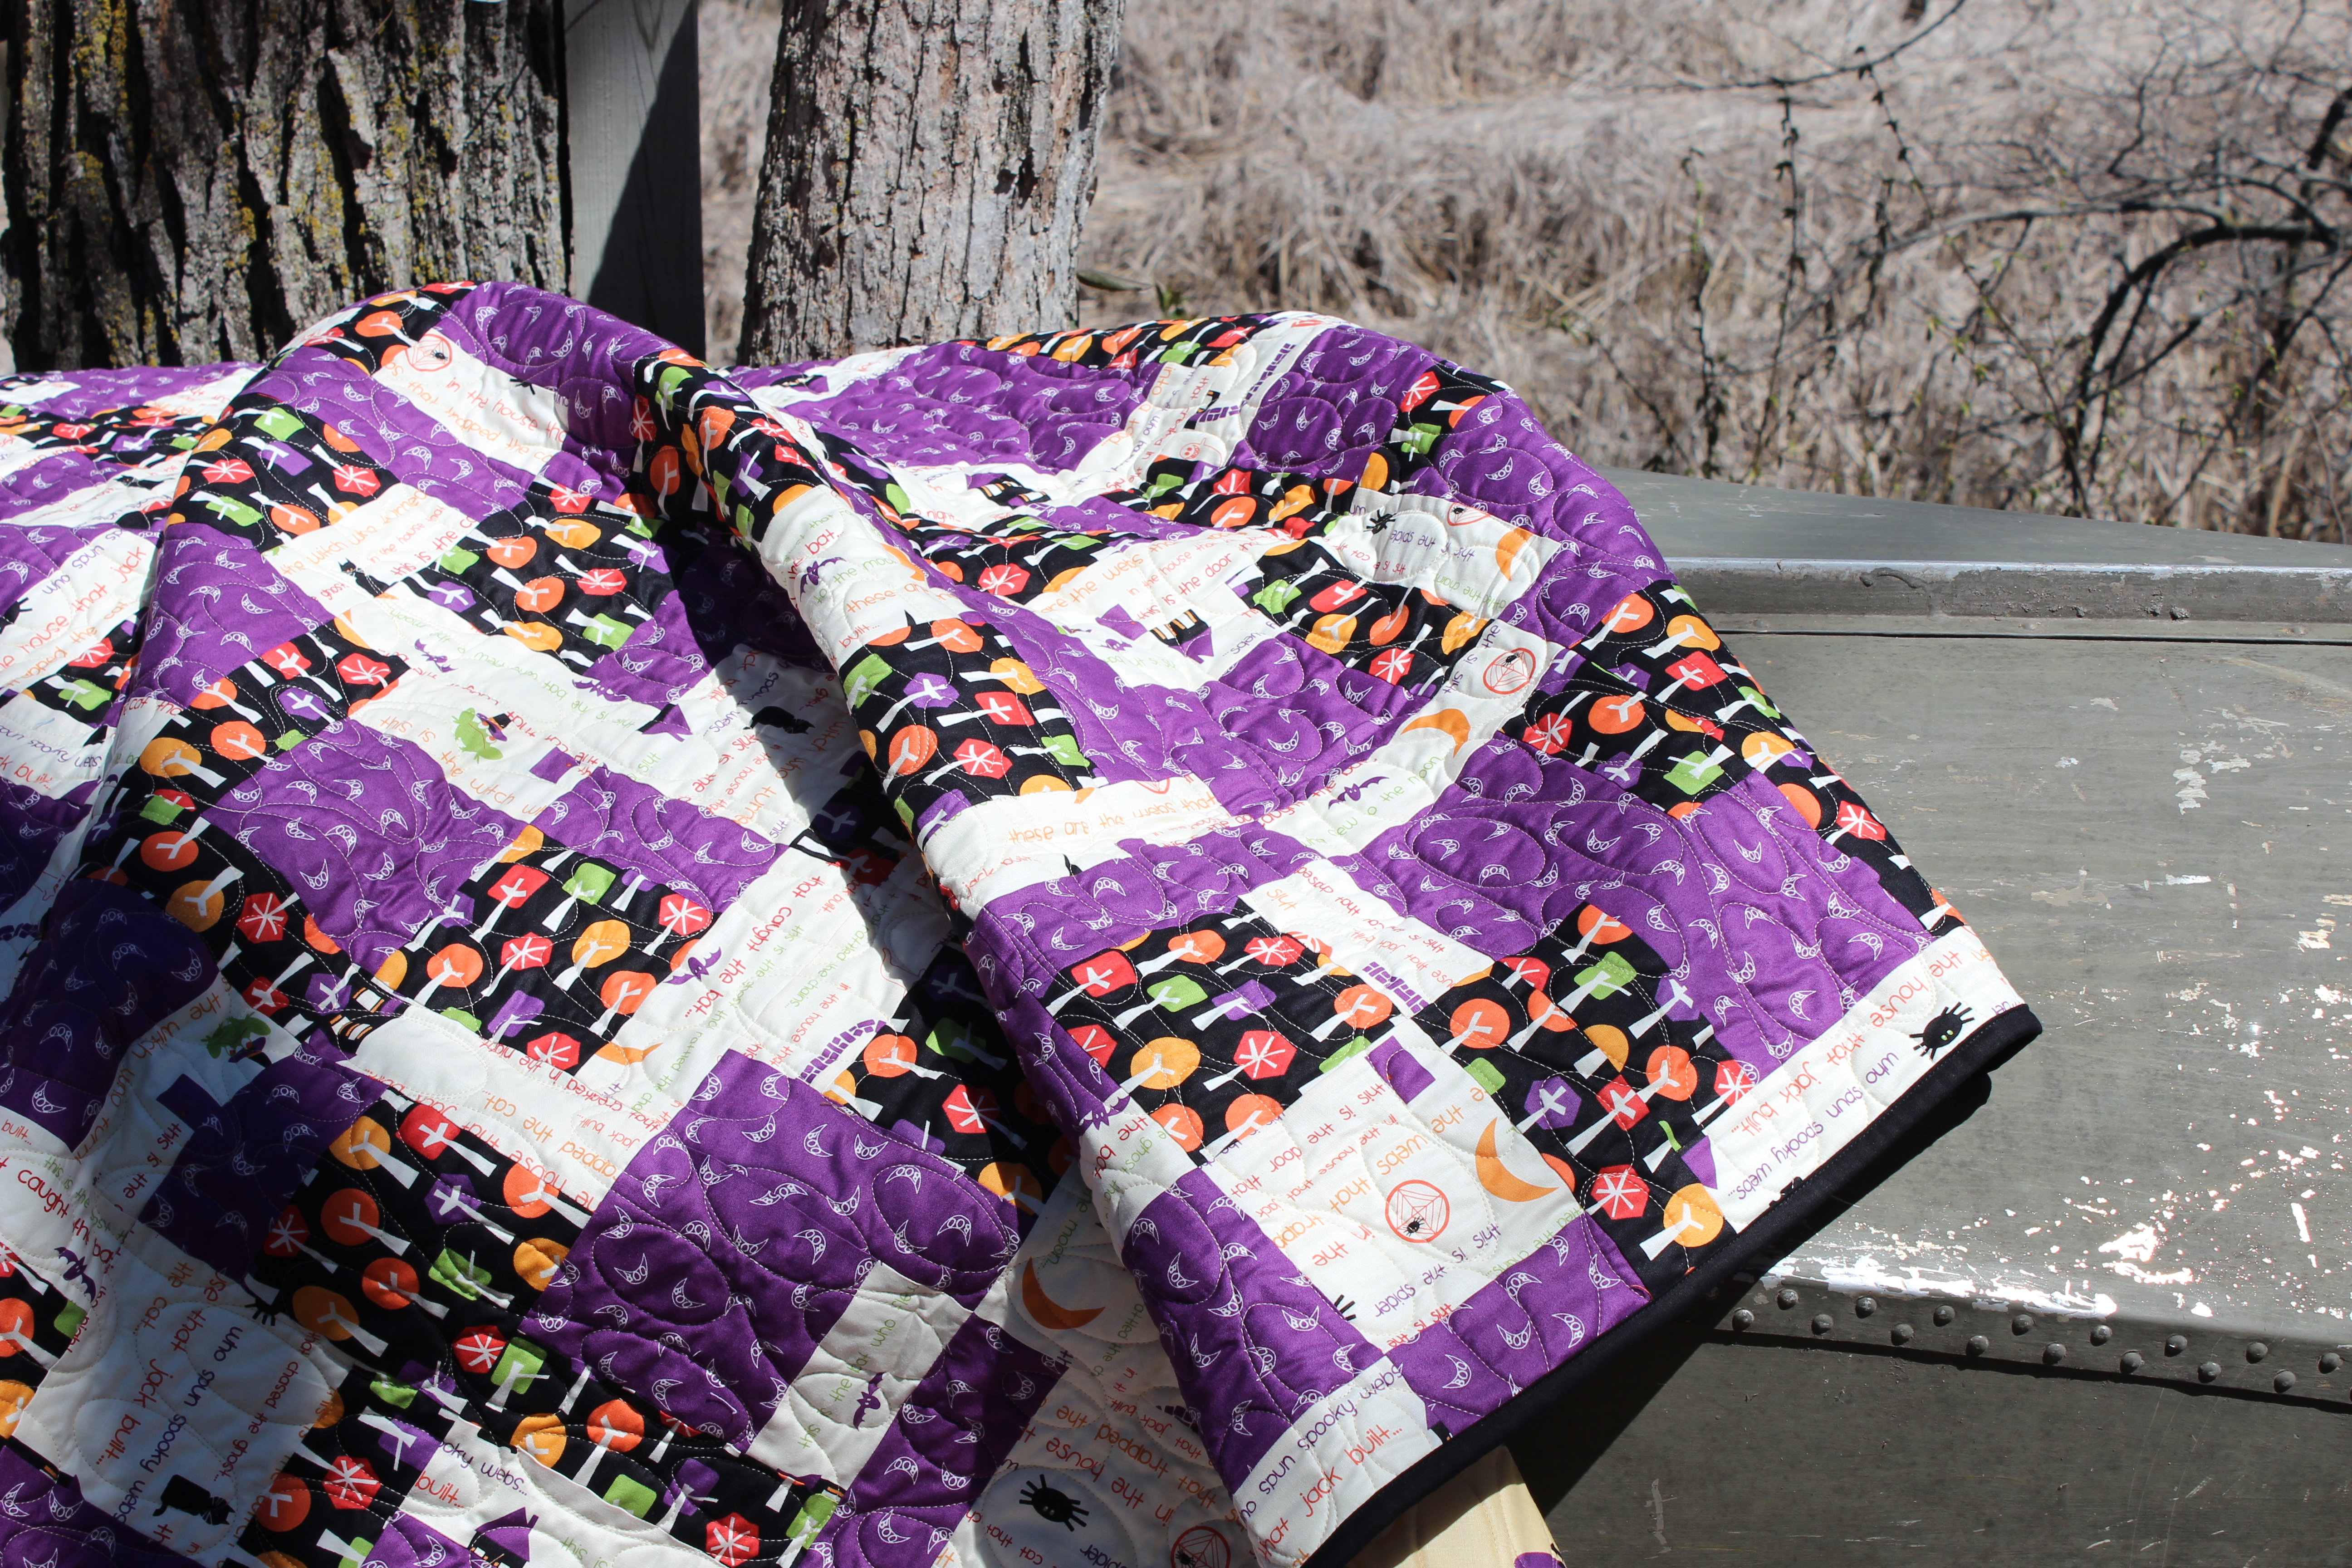
I love how the hexie border frames these quilts. I also decided to make up two of my best selling quilt patterns with fabrics from “The House That Jack Built”. Here’s a look at my Just Three Yards pattern. It’s just a half yard each of 6 different fabrics.

Jack- 9

And here is my Three Yard Throw pattern. A yard each of three different prints.

Jack- 10

Both of those patterns can be found on our shop’s website, Bay Window Quilt Shop:

Thank you for taking the time to hear about my new fabric line. I am thrilled to be able to show it to all of you along with what I’ve made so far. Knowing me, there will be more projects and ideas for using these prints that have a special place in my heart. If you want to join me along the way be sure to follow along on Instagram (@katiehennagir) or my blog. There are only 178 days until Halloween….

Happy Sewing! -Katie

Posted in Uncategorized | Comments Off on Katie Hennagir’s The House that Jack Built

Dresden Carnival Blog Hop

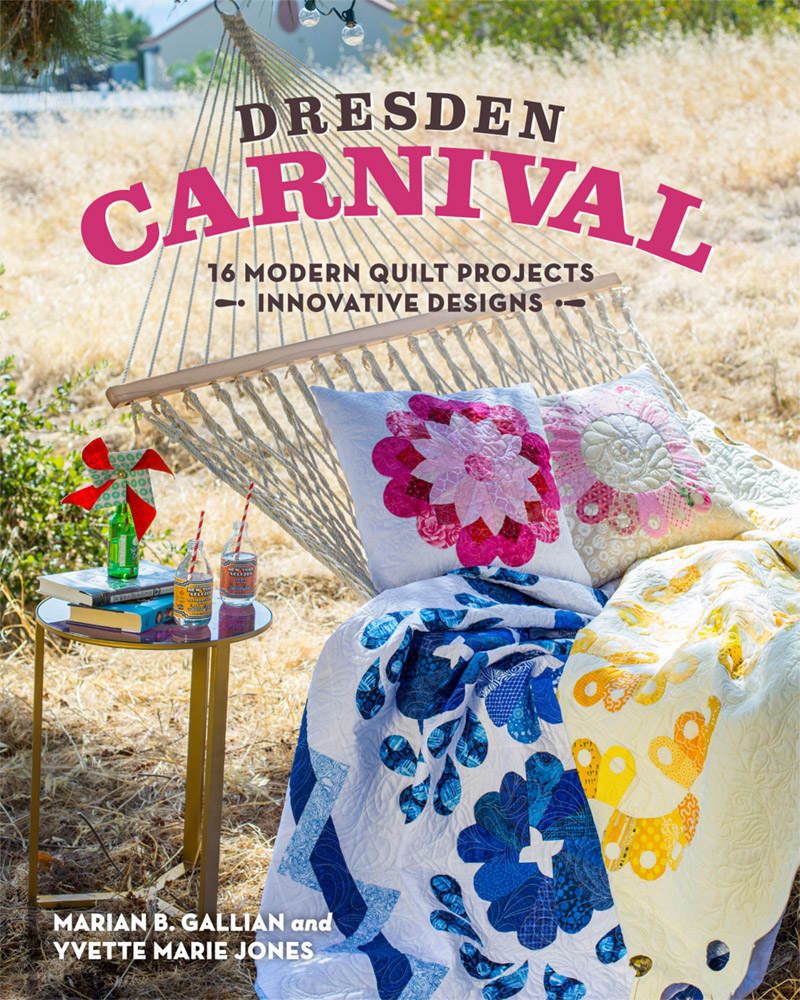
Hey there, friends! Giuseppe here from Andover (AKA @giucy_giuce). Today we are reviewing the new book Dresden Carnival by Marian B. Gallian and Yvette Marie Jones of Pink Hippo Quilts and Vetmari, respectively.

DresdenCarnival_Cover

When Marian and Yvette asked us to peruse their new book we jumped at the chance to get our hands on a copy. Our Brand Manager, Daryl (AKA @fabrichick), has worked with these ladies for as long as she has been at Andover. I’ve been a fan of their work in my tenure here as well. We couldn’t possibly be more excited for them and we are so honored to be included in this blog hop!

The ladies used Makower UK‘s Modern Folkloric fabric to splendid effect in their gorgeous Italian Ice quilt. I love the beautiful swish of the Dresden Plates against the angularity of the outer-most border.

11125 Gallian Jones

The book is packed to the brim with inspiring Dreseden Plate quilts for all levels. As a quilter I have never tackled the Dresden Plate. All those curves and appliqué are so intimidating! I can honestly say, though, that this book really has inspired me to give it a shot. The instructions throughout the book are super clear and easy to follow.

After reading the book I pulled some fabric for a Dresden pillow I hope to make soon. I pulled from groups by Alison Glass, Lizzy House, and our newest designer Libs Elliott.  FullSizeRender (5)

Dresden Carnival is chock-full of sophisticated, colorful quilts. The fabrics are so expertly curated, the palettes so romantic and classic. I felt like this fabric pull invoked that same feeling of chic elegance.
FullSizeRender (4)

I highly recommend checking this book out. For the experienced Dresden maker it is filled with projects that will inspire you to look at this classic motif in a new light. For the novice, like me, it’ll inspire and motivate you to try something new!

There are a ton of great posts about this book on the tour. Check out the blog hop schedule below!

Mon. April 18: C&T Publishing

Tues. April 19: Generation Q Magazine 

Wed. April 20: Bryan House Quilts

Thurs. April 21: Michael Miller Fabrics

Fri. April 22: Textile Time Travels

Mon. April 25: Happy Quilting

Tues. April 26: Kitchen Table Quilting

Wed. April 27: Andover Fabrics

Thurs. April 28Crazy Old Ladies

Fri. April 29Vetmari  & Pink Hippo Quilts

Posted in Uncategorized | Comments Off on Dresden Carnival Blog Hop

Design Inspiration: The Dargate Book

A NOTE ON THE AUTHOR: Margo Krager, owner of ReproductionFabrics.com, a website and storefront located in Northfield, MN, has been a fabric retailer since 1984. She has spent over 20 years researching historic cotton printed and yarn-dyed fabrics used in quilts and garments, gives lectures on historic dye, and print technologies and does hands-on workshops on Center Medallion Quilts.

Margo received a Bachelor’s of Science degree in Medical Technology in 1970 from Michigan State University and worked in that field for 15 years. In 1984 she switched needles and became a fabric retailer. Since that time she has also done graduate level work in History at Montana State University, distance learning through the Quilt Studies Program at the University of Nebraska-Lincoln and published a professions paper, The Calico Trade Shirts on the Journey with Lewis and Clark, with the Textile Society of America.

Her design inspiration comes from the 9 antique fabric sample books she owns.

Design Inspiration: The Dargate Book

by Margo Krager

Dargate Cover

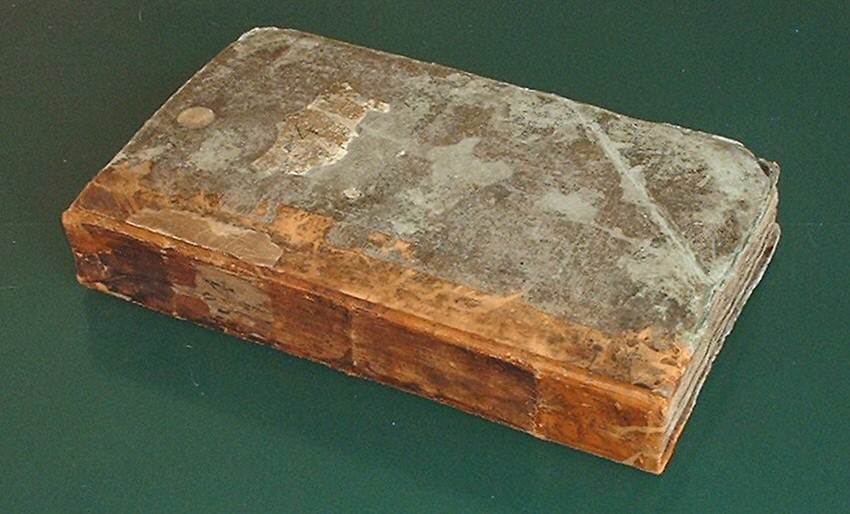
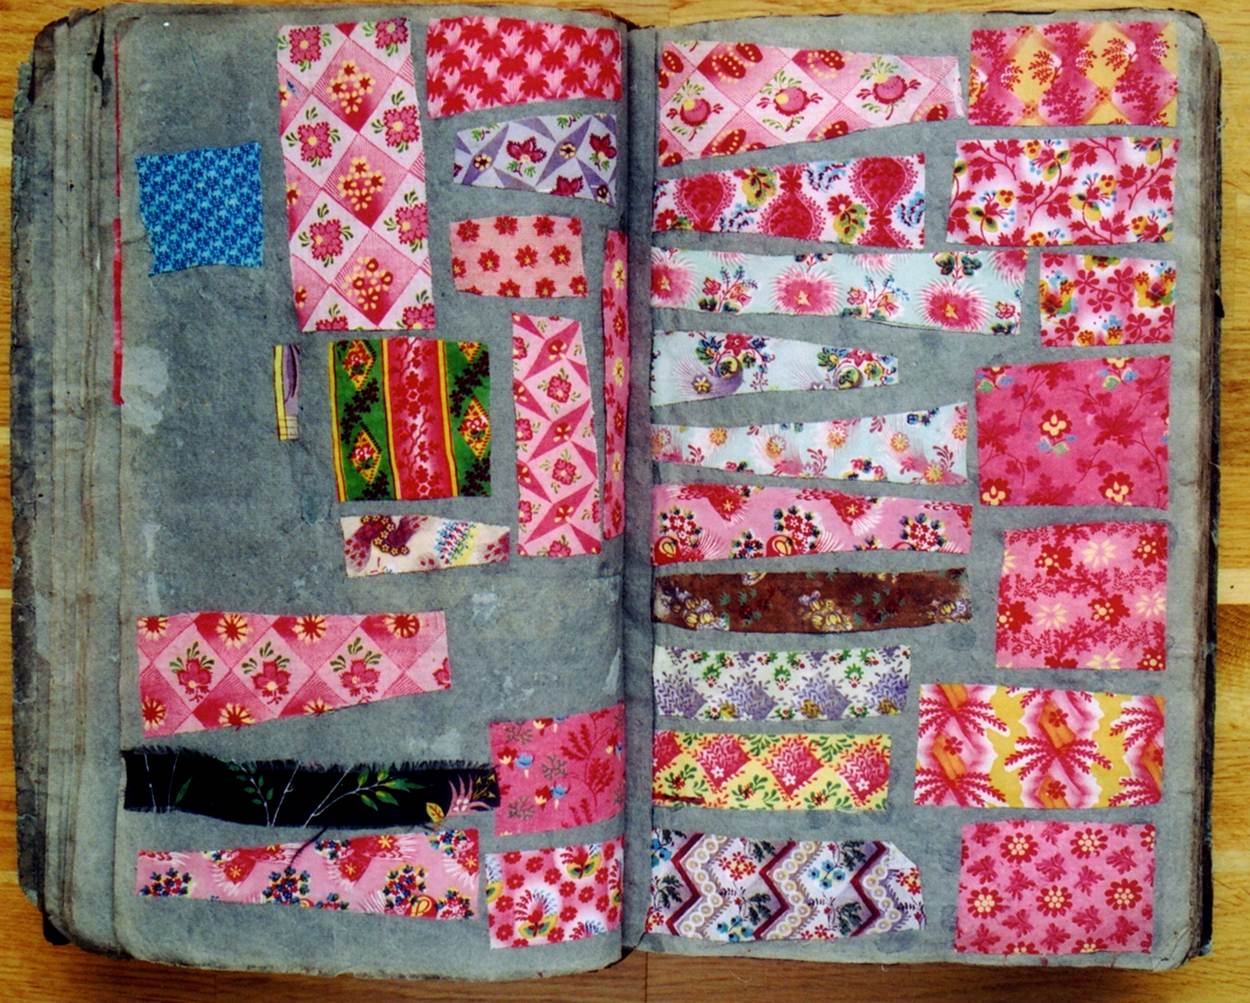
This fabric sample book was obtained from an estate sale at the Dargate Auction House in Pittsburgh, Pennsylvania in the summer of 1997. The ledger-style book (10” X 16”) contains 330 rag-paper pages with fabric samples attached with either horse hoof or fish bone glue. The book had been kept in a slipcase, away from light for about 80 years. Consequently there has been very little deterioration of either the fabrics or the dye colors (archival environment…rag paper, archival glues and no light). It contains approximately 1,750 fabric swatches of c. 1830 French dress goods. Both Dr. Virginia Gunn, Professor of Costume at the University of Akron (now retired) and Susan Meller, author and textile historian, have dated the samples c. 1830.

In 1997, I had my mail order company in an old country store in the Dutch farming community of Churchill, MT. UPS was on strike late in the summer of 1997. Some fabric wholesalers suspended shipments with a ‘wait and see’ attitude. Others began to ship goods through the US Postal Service. One day in late August, my postal carrier brought the mail—letters with orders, boxes with fabric and notions, and then he handed me a large flat box. From the label I knew it was the book. Not insured, not registered. Somehow with the United State Post Office in extremis, this very special package had arrived.

There is no provenance on the book, no inscriptions, no notations, and no dates. I took it to Dr. Virginia Gunn, professor of costume at the University of Akron and sent scans to Susan Meller, author of Textile Designs. They both dated the book c. 1830 and probably French. After numerous hours of turning pages and admiring the wide variety of designs, I knew this would be a great source of reproduction fabric designs, not only for quilters but also for costumers. My goal has been to reproduce as accurately as possible the designs, scale and colors of the samples in the Dargate Book.

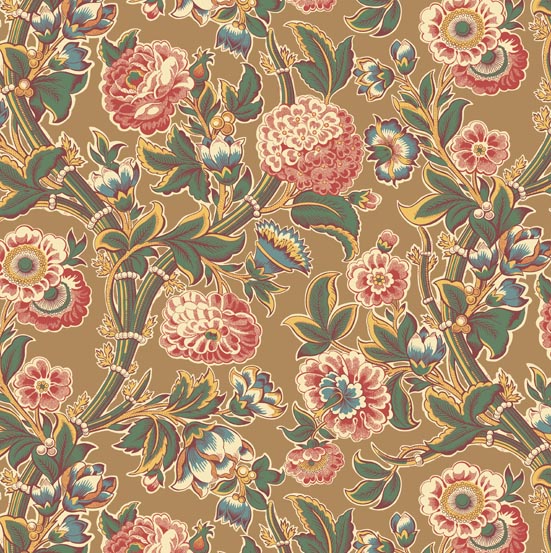
Some Dargate pinks…

Dargate Inside

Small and large prints in two or three shades of pink or red (often referred to as Double Pinks, 2 or 3 Reds and Cinnamon pinks) have been a perennial favorite of the textile industry. The Dargate Book has a large assorted of double pinks as well as many with highlights of yellow!

Scan_Pic0570

The only natural dye stuffs (a substance that can be used as a dye or from which a dye can be obtained) with an affinity for cotton are indigo, some berries and tree barks. Other natural dyes such as madder need a mordant to bind them to the fabric. The word mordant is from the French, mordre, meaning ‘biting’ or ‘caustic’. Mordants are salts of common chemicals such as aluminum (alum) or iron. They form a bond between the dye and the cloth.

Different mordants produce different colors in the madder dye bath while different strengths of the same mordant give different shades of a hue. An aluminum acetate mordant (alum) produces a range of colors from deep red to a very pale pink and was used historically for block printing as well as copper plate and then roller printing.

For a double pink, the fabric was first printed in a pattern with a weak solution of alum and allowed to dry/age and then over printed with a companion pattern in a stronger alum mixture and dried again.

The next step was a madder dye bath. The mordants bonded the dye and cloth together for a lively double pink design. Occasionally a design with three pinks/reds was produced using three different strengths of the mordant.

Today’s modern fiber reactive dyes are able to reproduce these much loved designs.

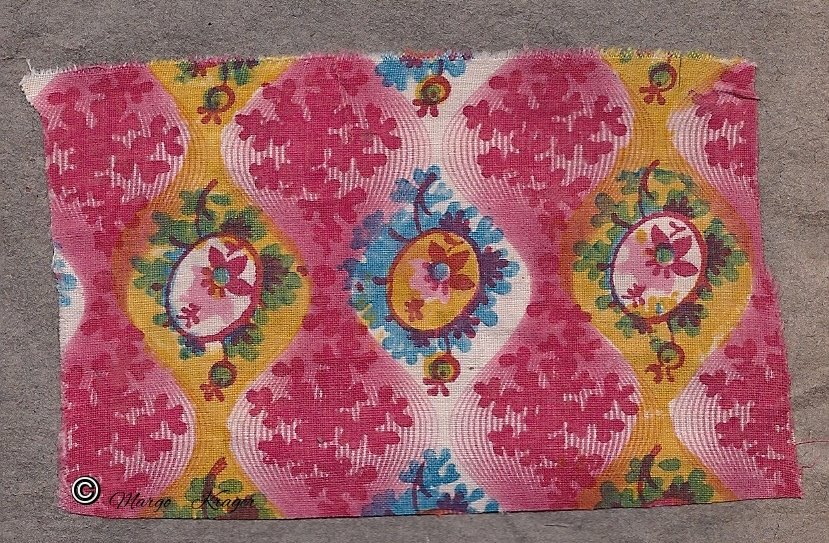
72dpi-A-7920-BE


DARGATE POLYCHROMESA-7920-BE

72dpi-A-8158-E

TRINKETS: A-8158-E

72dpi-A-8156-E


TRINKETS: A-8156-E

72dpi-A-8201-E

DARGATE VINES: A-8201-E

72dpi-A-8197-LE

DARGATE VINES: A-8197-LE


Posted in Uncategorized | Comments Off on Design Inspiration: The Dargate Book